APPENDIX
─
Installation Guide for Perforation Cutter
Caution
*
* **
Power off the printer and remove the cable from the connector before perforation cutter module installation
**
Labels with adhesive glue are not applicable or otherwise could result to malfunction
***
*
Applicable label size is at maximum width of 80mm and minimum length of 30mm.
(Usage with labels outside this range will be excluded from warranty terms)
****
Stop position (E value) should set to 51 through GoLabel before using the perforation cutter
*****
After the perforation cutter is installed, please send the command ^D1,5 through Golabel to set the perforation cutter.
******
Command : ^XSETCUT,MODE,0,2→Full Cut
,
^XSETCUT,MODE,1,2→Perforation Cut
This cutter module is suitable for Firmware V2.100 or later.
Preparation Steps
For more details about the preparation steps to install optional modules, please refer
to printer User Manual.
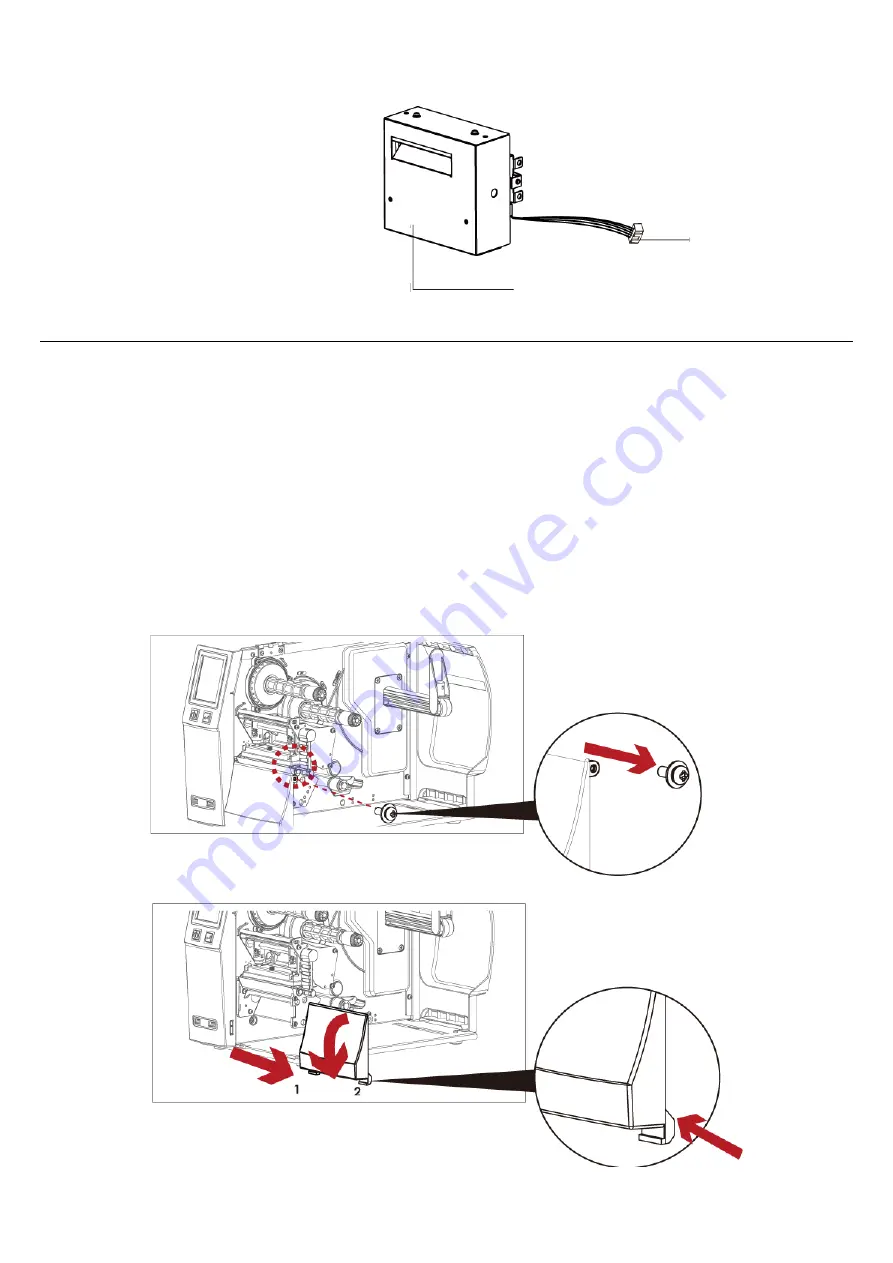
Overview Of Perforation
Cutter
CONNECTION CABLE OF
CUTTER
COVER
(Power off the printer and remove the power
cable before installing the
perforation
cutter
module)
1. Loose the screw (as circle indicated).
2.
Remove the cover panel by pushing to the
direction of right-hand side.
Содержание ZX1000i Series
Страница 19: ...7 Once the driver installation is complete the new printer should appear in the Printers and Faxes folder ...
Страница 29: ...Win 1254 Win 1255 Win 1257 Label Setting Rotation X offset Y offset Start Offset ...
Страница 75: ...5 Click WiFi Setting icon 6 Click Quick Setting icon ...
Страница 76: ...7 Click the Search button ...
Страница 77: ...8 Select server and click next button 9 Enter the password set on the server side and click the Setting button ...


