15
3. Maintenance and Adjustments
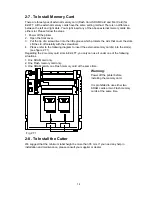
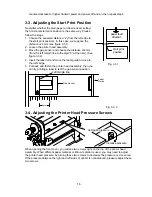
3-1. Cleaning the Printer Head
1. Open the Front cover and back cover.
2. Press the printer lock (part 14) to loosen the printer head assembly.
3. Turn over the head assembly.
4. Use a soft cloth soaked with isopropyl alcohol to remove the stuck label and cleans the
surface.
5. Put back the printer head and fasten it.
3-2. Adjusting Gap Sensor Sensitive
Only trained personnel must make any adjustment of the gap sensor, and it is highly
recommended that adjustment be made in a well-lit room.
1. Power on then open the Front cover and back cover.
2. Press the printer lock (part 14) to loosen the printer head assembly.
3. Turn over the head assembly.
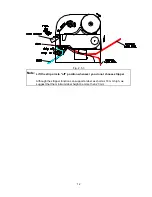
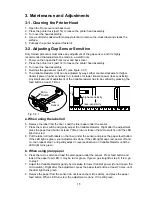
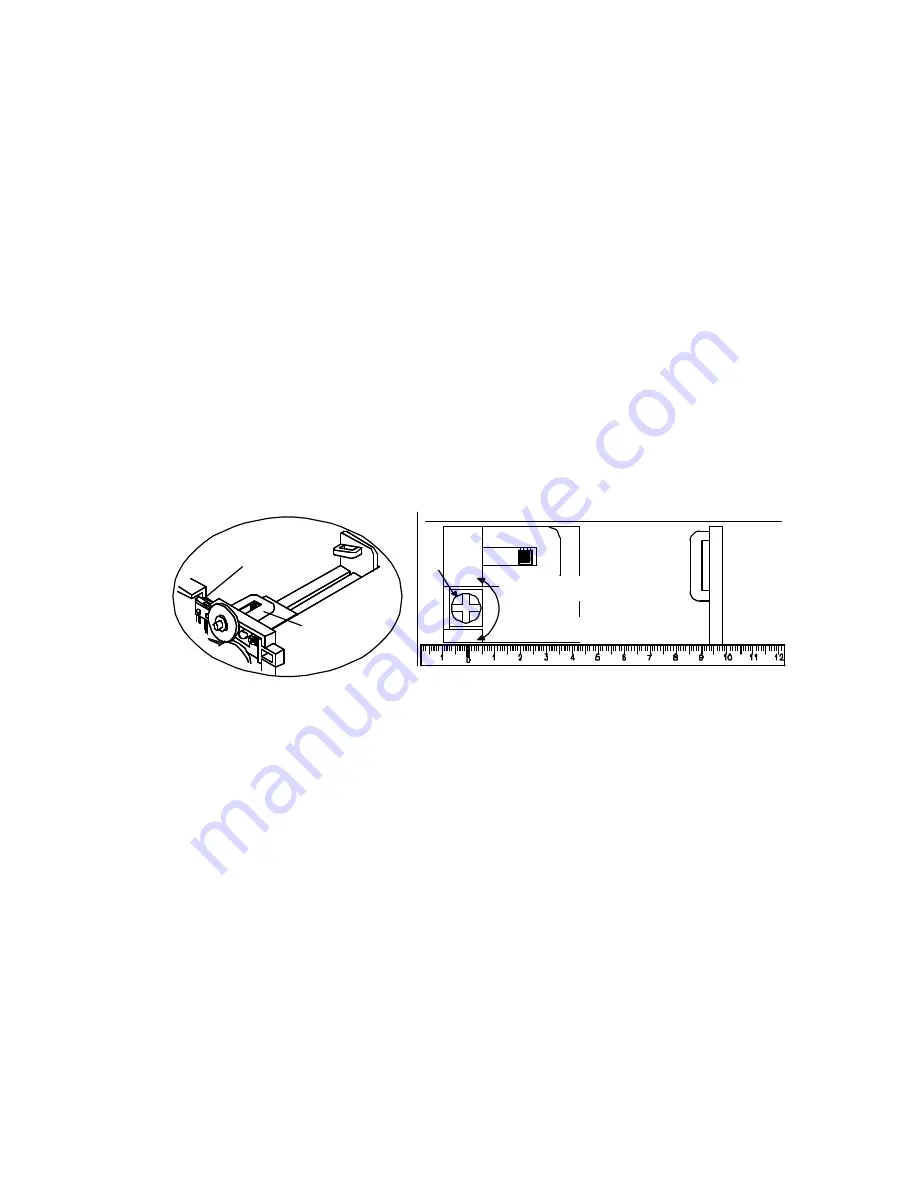
4. Overlook the gap sensor (part 27). (see figure 3.2.1)
5. The Variable Resister (VR) can be adjusted by ways either counter-clockwise for higher
transmit power (higher sensitivity) or clockwise for lower transmit power (less sensitivity).
Any small amount of adjustment of the Variable resister has to be verified by pressing the
feed button at least 7 times.
Gap
Sensor
Micro
Switch
higher-sensitivity
less-sensitivity
VR
Fig. 3.2.1
a. When using the label roll
6. Remove the label from the liner. Load the liner paper under the sensor.
7. Press the micro switch and gently adjust the Variable Resistor. Right after the adjustment,
press the paper feed button at least 7 times (do not loosen the micro switch), until the LED
light turns red.
8. Put the label roll (with labels on the liner) under the sensor and press the paper feed button.
If the LED light is green, your adjustment is done. If the LED light keeps red, power off and
on, then repeat step 7 and gently adjust in reverse direction on Variable Resistor until the
LED light turns green.
b. When using plain paper
6. Press the micro switch and load the plain paper under the sensor. Press feed button and
look at the paper feed LED, it may be red or green. If green, go straight to step 8; if red, go
to step 7.
7. Adjust the Variable Resistor gently by clockwise for lower transmit power (do not loosen the
micro switch). Right after the adjustment, press the paper feed button at least 7 times, until
the LED light turns green.
8. Remove the paper from the sensor (do not loosen the micro switch), and press the paper
feed button. When LED turns red, the adjustment is done. If it is still green,
Содержание EZ-2P
Страница 1: ...EZ 4TT 4TK 2P 4P User s Manual ...


