8
7
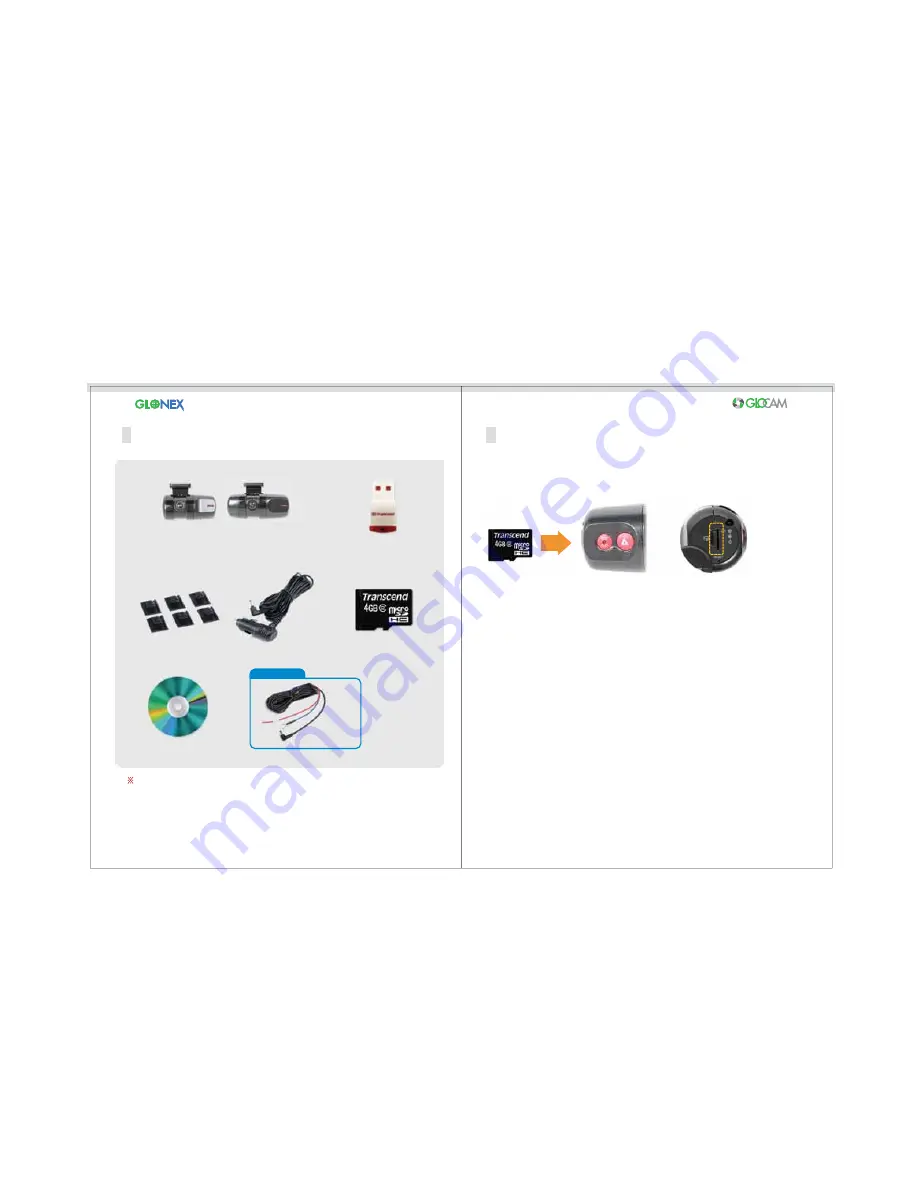
The picture of components may differ from the items included in this package,
Some accessories may be modified or discontinued without notice.
1. Insert SD™ Card into the slot.
2. Replace the cap over the end of the camera to protect
the device and card.
3. Connect the power cord into camera - LED will light up.
4. Remove the SD™ Card by pushing to eject it.
Caution: Make sure that the card is pushed in securely. If it is not
inserted correctly, it may cause a malfunction.
Components Check List
Inserting / Removing the SD™ Card
12-V Power Cord
Micro-SD™ Card
Harness Power Cable
Optional
Installation CD
GLOCAM Camera
or
Micro-SD™ USB Adapter
Cable Clips
It is recommended that you use Class 4 or higher memory cards for optimal
camera performance.
Caution: Do not let card get wet or dirty. Do not touch metal end of card. These
can cause malfunctions of the card / camera.
Do not use the SD™ Card for any other purpose than with the camera. To do so
may cause loss of data and/or malfunction.
GC1
GC2


