background image


7


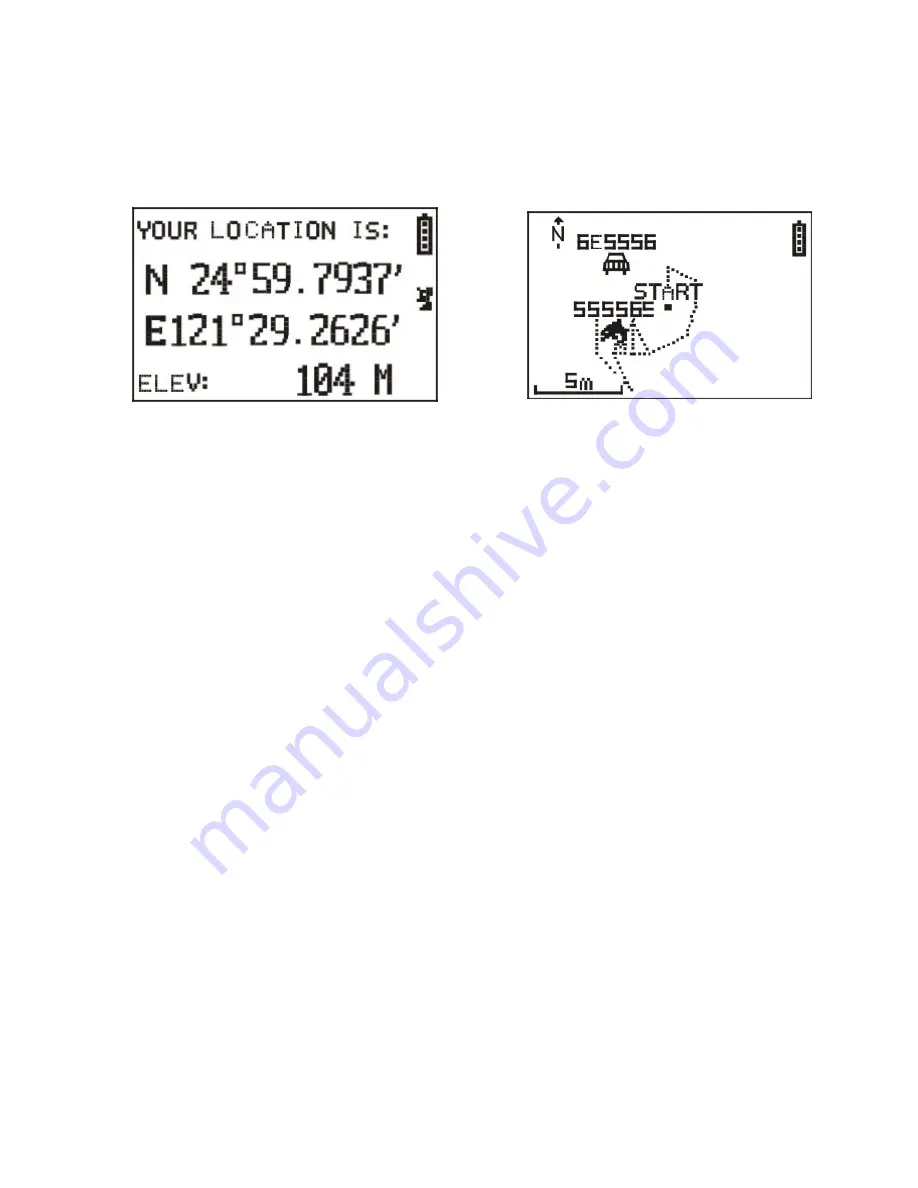
Location mode 

Map mode (If enabled) 

 
2. 

Speedometer Mode

: The Speedometer mode allows you to start or stop the timer, 

reset the timer and split a lap. It also provides access to two screens: 

„

  The Timer screen displays “TIME OF DAY”, “SPEED” and “ELEVATION” of 

you workout. 

„

  The countdown screen displays the time you spent of workout and average 

speed and distance of you workout. 

3. 

Menu Mode

: The Menu Mode provides access to features and settings. 

4. 

Location Mode

: The Location Mode provides your current location for your 

reference. 

5. 

Map Mode

: The Map Mode, when enabled through the Navigation menu, displays 

where you are going and where you have been on a graphic map. 


z


Setting the Time Zone


When the GH-601 is ready for use; you may need to check the Time Zone selection. To 
change the time zone follow steps below: 
1. Press 

PG

 button to display the Menu mode. 

2. The current date and time are displayed on the button of the screen. When the 

GH-601 established a GPS fix, the GMT is selected as the default Time Zone. 

3. To change the Time Zone, use 

UP/DOWN

 buttons to select ‘select time zone’ and 

press 

OK

Содержание GH-601

Страница 1: ...Wrist Type GPS for Outdoor Training GPS Receiver GH 601 _______________________________________ User Manual Version 1 1...

Страница 2: ...ntroduction 2 Features 2 Application Software 2 Accessories 2 Front panel description 3 Charging the GH 601 4 Starting up your GH 601 5 GH 601 main functions 9 Sport Record 10 Navigation 11 GPS Mouse...

Страница 3: ...ithium ion battery 3 Large LCD for easy reading 4 WAAS ENGOS support 5 Waterproof rigid design to avoid careless damage 6 Records all history of self training by defined day 7 GH 600 series can be use...

Страница 4: ...3 Front panel description...

Страница 5: ...harge the internal battery when the battery runs out 1 To charge the battery please connect one end of mini USB cable to PC USB port and the other end to the mini USB port of GH 601 2 Connect one end...

Страница 6: ...the POWER button for 14 seconds to shutdown and again to restart 3 When the GH 601 is fully charged the battery icon scale will be filled GH 601 can operate up to 16 hours on one battery charge 4 GH...

Страница 7: ...hrough the various modes of the GH 601 The three default modes Speedometer Menu and Location modes can be cycled through by pressing PG button If the Map mode is enabled then this mode will also be cy...

Страница 8: ...on Mode The Location Mode provides your current location for your reference 5 Map Mode The Map Mode when enabled through the Navigation menu displays where you are going and where you have been on a g...

Страница 9: ...switch between the Speedometer and Menu Modes Press to exit the current page or screen 3 The ESC LOOP button Press to split a lap when timer is running When it is in menu mode press and release to re...

Страница 10: ...e GPS on off Save location Search location Return to Orig return to original location GPS info 3 GPS Mouse Turn on off GPS ms 4 Configuratio Setup time zone time zone such as 12 11 11 12 Setup GPS Set...

Страница 11: ...o erase the all history files 5 When in Run File Info screen select View Run Map to review the data information in Map mode or Delete to remove this file z To save your training data 1 In the Speedome...

Страница 12: ...Default setting is enabled or press GPS Off for more power saving to increase battery life 5 Press Search Location to locate the position you wish to find 6 Press Return To Orig to go back to the sta...

Страница 13: ...ttons Then press ENTER to decide what you want 4 Press DOWN button to highlight the location name 5 Scroll through the letter holders using DOWN or UP buttons and press ENTER button to decide what you...

Страница 14: ...on marks 3 Press UP DOWN buttons to select the waypoints where you want 4 Select GOTO to review locations in Map mode Or select Delete to delete the waypoint 5 You can see clearly the destination from...

Страница 15: ...isplay the Menu Mode 2 Select GPS Mouse and press OK 3 Select Turn on GPS MS and press OK 4 Please install the GH 601 USB driver on your PC 5 Please connect one end of mini USB cable to PC USB port an...

Страница 16: ...et Unit to set distance units such as kilometers or miles 6 Press User Name to fill your name into the GH 601 7 Press LCD Contrast to adjust brightness in LCD by pressing UP DOWN buttons 8 Press Set B...

Страница 17: ...from GH 601to PC please connect one end of mini USB cable to PC USB port and the other end to the mini USB port of GH 601 3 Select the suitable COM port for updating 4 Please set the baud rate to 4800...

Страница 18: ...ther end to the mini USB port of GH 601 3 Select the suitable COM port for updating 4 Please set the baud rate to 38400 bps for COM port in PC 5 Please confirm you wish to update firmware 6 Select the...

Отзывы: