


MI07PYRU – rev.00/2017
45
80
81
82
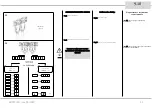
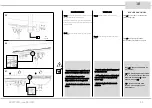
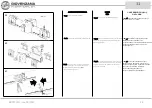
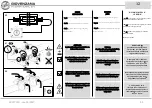
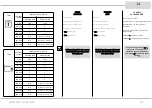
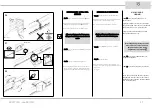
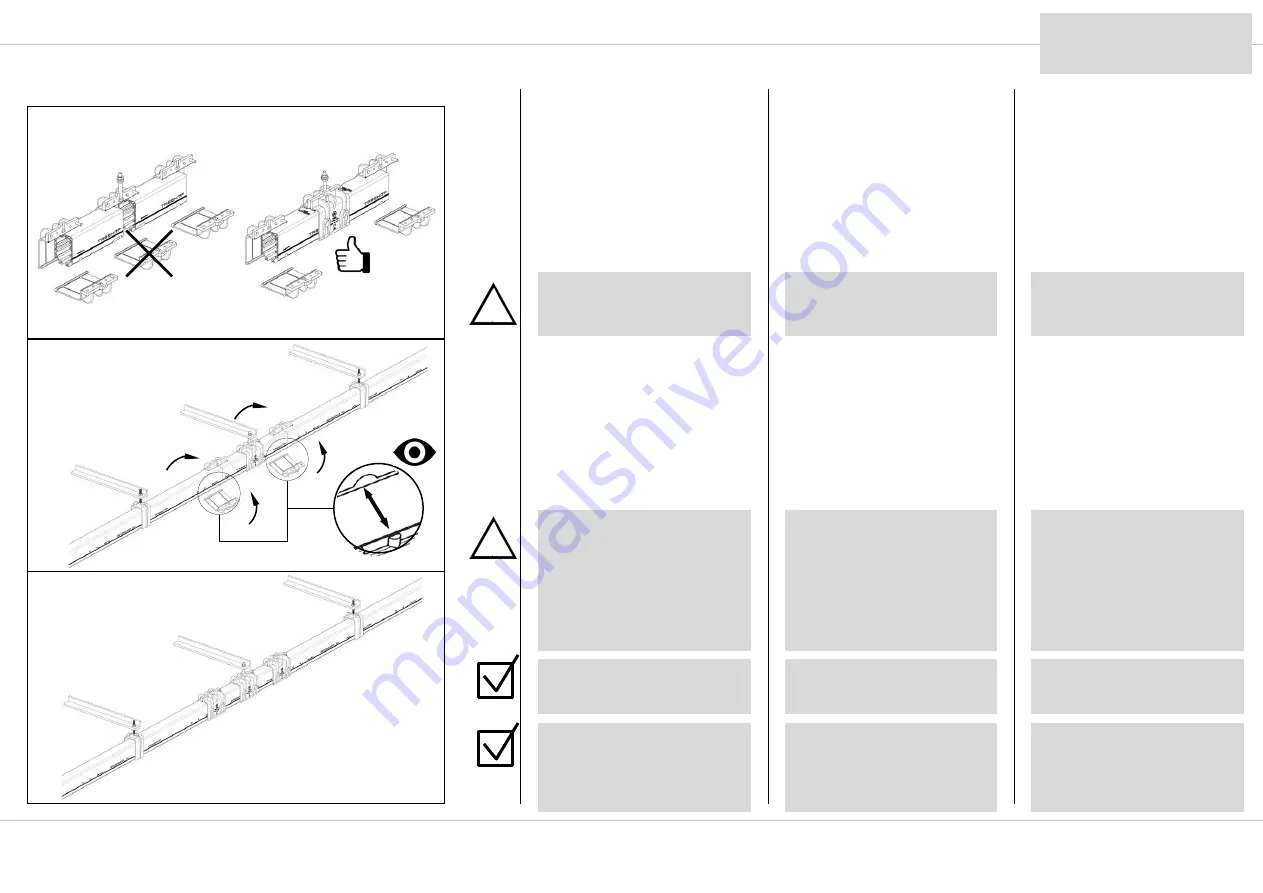
GIUNTO
ESPANSIONE
Procedere al montaggio del giunto di espansione.
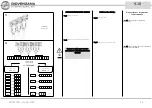
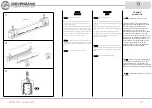
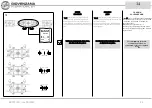
Posizionare il giunto di espansione il più vicino possibile alla
mezzeria linea.
Se presente due o più giunti, distribuirli lungo la linea alla stessa
distanza l’ uno dall’ altro.
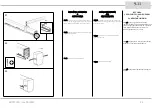
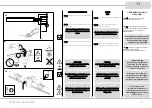
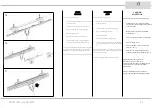
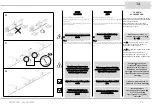
Dis. 81: aprire le giunzioni di sinistra e di destra quindi connettere
il giunto alle barre adiacenti e richiudere le giunzioni.
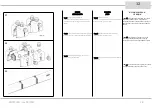
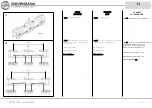
Dis. 82: mostra il giunto di espansione montato
Per non variare il passo dei supporti è buona cosa tagliare la barra
precedente o la barra successiva la giunto di espansione di 400mm.
.
Il giunto deve essere sostenuto dal suo punto fisso
centrale.
Durante il montaggio e la movimentazione
assicurasi di non perdere che le posizioni prima
settate, quindi avvicinare o spingere le barre
adiacenti fino alla posizione necessaria
Non rimuovere in nessun caso la giunzione centrale
(dis. 80)
Verificare nuovamente la regolazione e se
compromessa operare per settarlo nella giusta
posizione
14
СЕКЦИЯ
РАСШИРЕНИЯ
Приступить
к
установке
секции
расширения
.
Расположить
секцию
расширения
как
можно
ближе
к
середине
линии
.
При
наличии
более
чем
одной
секции
,
распределить
их
по
всей
длине
на
равном
расстоянии
друг
от
друга
.
Рис
. 81:
раскрыть
муфты
справа
и
слева
,
подсоединить
секцию
расширения
где
необходимо
,
закрыть
муфты
.
Рис
.82:
изображение
установленной
секции
расширения
.
Чтобы
не
менять
расстояние
между
кронштейнами
,
лучше
обрезать
одну
из
близлежащих
к
расширению
секций
на
400
мм
.
Ни
при
каком
условии
не
снимать
центральную
муфту
.
(
рис
. 80)
Убедиться
,
что
во
время
установки
и
перемещений
фрагменты
не
сместились
с
выбранных
температурных
отметок
.
В
случае
необходимости
заново
подогнать
их
под
нужные
отметки
.
Заново
проверить
температурные
настройки
и
,
в
случае
неточностей
,
отрегулировать
до
нужных
отметок
.
Секция
расширения
должна
держаться
на
точке
фиксации
.
EXPANSION
JOINT
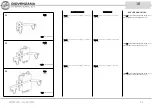
Proceed with installation of the expansion joint.
Position the expansion joint as close as possible to the midpoint of the
line.
If there are two or more expansion joints, distribute them along the
line the same distance apart.
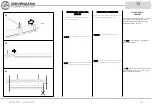
Dwg. 81: open the left and right end joints, then connect the
expansion joint to the adjacent rails and close the end joints again.
Dwg. 82: shows the mounted expansion joint.
In order not to vary the inter-support distance, it is best to cut 400
mm from either the rail preceding or the rail following the expansion
joint.
The joint must be supported by its central fixed
point.
Make sure set-up positions are not lost during
mounting and handling, and then move or push the
adjacent rails to the required positions.
Do not remove the central joint under any
circumstances
(Dwg. 80)
Check set-up again and if altered take steps to
restore correct positioning.
Содержание TR85H7P
Страница 52: ...Note Notes Заметки MI07PYRU rev 00 2017 52 ...
Страница 53: ...Note Notes Заметки MI07PYRU rev 00 2017 53 ...
Страница 54: ......


