GB
8
1)
TECHNICAL
AND
DIMENSIONAL
CHARACTERISTICS
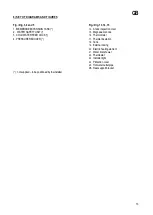
The technical and dimensional characteristics of the appliances are given, according to the model, in Figures 6, 7, 8
and in the
Table of Dimensions, table 1. The electrical specifications are given on the appliance, according to the model.
2)
GENERAL
INSTRUCTIONS
Installation is the customer’s responsibility. The Manufacturer declines any liability for damage due to incorrect installation and
non-compliance with the instructions contained in this user’s handbook, and in particular:
the electrical connection must comply with that specified in the relevant section;
the “water safety unit” must be correctly installed, efficient and not tampered with;
installation and maintenance must be carried out by qualified personnel in compliance with
current regulations;
the maintenance instructions must be respected;
the appliance must be installed in a suitable closed room (to avoid appliance freezing);
the appliance is only intended for domestic use.
This appliance complies with the current provisions of EEC Directives.
The internal boiler is designed to withstand a max. pressure of 0.8 Mpa (8 bar) without deformation.
3)
INSTALLATION
(
BY QUALIFIED PERSONNEL ONLY
)
IMPORTANT: The appliances must be installed in compliance with the provisions of the EN standard
regarding placing in bathrooms; they must be installed according to the version (oversink and undersink)
as shown on the packing.
Oversink appliances must not be installed as undersink applications, and vice versa.
No type of conversion is possible because the type of heating element and the safety and adjustment thermostat
setting do not allow it.
3.1. Wall mounting
After checking that that wall is strong enough fix 2 hooks of suitable size (not supplied) to it, making sure they a securely
anchored. Then hang the appliance on the hooks by means of the support bracket, as shown in fig. 8.
3.2. Anode.
The magnesium anode fitted inside the appliances, together with the special treatment inside the boiler, guarantees protection
against corrosion of the tank.
3.3. Water connection
The water inlet and outlet are marked as follows:
- blue ring for the cold water inlet;
- red ring for the hot water outlet.
It is advisable to place the appliance near the main hot water drawing point in order to avoid heat loss along the piping, and
possibly near a drain to facilitate emptying operations. The appliance water connection is shown in Fig. 3, 4 and 5. The
procedure for correct installation is illustrated below.
3.3.1. Water safety unit (compulsory).
It is compulsory to install a water safety unit
(not supplied by us)
conforming to current EN 1487 standards or equivalent,
which must comprise at least the following elements:
Stopcock;
Non-return valve;
Non-return valve control device;
Safety valve;
Water pressure cutoff device.
The above-mentioned components are necessary for safe operation of the appliances supplied. The rated pressure setting of
the water safety unit must be 0.7 Mpa (7 bar). When installing the water safety unit make sure not to force or tamper with it.
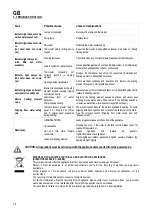
Water may drip from the water safety unit discharge connection (see par. “USER INSTRUCTIONS – Dripping from water
safety unit”). This opening must be left open to the atmosphere. A downward sloping drain pipe must be arranged in a place
free of condensate and ice. To avoid overpressures make sure the piping is free of any obstructions.
3.3.2. Pressure reducer.
Содержание RAPIDI 10 Series
Страница 2: ......
Страница 44: ...42 SCHEMA ELETTRICO WIRING DIAGRAM Fig Abb 1 SCHÉMA ÉLECTRIQUE SCHALTBILD ESQUEMA ELÉCTRICO Fig Abb 2 ...
Страница 49: ...47 Fig Abb 15 ...
Страница 50: ...48 Fig Abb 16 Fig Abb 17 Fig Abb 18 ...
Страница 51: ......


