background image

GB 

14 

7.


TROUBLESHOOTING 


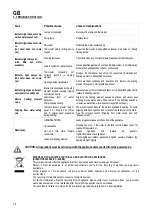
Fault 


Possible causes


Cures and explanations


Indicator light does not come 

on (hot water comes out) 

Lamp not connected 

Reconnect the lamp and thermostat. 

Faulty lamp 

Replace lamp 

Indicator light does not come 

on  

(hot water does not come 

out) 

No current 

Reinstate the mains power supply 

Thermostat safety limiting device 

tripped  

Reset the thermostat. Call qualified personnel. See notes on “Safety 

limiting device” 

Indicator light always on  

(with little hot water 

available) 

Drawing tap/s open 

Check and close any hot water drawing taps even left partially open. 

Leak in system hot water section 

Have a qualified plumber check the plumbing system; a small leak can 

activate the heating element often or continuously. 

Indicator light always on 


(hot water does not come 

out) 

Thermostat connectors not 

correctly inserted in heating 

element 

Remove the thermostat and check the connectors (thermostat and 

heating element). Call qualified personnel. 

Heating element interrupted 

Check electrical continuity and insulation and replace the heating 

element if necessary. Call qualified personnel. 

Indicator light goes off when 

water heater is switched on 

Element line overloaded or heating 

element earthed causing tripping 

of protection device  

Disconnect any other electrical appliances or call qualified personnel to 

replace the heating element 

Electric heating element 

noisy 

Anomalous level of water 

hardness. 

Water causing scaling. 

Scale on the heating element causes an uneven and violent heat 

exchange in the places where it has come off. The definitive solution is 

to install a water softener (A dispenser may not be sufficient).  

Dripping from water safety 

unit 

Internal pressure greater than or 

equal to 0.7 Mpa (7 bar). (Often 

due to normal water expansion 

during heating) 

The system cannot “absorb” the water expansion in heating. To avoid 

dripping install an expansion tank or connect the safety valve to a drain. 

See the relevant section “Dripping from water safety unit” and 

“Expansion tank”. 

Water leaks 

GENERAL NOTES 

Leaks are generally seen at the bottom of the appliance. 

Condensation 

Dripping can occur if the water in the tank is cold. Always check for 

leaks with the water hot.  

Hot and cold water flexible 

connectors  

Check tightness and replace the gaskets. 


Tighten down and check tightness 

Leaks from heating element 

Check tightness, replace gasket and tighten securely. Replace the 

heating element if faulty. 


CAUTION: All operations must be carried out with the appliance disconnected from the power mains. 


DISPOSAL OF OBSOLETE ELECTRICAL AND ELECTRONIC APPLIANCES


(DIRECTIVE 2002/96/EC – WEEE) 

This symbol indicates that the appliance must not be treated as domestic waste upon disposal.  

Rather, it must be delivered to an authorized collection centre for the recycling of electrical and electronic 

appliances. 

Proper disposal of this appliance will avoid potential health hazards and adverse consequences for the 

environment. 

The recycling of materials helps to conserve natural resources. 

For further information about the recycling of this appliance, please contact your municipal offices, your domestic 

waste disposal service or the retailer/installer from whom the appliance was purchased. 

The penalties for failure to comply with these disposal procedures are laid down in local legislation. 


Содержание RAPIDI 10 Series

Страница 1: ...nstructions for installation use and maintenance 8 FR CHAUFFE EAU ÉLECTRIQUE Instructions pour l installation l emploi l entretien 15 DE ELEKTRISCHER WARMWASSERBEREITER Montage Bedienungs und Wartungsanleitungen 22 ES CALENTADORES ELÉCTRICOS Instrucciones para la instalación el uso la manutención 29 RO INCALZITOARE DE APA ELECTRICE Instructiuni de instalare utilizare si intretinere ...

Страница 2: ......

Страница 3: ...ezza del muro procedere al fissaggio di N 2 ganci di adeguate dimensioni esclusi dalla nostra fornitura al muro Successivamente appendere l apparecchio alla parete agganciando la staffa di sospensione ai ganci come indicato in fig 8 3 2 Anodo L anodo di magnesio montato all interno degli apparecchi garantisce insieme al trattamento speciale interno della caldaia la protezione contro le corrosioni ...

Страница 4: ...da aprire l alimentazione idrica generale o il rubinetto di alimentazione acqua dell apparecchio aprire un rubinetto dell acqua calda es bagno lavabo etc per consentire l uscita dell aria interna all uscita di un flusso costante d acqua dal rubinetto l apparecchio sarà pieno verificare l assenza di perdite lungo i vari collegamenti idraulici Si consiglia di effettuare una pulizia delle tubazioni p...

Страница 5: ...erno dell apparecchio ad una temperatura non inferiore ai 50 C Fare scorrere dai rubinetti e docce in caso di assenze prolungate l acqua per qualche minuto Mantenere docce e rubinetti privi di incrostazioni 4 3 1 Modelli senza selettore esterno La taratura del termostato al valore massimo viene eseguita in fabbrica qualora se ne desiderasse modificarne il valore bisogna disinserire l alimentazione...

Страница 6: ...vertire un click 5 2 Controllo Sostituzione dell anodo La sua funzione è molto importante per proteggere il serbatoio contro le corrosioni causate dalle correnti vaganti o dall aggressività dell acqua Il suo consumo è proporzionale al lavoro di protezione svolto e dalla qualità dell acqua interna E molto importante provvedere al controllo della sua efficienza almeno con una frequenza biennale o co...

Страница 7: ...izia del calcare facendo attenzione a non danneggiare la corazza della resistenza rimontare serrando i dadi M10 con coppia di serraggio pari a 12 Nxm eseguire tale operazione seguendo uno schema di avvitamenteo a croce Fare attenzione al corretto posizionamento della guarnizione e delle viti su cui sono serrati i dadi seguire le istruzioni specifiche per il collegamento ed il montaggio della calot...

Страница 8: ...DDA 4 RIDUTTORE DI PRESSIONE 1 Comperchio ispezione anodo 2 Anodo di magnesio 3 Termometro 4 Isolamento termico 5 Serbatoio 6 Involucro esterno 7 Resistenza elettrica 8 Rompigetto ingresso acqua 9 Termostato 10 Spia luminosa 11 Calotta di protezione 12 Tubo uscita acqua calda 13 Staffa posteriore di sostegno non in dotazione da collocare a cura dell installatore ...

Страница 9: ...luzione definitiva è di installare un addolcitore Un dosatore può non essere sufficiente Gocciolamento di acqua dal gruppo di sicurezza idraulico Pressione interna maggiore o uguale a 0 7 Mpa 7 bar Spesso dovuta alla normale dilatazione dell acqua durante il riscaldamento L impianto non è in grado di assorbire la dilatazione termica dell acqua in riscaldamento Per evitare il gocciolamento installa...

Страница 10: ...adjustment thermostat setting do not allow it 3 1 Wall mounting After checking that that wall is strong enough fix 2 hooks of suitable size not supplied to it making sure they a securely anchored Then hang the appliance on the hooks by means of the support bracket as shown in fig 8 3 2 Anode The magnesium anode fitted inside the appliances together with the special treatment inside the boiler guar...

Страница 11: ...ce is full when water flows freely from the tap check for any leaks in the various plumbing connections It is advisable to clean the pipes before installation The electrical connection can only be made after this operation 3 5 Electrical connection NB The appliance is arranged for installation with fixed pipe for the electrical connection Make sure the mains voltage matches the value given on the ...

Страница 12: ...stat knob Fig 1 towards to increase or to decrease the temperature Refer to the relevant notch located on the thermostat To prevent the formation of legionella an adjustment close to the factory setting towards the notch is advisable 4 3 2 Models with external selector Adjustment is made by turning the knob selector located on the cover see fig 18 Max temperature setting is obtained by turning the...

Страница 13: ...o the appliance empty the water from the appliance by following the instructions given in the relevant section remove the electrical protection cover Fig 13 Ref 9 using a screwdriver and disconnect the electrical wires and indicator lamp from the respective terminals remove the thermostat unscrew the heating element using a CH 55 spanner check the good condition of the anode and replace if necessa...

Страница 14: ...econnect the power 5 3 2 Versions with external selector heating element on coupling switch off the power to the appliance empty the tank see section on emptying the appliance remove the electrical protection cover undoing the fixing screws disconnect the electrical wires from the respective terminals and remove the thermostat remove the heating element using a suitable CH 55 spanner remove any sc...

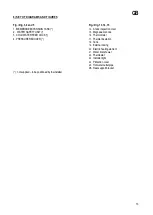
Страница 15: ...ED COCK 4 PRESSURE REDUCER 14 Anode inspection cover 15 Magnesium anode 16 Thermometer 17 Thermal insulation 18 Tank 19 External casing 20 Electric heating element 21 Water inlet shower 22 Thermostat 23 Indicator light 24 Protection cover 25 Hot water outlet pipe 26 Rear support bracket not supplied to be positioned by the installer ...

Страница 16: ...he definitive solution is to install a water softener A dispenser may not be sufficient Dripping from water safety unit Internal pressure greater than or equal to 0 7 Mpa 7 bar Often due to normal water expansion during heating The system cannot absorb the water expansion in heating To avoid dripping install an expansion tank or connect the safety valve to a drain See the relevant section Dripping...

Страница 17: ...es de bains selon la version ils seront installés au dessus ou au dessous de l évier comme stipulé sur l emballage Les appareils à installer au dessus d un évier ne peuvent être installés au dessous de celui ci et vice versa Aucune transformation n est consentie car le type de résistance et le tarage du thermostat de réglage et de sécurité ne le permettent pas 3 1 Fixation murale Après avoir const...

Страница 18: ...ce électrique et du groupe de sécurité hydraulique Pour effectuer le remplissage de l appareil procéder comme suit amener le robinet présent sur le groupe hydraulique Fig 3 4 et 5 réf 3 en position de fonctionnement l ouverture du robinet permet d alimenter l appareil La retenue incorporée dans le groupe de sécurité hydraulique empêche le reflux de l eau chaude ouvrir l alimentation hydrique génér...

Страница 19: ...être adoptées Maintenir l eau chaude à l intérieur de l appareil à une température non inférieure à 50 C En cas d absence prolongée faire couler l eau des robinets et de la douche pendant quelques minutes avant de l utiliser Veiller à ce que les robinets et les douches ne présentent aucune incrustation 4 3 1 Modèles non équipés d un sélecteur extérieur Le tarage du thermostat sur la valeur maximal...

Страница 20: ...sition indiquée par la Fig 1 jusqu à ce qu un déclic soit émis 5 2 Contrôle Remplacement de l anode La fonction de l anode est particulièrement importante car elle protège le réservoir contre les attaques de corrosion provoquées par les courants incessants ou par le degré d agressivité de l eau Son usure est proportionnelle au travail de protection exercé et à la qualité de l eau interne Il est tr...

Страница 21: ...ommager la partie externe de la résistance remonter en serrant les écrous M10 à un couple de serrage de 12 Nxm effectuer cette opération en suivant un schéma de serrage en forme de croix Vérifier la mise en place correcte des joints et des vis sur lesquelles sont serrés les écrous suivre les instructions spécifiques pour le branchement et le montage de la calotte avec sélecteur extérieur Fig 16 17...

Страница 22: ...4 RÉDUCTEUR DE PRESSION 27 Couvercle d inspection de l anode 28 Anode de magnésium 29 Thermomètre 30 Isolation thermique 31 Réservoir 32 Enveloppe externe 33 Résistance électrique 34 Brise jet entrée d eau 35 Thermostat 36 Voyant 37 Calotte de protection 38 Conduit de sortie eau chaude 39 Écrier arrière de support non fourni avec l appareil doit être placé par l installateur ...

Страница 23: ... irrégulier et violent aux endroits où le calcaire s est incrusté La solution définitive consiste à installer un adoucisseur un doseur peut s avérer insuffisant Dégoulinement d eau à partir du groupe de sécurité hydraulique La pression intérieure est à 0 7 Mpa 7 bar souvent dû à la dilatation normale de l eau au cours du réchauffement L installation n est pas en mesure d absorber la dilatation the...

Страница 24: ...liert werden und umgekehrt Veränderungen sind aufgrund des Typs des Heizwiderstands und der Eichung des Regel und Sicherheitsthermostats nicht zulässig 3 1 Wandbefestigung Erweist sich die Wand nach entsprechender Prüfung als ausreichend solide zwei ausreichend starke Haken fest an der Wand befestigen nicht im Lieferumfang inbegriffen Das Gerät dann mit dem eigens dafür vorgesehenen Bügel Abb 8 an...

Страница 25: ...s Öffnen des Hahns ermöglicht die Versorgung des Geräts Das Rückschlagventil in der Hydraulik Sicherheitsgruppe verhindert den Rücklauf des warmen Wassers Die Hauptwasserleitung oder den Wasserversorgungshahn des Geräts öffnen Einen Warmwasserhahn z B im Bad oder an der Spüle öffnen um die in der Leitung enthaltene Luft auszustoßen sobald der Wasserstrom konstant aus dem Hahn fließt ist das Gerät ...

Страница 26: ... mit einer Temperatur von nicht unter 50 C Bei längerer Abwesenheit das Wasser einige Minuten lang aus Hähnen und Duschen laufen lassen Duschköpfe und Hähne müssen frei von Ablagerungen sein 4 3 1 Modelle ohne externe Einstellvorrichtung Die Einregelung des Thermostats auf den Höchstwert erfolgt werkseitig soll dieser Wert verändert werden die Stromversorgung unterbrechen und dann das Schutzblech ...

Страница 27: ...ität des Wassers verursachte Korrosion zu schützen Ihr Verbrauch ist proportional zur geleisteten Arbeit und der Qualität des inneren Wassers Es ist sehr wichtig die Leistungsfähigkeit der Anode mindestens alle zwei Jahre aber auf jeden Fall im Verhältnis zur Qualität des Wassers zu prüfen Die Wirksamkeit der Anode hängt von ihrer Unversehrtheit ab Ihren Verbrauch bei der Kontrolle prüfen wenn er ...

Страница 28: ...lkablagerungen ablösen und entfernen dabei die Panzerung des Widerstands nicht beschädigen Wieder einbauen und die Muttern M10 mit einem Drehmoment von 12 Nxm über Kreuz anziehen Auf die richtige Positionierung der Dichtung und der Schrauben achten auf die die Muttern aufgeschraubt werden Die Anleitungen für die Verbindung und die Installation des Schutzblechs mit externem Wahlregler beachten Abb ...

Страница 29: ...LTWASSERZULAUFHAHN 4 DRUCKMINDERER 40 Inspektionsklappe Anode 41 Magnesiumanode 42 Thermometer 43 Wärmeisolierung 44 Behälter 45 Externes Gehäuse 46 Heizwiderstand 47 Strahlbrecher Wassereingang 48 Thermostat 49 Warnleuchte 50 Schutzblech 51 Warmwasserausgang 52 Hinterer Haltebügel nicht beigeliefert muss vom Monteur installiert werden ...

Страница 30: ...steht darin einen Wasserenthärter zu installieren ein Dosiergerät könnte nicht ausreichen Tropfenleck an der hydraulischen Sicherheitsgruppe Innendruck höher oder gleich 0 7 Mpa 7 bar Ist häufig auf die normale Ausdehnung des Wassers beim Aufheizen zurückzuführen Die Anlage kann die thermische Dilatation des Wassers beim Aufheizen nicht aufnehmen Um Tropflecks zu vermeiden ein Expansionsgefäß inst...

Страница 31: ...te que aparece indicada en el embalaje Los aparatos cuya instalación está prevista encima del lavabo no pueden ser instalados debajo del mismo y viceversa No es posible efectuar ninguna transformación ya que el tipo de resistencia y la calibración del termostato de regulación y de seguridad no lo permiten 3 1 Fijación en la pared Después de haber verificado la adecuada solidez de la pared fijar fi...

Страница 32: ...enar el aparato es necesario disponer la llave presente en la unidad hidráulica Figs 3 4 y 5 Ref 3 en posición de funcionamiento mediante la apertura de la llave se obtiene la alimentación del aparato La válvula de retención incorporada en la unidad hidráulica de seguridad impide el retorno del agua caliente abrir la alimentación hídrica general o la llave de alimentación agua del aparato abrir un...

Страница 33: ...egionella Para ello se presentan a continuación algunas medidas generales de prevención que se aconseja adoptar El agua caliente debe ser mantenida en el interior del aparato a una temperatura no inferior a los 50 C En caso de ausencias prolongadas hacer salir el agua de grifos y duchas por algunos minutos Mantener duchas y grifos sin incrustaciones 4 3 1 Modelos sin selector externo La regulación...

Страница 34: ...to aislado de punta redondeada en la posición indicada en la Fig 1 hasta advertir un clic 5 2 Control Sustitución del ánodo Su función es muy importante para proteger el depósito contra las corrosiones causadas por las corrientes vagantes o por la agresividad del agua Su consumo es proporcional al trabajo de protección efectuado y a la calidad del agua presente en su interior Es muy importante hac...

Страница 35: ... efectuar la desincrustación y limpieza del calcáreo prestando atención a fin de no dañar la coraza de la resistencia reinstalar apretando las tuercas M10 con par de apriete de 12 Nxm efectuar esta operación siguiendo un esquema de enrosque en cruz Prestar atención a fin de respetar el correcto posicionamiento de la guarnición y de los tornillos sobre los que se aprietan las tuercas aplicar las in...

Страница 36: ...CTOR DE PRESIÓN 53 Tapa inspección ánodo 54 Ánodo de magnesio 55 Termómetro 56 Aislamiento térmico 57 Depósito 58 Revestimiento externo 59 Resistencia eléctrica 60 Rompechorro entrada agua 61 Termostato 62 Testigo luminoso 63 Casquete de protección 64 Tubo salida agua caliente 65 Soporte trasero de sustentación no incluido en el suministro colocación a cargo del instalador ...

Страница 37: ...gular y violento en los puntos en que el calcáreo se ha desincrustado La solución definitiva consiste en instalar un suavizador un dosificador puede no ser suficiente Goteo de agua desde la unidad hidráulica de seguridad Presión interna superior o igual a 0 7 Mpa 7 bares Debido a menudo a la normal dilatación del agua durante el calentamiento La instalación no es capaz de absorber la dilatación té...

Страница 38: ...stalate sub lavoar şi viceversa Nu este posibilă nici o transformare pentru că tipul de rezistenţă şi calibrarea termostatului de reglaj şi siguranţă nu o permit 3 1 Fixarea pe perete După verificarea rezistenţei peretelui pe care urmează să fie aparatul fixaţi cele 2 cârlige de dimensiuni adecvate nu se livrează împreună cu aparatul de perete După aceasta fixaţi aparatul pe perete prin agăţarea c...

Страница 39: ...Deschiderea alimentării generale cu apă sau a robinetului de alimentare cu apă a aparatului Deschideţi un robinet de apă caldă de ex de la lavoar sau cadă pentru a permite ieşirea aerului din aparat în momentul unui flux continuu de apă aparatul este plin Se va verifica existenţa eventualelor pierderi de apă de a lungul diverselor conexiuni hidraulice Se recomandă o curăţire a tubulaturii înainte ...

Страница 40: ... să curgă cateva minute înainte de folosire menţineţi duşul şi robineţii fără depuneri 4 3 1 Modele fără selector extern Calibrarea termostatului la valoarea maximă se face în fabrică astfel că în cazul în care doriţi modificarea valorii trebuie să deconectaţi aparatul de la alimentarea electrică să demontaţi calota de protecţie să răsuciţi butonul termostatului Fig 1 spre pentru creştere sau spre...

Страница 41: ...ostatului folosind o unealtă izolată cu vârful rotunjit în poziţia indicată în Fig 1 până la auzirea unui click 5 2 Controlul înlocuirea anodului Funcţionarea acestuia este foarte importantă pentru protejarea rezervorului împotriva coroziunilor cauzate de curenţi sau de duritatea apei Uzura anodului este proporţională cu activitatea de protecţie desfaşurată şi cu calitatea apei interne Este foarte...

Страница 42: ...TE GENERALE Folosiţi numai unelte adecvate Înlocuiţi întotdeauna garniturile şi sau inelele folosite pentru păstrarea în stare bună a părţii hidraulice Folosiţi numai piese de schimb originale În fazele de remontaj asiguraţi vă că rezistenţa este fixată corect şi garnitura este montată corect termostatul este introdus în suportul de rezistenţă împingându l până în capăt fără a l lovi cauzându i as...

Страница 43: ...r pe rezistenţă provoacă un schimb termic iregular şi violent în punctele în care calcarul este cojit Soluţia definitivă este instalarea unui dedurizator Un dozator poate să nu fie suficient Scurgerea apei din grupul de siguranţă hidraulic Presiune internă majoră sau egală cu 0 7 Mpa 7 Bar de multe ori datorată dilatării apei în timpul încălzirii Echipamentul nu este în măsură să absoarbă dilatare...

Страница 44: ...42 SCHEMA ELETTRICO WIRING DIAGRAM Fig Abb 1 SCHÉMA ÉLECTRIQUE SCHALTBILD ESQUEMA ELÉCTRICO Fig Abb 2 ...

Страница 45: ...43 Fig Abb 3 Fig Abb 4 Fig Abb 5 Fig Abb 6 RAPIDI SOPRALAVELLO RAPID OVERSINK MODELS RAPIDES DESSUS ÉVIER SCHNELLWARMWASSERBEREITER FÜR UNTERGESTELLTE INSTALLATION ...

Страница 46: ...44 INSTANTÁNEOS ENCIMA DEL LAVABO Fig Abb 7 RAPIDI SOTTOLAVELLO RAPID UNDERSINK MODELS RAPIDES DESSOUS ÉVIER SCHNELLWARMWASSERBEREITER FÜR ÜBERGESTELLTE INSTALLATION INSTANTÁNEOS DEBAJO DEL LAVABO ...

Страница 47: ...45 Fig Abb 8 FISSAGGIO A MURO WALL MOUNTING FIXATION MURALE WANDBEFESTIGUNG FÜR SCHNELLWARMWASSERBEREITER FIJACIÓN EN LA PARED SERIE INSTANTÁNEOS Fig Abb 9 SMART VO ...

Страница 48: ... RAPIDI SOPRA E SOTTOLAVELLO RAPID OVERSINK AND UNDERSINK MODELS RAPIDES DESSUS ET DESSOUS ÉVIER SCHNELLWARMWASSERBEREITER FÜR UNTERGESTELLTE INSTALLATION INSTANTÁNEOS ENCIMA Y DEBAJO DEL LAVABO Fig Abb 6 e 7 A B C D E F G 10 261 251 450 228 100 62 189 15 296 285 498 248 100 69 216 30 366 355 568 384 100 89 266 Fig Abb 13 Fig Abb 14 ...

Страница 49: ...47 Fig Abb 15 ...

Страница 50: ...48 Fig Abb 16 Fig Abb 17 Fig Abb 18 ...

Страница 51: ......

Страница 52: ... siguiente manual satisfacen los requisitos esenciales establecidos por las siguientes directivas europeas BT 2006 95 CE EMC 2004 108 CE PED art 3 3 97 23 CE Il Responsabile The Manager Der Verantwortliche Le Responsable El Responsable Marco GIONA La ditta declina ogni responsabilità per eventuali inesattezze contenute nelle presenti istruzioni dovute a errori di stampa o trascrizione e si riserva...

Отзывы: