GB
11
- turn the emptying knob on the water safety unit (Fig. 3, 4 and 5 ) to the open position;
- make sure the water safety unit discharge union is connected to a drain as provided for in par.3.3.1.
Reconnect the power only after this operation.
5.
MAINTENANCE
INSTRUCTIONS
(
QUALIFIED PERSONNEL ONLY
)
IMPORTANT: repair and/or maintenance operations must be carried only using original spare parts and by
qualified personnel. Before performing any maintenance operation, disconnect the appliance from the
power mains.
5.1. Safety limiting device (manual reset )
Reset, after eliminating the causes of intervention, as follows:
- disconnect the power supply;
- remove the protection cover fixing screws;
- lightly press the thermostat reset button, using an insulated object with round tip, in the position indicated in Fig. 1, until
hearing a click.
5.2. Control/Replacement of anode
Its function is very important for protecting the tank against corrosion caused by stray currents or the aggressiveness of the
water. Anode wear is proportional to the protection work carried out and the quality of the water inside.
Make sure to check its efficiency
at least every two years
or in any case according to the quality of the water. Protection
efficiency is linked to its integrity. When checking, also check wear; replace if excessively worn or insufficient to guarantee
protection until the next foreseen control. Spare parts are available from the distributor and/or the manufacturer.
IMPORTANT: Remember that damage caused by excessive anode wear (insufficient tank protection) is
not due to manufacturing defects and is therefore not covered by the warranty.
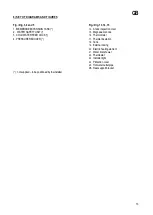
5.2.1. Rapid water heater versions without external selector (Fig 13).
For control and/or replacement, proceed as follows:
- switch off the power to the appliance;
- empty the water from the appliance by following the instructions given in the relevant section;
- remove the electrical protection cover (Fig. 13 Ref. 9) using a screwdriver and disconnect the electrical wires and indicator
lamp from the respective terminals;
- remove the thermostat;
- unscrew the heating element using a CH 55 spanner;
- check the good condition of the anode and replace if necessary, removing it together with its support with the aid of pliers (the
anode holder is screwed onto a special threaded housing) Fig. 13 Ref. 2;
- screw on the heating element using a CH 55 spanner, making sure to correctly position the gasket.
- carry out the specific instructions for the electrical connection (Fig. 2) and refit the cover (Fig. 13 Ref. 2)
- fill the appliance according to the instructions in the relevant section, then reconnect the power.
5.2.1. Rapid water heater versions with external selector (Fig 16, 17, 18).
For control and/or replacement, proceed as follows:
- switch off the power to the appliance;
- empty the water from the appliance by following the instructions given in the relevant section;
- remove the electrical protection cover (Fig. 13 Ref. 9) using a screwdriver and disconnect the electrical wires and indicator
lamp from the respective terminals;
- remove the thermostat;
- remove the counterflange using a suitable spanner for M10 nuts and remove it from the housing;
- check the good condition of the anode and replace if necessary, removing it together with its support with the aid of pliers (the
anode holder is screwed onto a special threaded housing) Fig. 13 Ref. 2;
- tighten the M10 nuts with torque setting of 12 Nxm; carry out in cross tightening order. Make sure to correctly position the
gasket and the screws on which the nuts are tightened;
- carry out the specific instructions for connection and fitting of the cover with external selector (Fig. 16, 17, 18).
- fill the appliance according to the instructions given in the relevant section, then reconnect the power.
Содержание RAPIDI 10 Series
Страница 2: ......
Страница 44: ...42 SCHEMA ELETTRICO WIRING DIAGRAM Fig Abb 1 SCHÉMA ÉLECTRIQUE SCHALTBILD ESQUEMA ELÉCTRICO Fig Abb 2 ...
Страница 49: ...47 Fig Abb 15 ...
Страница 50: ...48 Fig Abb 16 Fig Abb 17 Fig Abb 18 ...
Страница 51: ......


