7
INSTALLATION & GROUNDING
HOW TO USE
6
10
HOW TO USE
Ginnys.com • 1.800.544.1590
6
7
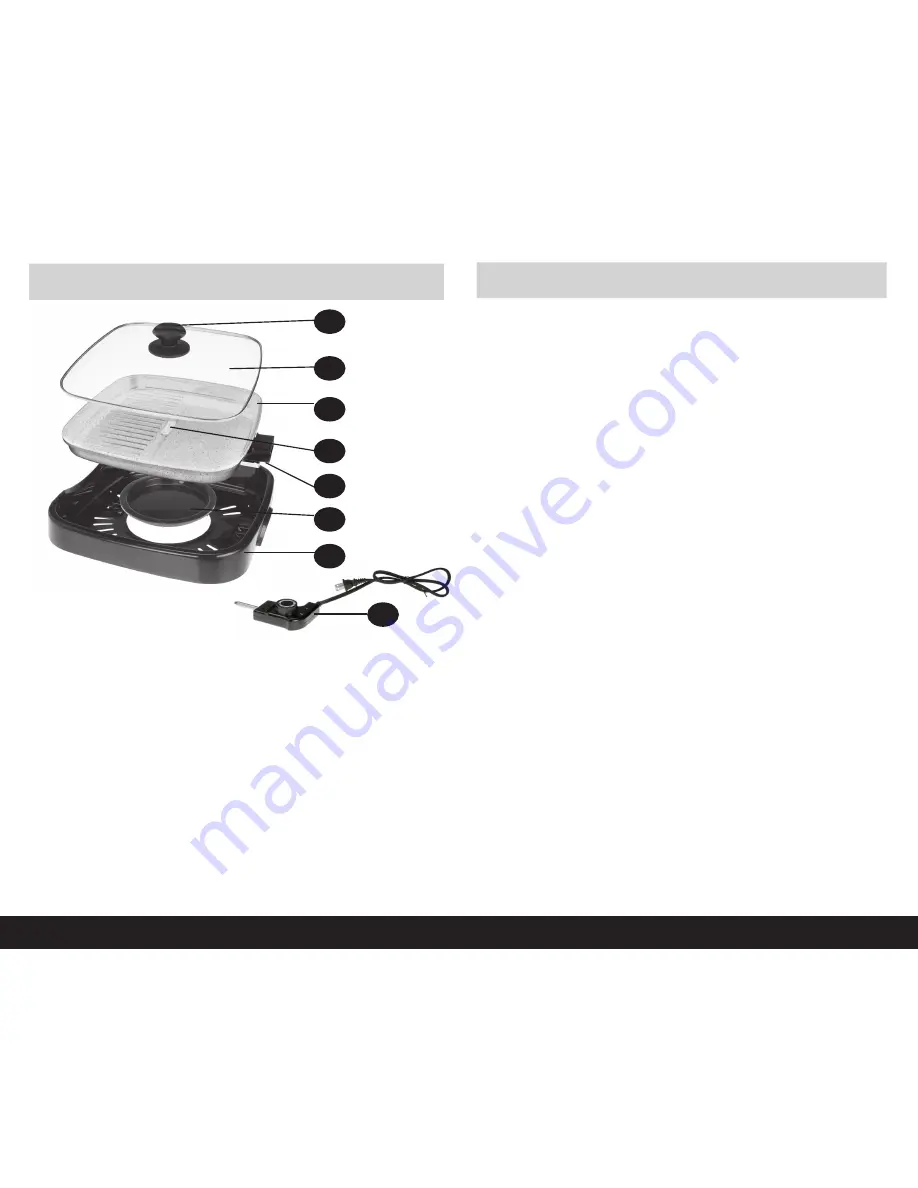
PART NAMES
Ca-
1. Lid handle with spoon rest
2. Glass lid with stainless steel rim
3. Cooking pan with ceramic coating (PTFE and PTOA-free)
4. Oil drain silicone plug
5. Temperature probe socket
6. Grease collector
7. Main housing
8. Temperature probe with adjustable temperature dial
1
2
3
4
6
5
7
8
BEFORE FIRST USE:
1. Clean the grill and all the accessories ("Cleaning and Care").
It is recommended to heat up the grill for about 10 minutes, without
any food, prior to using the first time.
2. Ventilate the room during this period.
ASSEMBLY:
1. Place the base of the appliance on a stable and heat resistant
surface.
2. Place the grease collector in the base.
3. Position the cooking pan on the housing base. The pan’s legs must
rest inside the recessed areas on the housing base.
4. Make sure the temperature controller is in the OFF position. Plug
the temperature controller into the socket on the side of the grill
plate by inserting its plug into the connection inlet on the appliance
as deeply as possible.
TEMPERATURE SETTINGS:
The temperature guide below is an approximate indicator:
WARM: 175° F +/- 10%
LOW: 285° F +/- 10%
MID: 340° F +/- 10%
HIGH: 480° F +/- 10%
OPERATION:
1. Insert the power cord plug into a wall socket.
2. Turn the knob to desired temperature level. Preheat the grill/griddle
to reach the ideal cooking temperature. When the appliance
reaches the desired temperature, the pilot light will go out.
3. Place the food on the grill side or on the griddle side, depending on
the cooking desired.
Note: The fat will discard better using the grill side.


