- 99 -
BIOS Setup
Parameter
Description
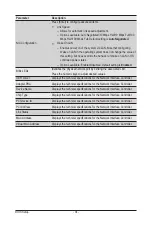
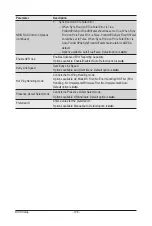
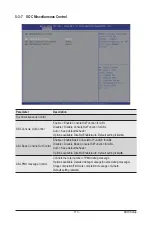
Memory Addressing
Press [Enter] for more options.
NUMA notes per socket
–
Specifies the number of desired NUMA (Non-uniform Memory
Access) notes per socket. Zero will attempt to interleave the two
sockets together.
– Options available: NPS0/NPS1/NPS2/NPS4/Auto. Default option
is
Auto
.
Memory interleaving
– Allows for disabling memory interleaving. Note that NUMA nodes
per socket will be honored regardless of this setting.
– Options available: Disabled/Auto. Default option is
Auto
.
Memory interleaving size
– Controls the memory interleaving size. The valid value are AUTO,
256 bytes, 512 bytes, 1Kbytes or 2Kbytes. This determines the
starting address of the interleave (bit 8, 9, 10 or 11).
– Options available: 256 Bytes/512 Bytes/1 KB/2KB/Auto. Default
setting is
Auto
.
1TB remap
– Attempt to remap DRAM out of the space just below the 1TB
boundary. The ability to remap depends on DRAM configuration,
NPS, and interleaving selection, and may not always be possible.
– Options available: Do not remap/Attempt to remap.Auto. Default
option is
Auto
.
DRAM map inversion
– Inverting the map will cause the highest memory channels to get
assigned the lowest addresses in the system.
– Options available: Disabled/Enabled/Auto. Default option is
Auto
.
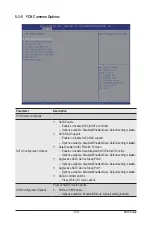
ACPI
Press [Enter] for more options.
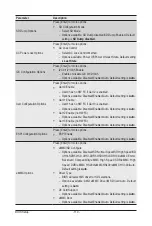
ACPI SRAT L3 Cache as NUMA Domain
– Enabled: Each CCX in the system will be declared as a separate
NUMA domain.
– Disabled: Memory Addressing \ NUMA nodes per socket will be
declared.
– Options available: Disabled/Enabled/Auto. Default option is
Auto
.
ACPI SLIT Distance Control
– Determines how the SLIT distances are declared.
– Options available: Manual/Auto. Default option is
Auto
.
ACPI SLIT remote relative distance
– Set the remote socket distance for 2P systems as near (2.8) or far
(3.2).
– Options available: Near/Far/Auto. Default option is
Auto
.
Содержание G292-Z44
Страница 1: ...G292 Z44 HPC Server 2U DP 8 x Gen4 GPU Server Broadcom solution User Manual Rev 1 0 ...
Страница 10: ... 10 This page intentionally left blank ...
Страница 16: ...Hardware Installation 16 This page intentionally left blank ...
Страница 27: ... 27 System Hardware Installation 2 3 1 4 CPU0 CPU1 ...
Страница 32: ...System Hardware Installation 32 For GPU7 GPU8 1 2 2 For GPU1 GPU2 Front Rear 1 ...
Страница 33: ... 33 System Hardware Installation 1 2 2 3 4 ...
Страница 35: ... 35 System Hardware Installation 1 1 2 2 For GPU3 GPU4 1 1 2 2 3 4 ...
Страница 37: ... 37 System Hardware Installation 3 4 5 6 6 ...
Страница 39: ... 39 System Hardware Installation 5 6 ...
Страница 41: ... 41 System Hardware Installation ...
Страница 47: ... 47 System Hardware Installation 3 10 Cable Routing System Main Power MB Top Tray Connector System Fan Power ...
Страница 48: ...System Hardware Installation 48 CPU Power MB Top Tray Connector 1 x 3 Power ...
Страница 49: ... 49 System Hardware Installation HDD Backplane Board Signal HDD Backplane Board Power ...
Страница 50: ...System Hardware Installation 50 Power Distribution Board to HDD Backplane Board Power SMD ...
Страница 51: ... 51 System Hardware Installation SlimLine SAS 1 MB Top Tray Connector SlimLine SAS 2 MB Top Tray Connector ...
Страница 52: ...System Hardware Installation 52 Front Panel IO NVMe ...
Страница 53: ... 53 System Hardware Installation NVMe Bo om Connector ...
Страница 54: ...System Hardware Installation 54 NVMe Bo om Connector ...
Страница 58: ...Motherboard Components 58 This page intentionally left blank ...
Страница 82: ...BIOS Setup 82 5 2 13 SATA Configuration ...
Страница 87: ... 87 BIOS Setup 5 2 18 Intel R I350 Gigabit Network Connection ...
Страница 89: ... 89 BIOS Setup 5 2 19 VLAN Configuration ...
Страница 93: ... 93 BIOS Setup 5 2 22 Intel R Ethernet Controller X550 ...

