42
|G5 – Owner’s Manual
12
TRIGGER
SETTINGS
In Trigger Settings mode, you control the behaviour of the sensors (triggers) of the connected pads.
The G5 drum module can therefore be adapted to your personal, individual playing style.
When you make changes to a preset, they are automatically saved. You will also find an
asterisk
[*]
next to the trigger setup name. If you want to save your settings in your own
preset, you can do this under:
[TRIGGER SETTINGS] -> [F1] Settings -> [F2]
Preset.
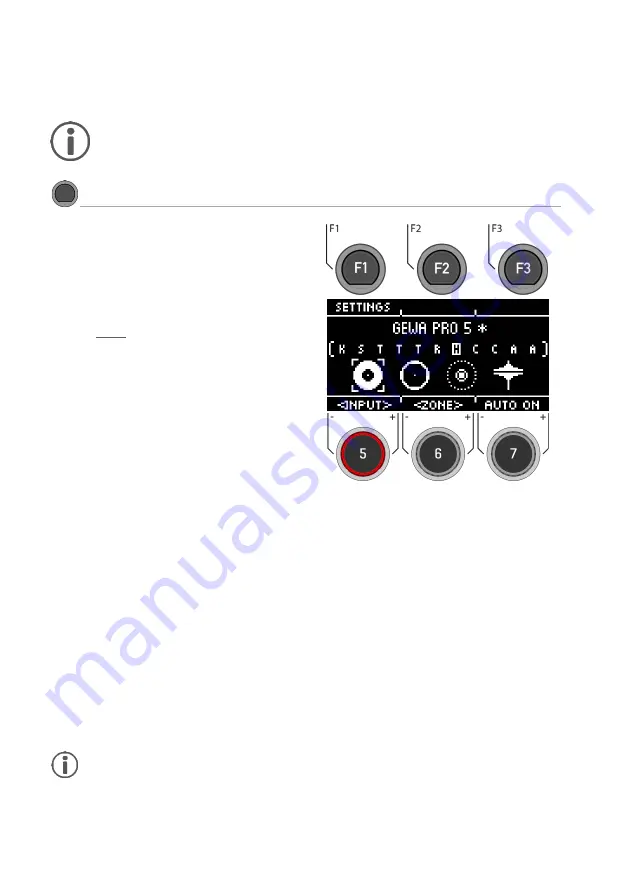
TRIGGER SETTINGS
Trigger Settings
The first level shows all
input channels
. In the top
line, you see the loaded trigger preset
Load and save
In contrast to the instrument level, the trigger
settings are saved automatically. If you want to
additionally save and name the settings as a
separate preset, you can do this in the submenu
[Preset]:
An [*] indicates that you have made changes.
Select channel
The middle
row
shows all
trigger inputs
. The inputs
correspond to the sockets on the back of the unit.
The active input is indicated by a highlighted
letter.
Select the channel
with the dial
[5] [<INPUT>].
Select zone
The
lower row
shows all
zones
accessible at the
active input. When the input is changed, the
component icons are updated according to the
trigger bank type assigned to the input channel
(drums, cymbals or hi-hat).
Change the zone
with the dial
[6] [<ZONE>].
Auto On
Turn the dial
[7]
to enable/disable automatic
channel detection. Play a component on your
drum kit and the module will automatically show
you the channel that was played.
Settings
Pressing
[F1]
takes you to a selection of parame-
ters that allow you to customise your G5 module
to your own playing style. For more information,
see the following chapter.
Exit the trigger selection by selecting another main
menu.
This
example
shows an activated bow
components of Hi-Hat input.
Note: Under the direct access [TRIGGER SELECT] you can determine what type of pad or
cymbal is placed on the input. Example: Cymbal = Edge, Bow, Bell


