5
4
GV-Data Capture
GV-Data Capture
4. Click the
New
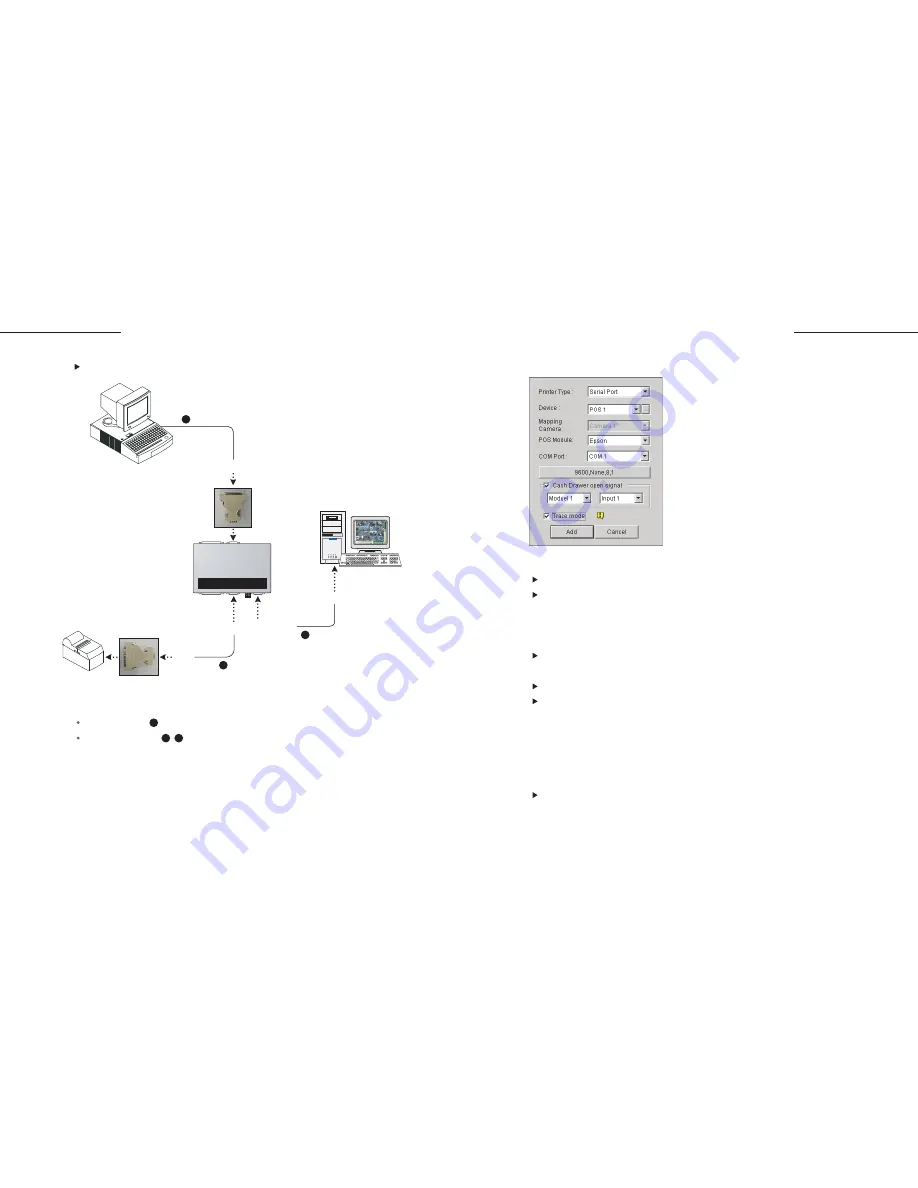
button. This displays the following COM setting dialog box.
2. Run the GV-system.
3. Click the
Configure
button, point to
POS Application Setting
, and select
POS Device Setup
. This displays the POS Server Setup dialog box.
Printer Type:
Select
Serial Port
for this application.
Device:
Assign the POS system to a camera channel. POS 1 displays the
images and data on the Camera 1 channel; POS 2 on the Camera 2
channel, and so on. Click the button [...] next to the item to rename the
device.
POS Module:
Select the printer attached to the POS system. If it's not
Epson, select
General
for other brands.
COM Port:
Select the COM port connected to the POS system.
The parameter button:
Click this button to configure the following
parameters or keep them as defaults.
Baud Rate: Select the baud rate corresponding to that of the POS system.
Data Bits: Select the data bit corresponding that of the printer.
Parity: Select None for the serial POS system.
Stop Bits: Select the stop bit corresponding to that of the printer.
Cash Drawer Open Signal:
This option is only available when an input
module is configured in the main system. Assign the input module
connected to the cash drawer. Every time when the cash drawer is open,
it will be recorded in System Log for later retrieval.
POS System Using a RJ45-DB25 Cable
The RJ-45 cable supplied with the POS system.
The RS-232 cables and converter No.1/No.2 supplied with the GV-Data
Capture box.
Figure 1. Serial POS System settings
DB9
Male
DB9 Female
GV-System
POS System
DB9 Female
DB9 Male
DB25 Female to DB9 Male
(crossover) No.1
DB25 Male to DB9 Female
(crossover) No.2
DB25 Male
Printer
RS-232
2
2
1
3
RS-232
3
RJ-45
1
GeoVision GV-DATA CAPTURE
Содержание DCV1-A-EN
Страница 1: ...2005 01 GV Data Capture...


