


44
6.
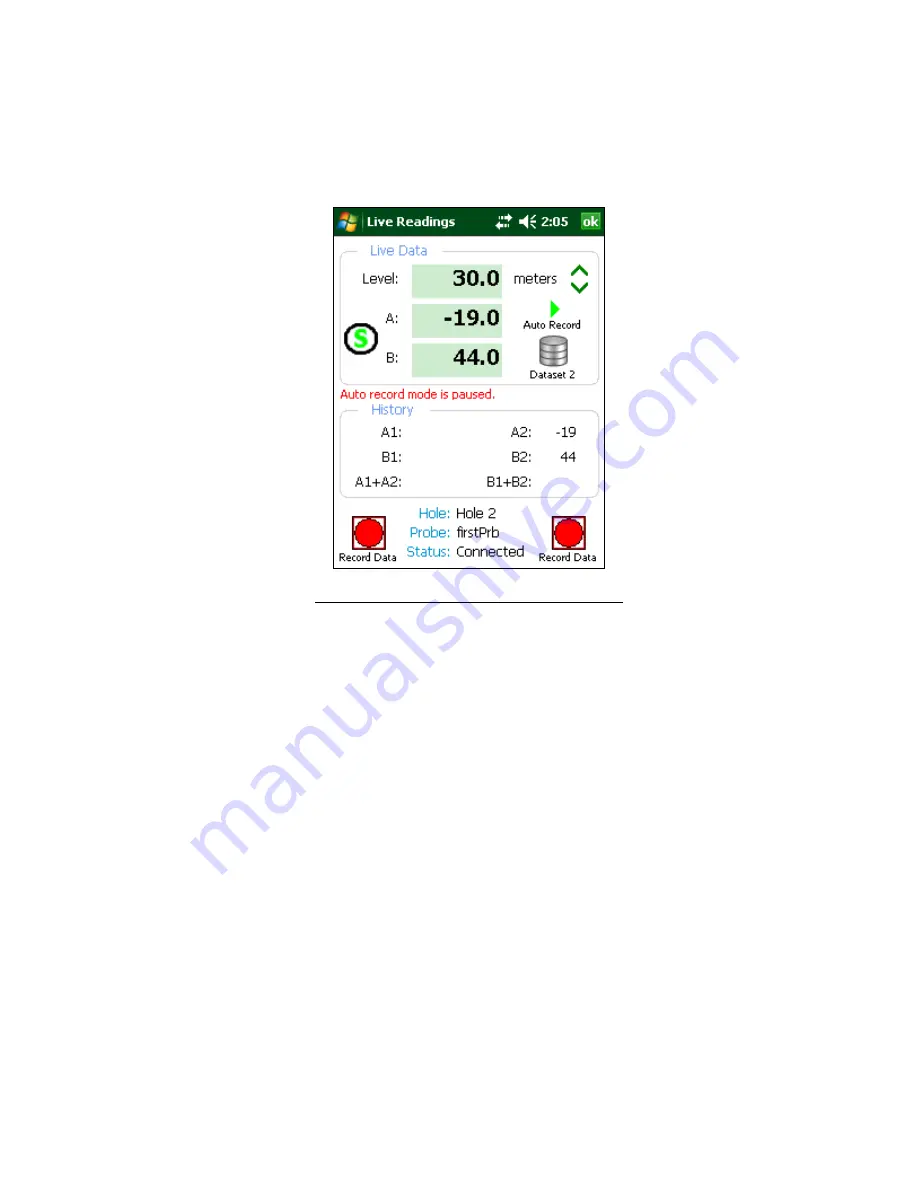
Tap the “Dataset 1” icon and observe that the red status text message
will change to “Auto record mode is paused” and the “Pause” icon will
change to the “Play” icon while “Dataset 1” becomes “Dataset 2” (see
Figure 42).
Figure 45 - Auto record paused, Dataset 2 selected
7.
After rotating the probe 180 degrees, lower it back to the “Starting
Level” appropriate for this hole. Repeat step 3.
8.
Repeat step 4 until all the “A-” readings have been taken.
9.
When done taking readings, tap the “Menu” item (bottom-left corner of
the screen), followed by “Exit Live Readings”. You will be given the
option to save the readings to a file (see Figure 30).
10.
Even if “No” (see Figure 30) is selected, the readings will not be lost
and can be restored later using the “File
→
Delete/Restore” menu option
from the main screen.
11.
If “Yes” (see Figure 30) is selected, then another dialog box will be
displayed giving the choice of saving with the auto-increment suffix on
the standard filename (see Figure 31). Selecting “Yes” again causes
the save operation to be carried out using a filename of the form:
[Hole_Name][3 digit AutoIncr_Suffix].GKN
12.
If “No” is selected (to the auto incrementing option) the standard File
Save As screen will be shown giving the option of modifying the file
name to another name of the user’s choosing. Use the stylus to click
on the keyboard icon (bottom) and make the changes desired (see
Figure 32).
Содержание GK-604D
Страница 2: ......
Страница 4: ......
Страница 12: ......
Страница 16: ...4 Figure 4 6000 6100 type probe Figure 5 GK 604 4 Interface ...
Страница 28: ...16 Figure 11 Windows Mobile Device Center ...
Страница 46: ...34 Figure 35 Viewing Compass Data ...
Страница 52: ...40 Figure 41 Stable Indication Figure 42 Unstable Indication ...


