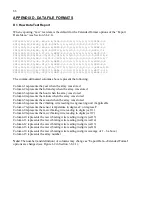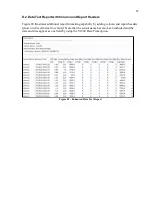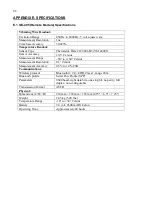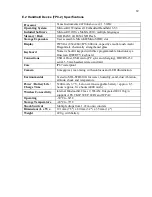
60
A.2.1 Connecting to a Load Cell with 10-pin attached
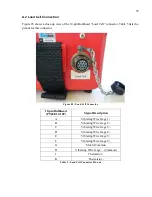
For load cells that have a 10-pin connector attached to the read out cable, align the
grooves on load cell connector (male), with the (female) connector on the unit marked
Load Cell. Push the connector into place and then twist the outer ring of the male
connector until it locks into place.
A.2.2 Connecting to a Load Cell with Flying Leads
Attach the GK-403-2 flying leads to the GK-405 by aligning the grooves on connector of
the flying leads (male), with the (female) connector on the GK-405 marked
Sensor
. Push
the connector into place and then twist the outer ring of the male connector until it locks
into place.
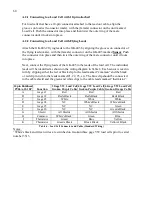
Next, connect the flying leads of the GK-405 to the leads of the load cell. The individual
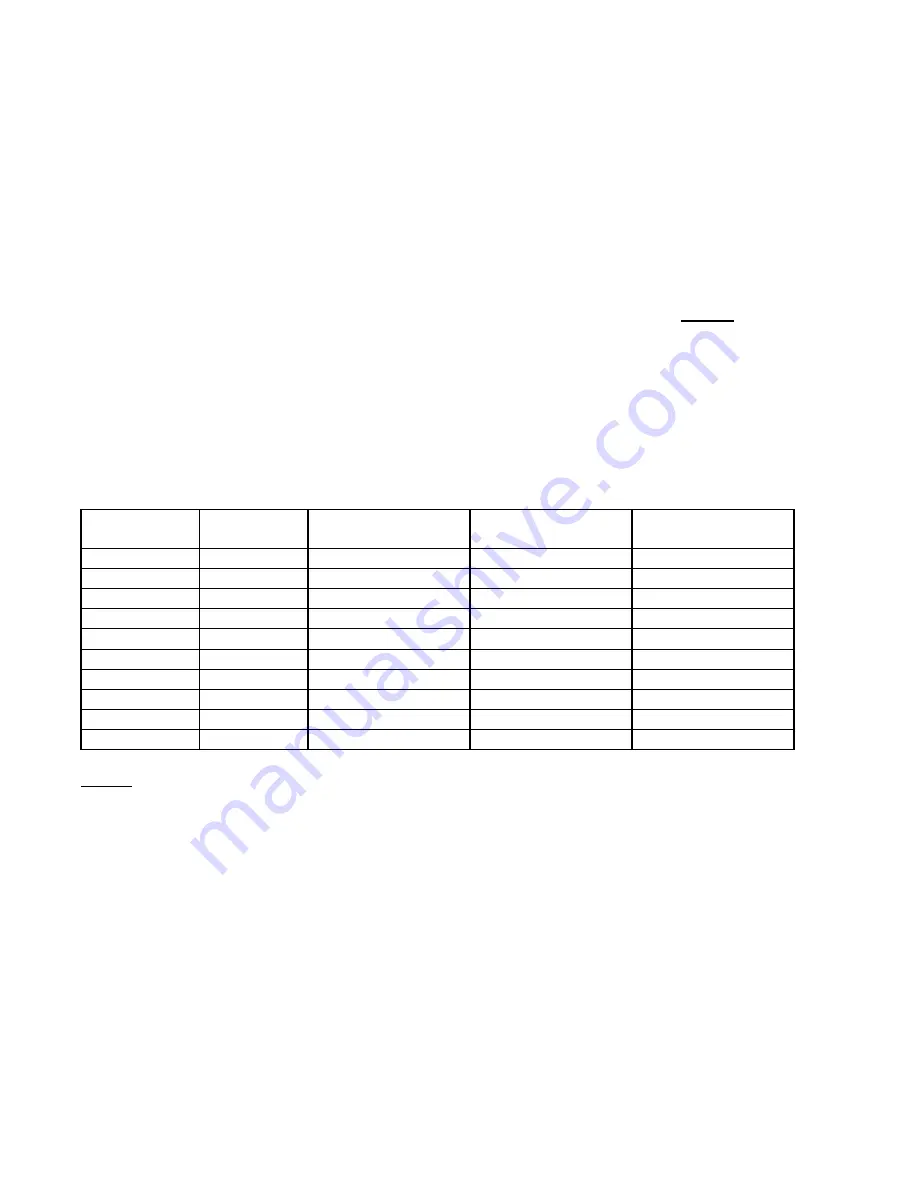
leads will be identified as shown in the wiring diagram in Table 6. Each sensor is read in
turn by clipping either the red or black clip to the lead marked “common” and the black
or red clip in turn to the leads marked #1, #2, #3, etc. The blue clip should be connected
to the cable shield and the green and white clips to the cable leads marked “thermistor”.
10 pin Bulkhead
PT06A-12-10P
Function
3 Gage VW Load Cell
Geokon Purple Cable
4 Gage VW Load Cell
Geokon Purple Cable
6 Gage VW Load Cell
Geokon Orange Cable
A
Gage #1
Red
Red
Red
B
Gage #2
Red's Black
Red's Black
Red's Black
C
Gage #3
White
White
White
D
Gage #4
NC
White's Black
White's Black
E
Gage #5
NC
NC
Green
F
Gage #6
NC
NC
Green's Black
G
Shield
All Shields
All Shields
All Shields
H
Common
White's Black¹
Green
Blue
J
Thermistor
Green¹
Blue
Yellow
K
Thermistor
Green's Black
Blue's Black
Yellow's Black
Table 6 - Load Cell Connector and Cable (Standard Wiring)
Notes:
¹ White's black and Green wires are switched on Geokon three gage VW load cells prior to serial
number 3313.
Содержание GK-405
Страница 2: ......
Страница 4: ......
Страница 20: ...12 Figure 17 Windows Mobile Device Center ...
Страница 64: ...56 Figure 82 Bluetooth Settings Window COM Ports Tab Figure 83 Remote Connect With ...

