English
1
b.
d.
c.
e.
f.
h.
i.
g.
j.
a.
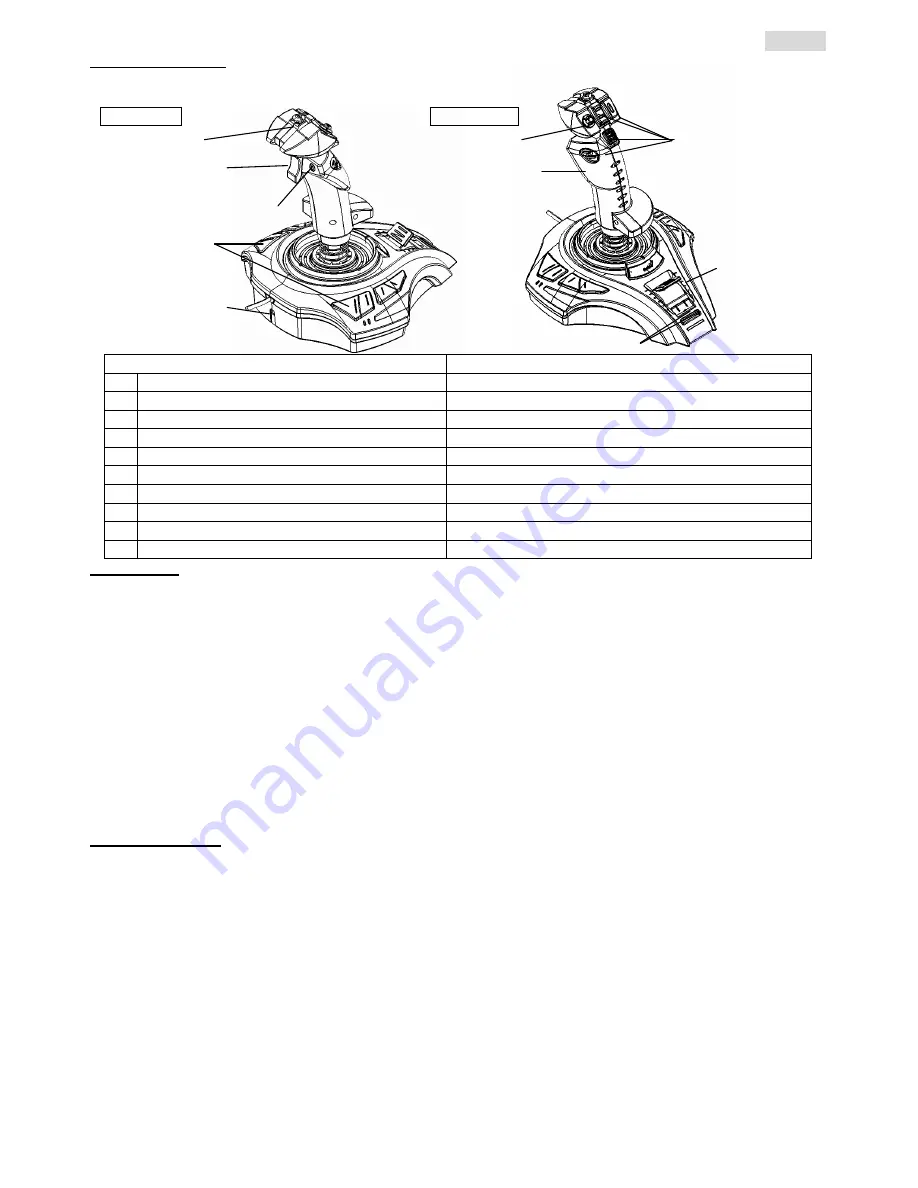
Front view
:
Side view
:
Hardware Overview
Check out the diagram below so you can see what each button function does on your
MetalStrike Series
.
Function list:
Note:
a
Adjustment screw
Only for
MetalStrike FF,
Pro
and
Wireless MetalStrike
b
Fire trigger
c
Cool fan switch
Only for
MetalStrike FF
and
MetalStrike Pro
d
8 additional function buttons on base
e
Adapter joint
Only for
MetalStrike FF
and
Wireless MetalStrike
f
8-way Hat Switch as a View Finder
g
Major function buttons
h
3D rotational handgrip with rudder function
i
Throttle (Center)
j
Turbo button and LED indicator
Installation:
Note: Always install the
MetalStrike Series
driver first (
MetalStrike 3D
does not need a driver), then the joystick.
Software Installation
1.
Place the CD disc into your CD-ROM drive; and wait for a few seconds for your computer to read it.
2.
If your system is set up to automatically read a CD, then the auto-run program is executed and the opening screen
for installation appears. Follow the on-screen instructions to install the
MetalStrike Series
driver step-by-step.
If your system doesn’t launch the driver installation automatically, type in the filename “
Install.bat
”, found on
your CD drive and click on it, then follow the on-screen instructions to install the driver.
Hardware Installation
1.
Insert the
MetalStrike Series
USB connector to the USB port or USB hub of your computer and make sure it is
firmly connected. If your
MetalStrike Series
joystick is wireless, plug in the dongle.
2.
After the
MetalStrike Series
is connected, the monitor shows “Find a new hardware” and the
MetalStrike Series
driver is located so you can now play games.
3.
Most games that support vibration feedback also have feedback adjustment sections, and will require DirectX
support. Refer to your game manual for more information.
Now you can calibrate the joystick, or play a game right away.
Advanced function:
Turbo/Auto Setting
1.
Turbo Mode:
press the Turbo button and hold, then press any other button and release the turbo button.
2.
Cancel Turbo:
press the button you set for Turbo and hold, and then press the Turbo button again to cancel the
Turbo function for this button.
3.
Auto Mode:
hold the Turbo button for two seconds, and the LED indicator will blink to indicate it is in Auto
mode. Press any button you want to set to auto mode one by one. Press the Turbo button again to finish the Auto
mode setting.
4.
Cancel Auto:
follow step three to cancel all buttons set in Auto mode.
Throttle Grip
The centralized throttle has a standard throttle function, which is required by flight simulation games. You may
accelerate or slow down the aircraft speed by rotating this switch for efficient maneuver control.
Cool Fan handle
There is a fan in the joystick handle, just use the switch to control the two speed (Off/Low/Light) fan. It keeps
you hand cool and dry when you
’
re playing games that require a lot of joystick movement.


