


23
Network Camera User Manual
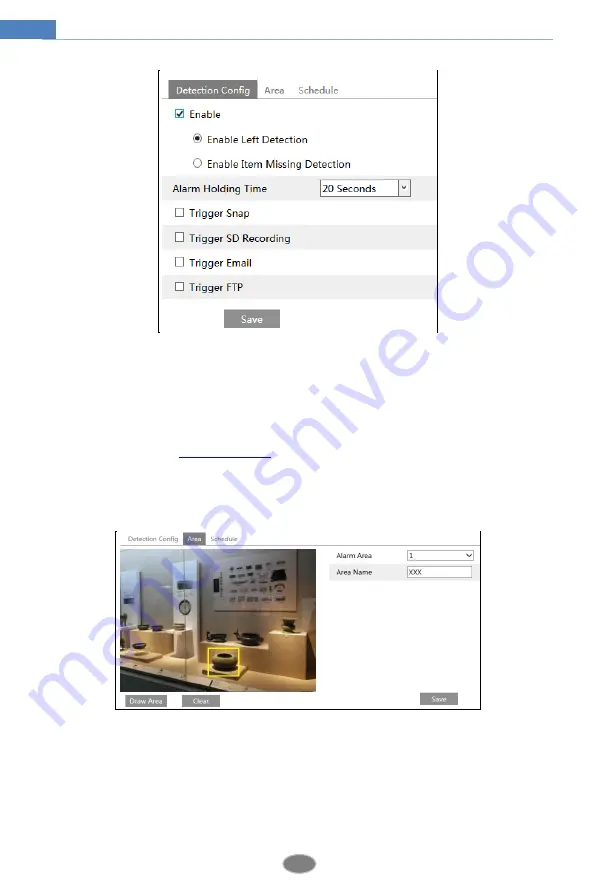
1. Enable object removal detection and then select the detection type.
Enable Left Detection
: Alarms will be triggered if there are items left in the pre-defined area.
Enable Item Missing Detection
: Alarms will be triggered if there are items missing in the
pre-defined area.
2. Set the alarm holding time and alarm trigger options. The setup steps are the same as motion
detection. Please refer to
motion detection
chapter for details.
3. Click “Save” button to save the settings.
4. Set the alarm area of the object removal detection. Click the “Area” tab to go to the interface
as shown below.
Set the alarm area number and then enter the desired alarm area name. Only one alarm area can
be added. Click the “Draw Area” button and then click around the area where you want to set
as the alarm area in the image (the alarm area should be a closed area). Click the “Stop Draw”
button to stop drawing. Click the “Clear” button to delete the alarm area. Click the “Save”
button to save the settings.
5. Set the schedule of the object removal detection. The setup steps of schedule are the same as


