Air Handler
7
4. Installation
4.1 Unit Inspection
Upon delivery, inspect the unit for damage. Any damage must be reported immediately to the
carrier. Do not install such an equipment damaged by freight which determines the integrity and
safety of the unit.
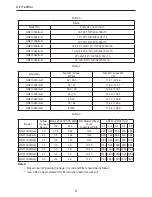
Please check the equipment model number to ensure the unit is appropriately sized for the
condensing unit.
If an incorrect unit is supplied, it must not be installed and it is to be returned to the supplier.
The manufacturer assumes no responsibility for the installation of incorrectly delivered units. The
evaporator coil contains high-pressure inert gas for holding charge.
4.2 Location
WARNING
: This air handler is designed for indoor installation only. Do not install it outdoors.
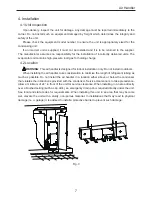
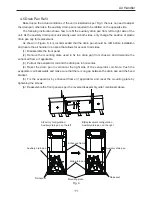
When installing the air handler, take consideration to minimize the length of refrigerant tubing as
much as possible. Do not install the air handler in a location either above or below the condenser
that violates the instructions provided with the condenser. Service clearance is to take precedence.
Allow a minimum of 24” in front of the unit for service clearance. When installing in an area directly
over a finished ceiling (such as an attic), an emergency drain pan is required directly under the unit.
See local and state codes for requirements. When installing this unit in an area that may become
wet, elevate the unit with a sturdy, non-porous material. In installations that may lead to physical
damage (i.e. a garage) it is advised to install a protective barrier to prevent such damage.
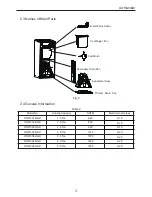
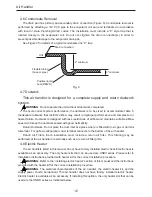
Fig. 3


