background image

1.

Do not operate this sander when tired, distracted or 
under the effects of drugs, alcohol or any medica-
tion that impairs reflexes or alertness.

2.

Keep the work area well lit, clean and free of debris.

3.

Stay alert! Give your work your undivided attention.
Even a momentary distraction can lead to serious 
injury.

4.

Do not wear loose clothing, gloves, bracelets,
necklaces, or other jewelry. Wear face, eye, ear,
respiratory and body protection devices. Wear 
protective hair covering to contain long hair and 
wear non-slip footwear.

5.

Keep hands well away from the spindle and all 
moving parts. Do not clear chips and sawdust 
away with hands. Use a brush.

6.

Fine particulate dust is a carcinogen that can be 
hazardous to health. Always work in a well ventila-
ted area and whenever possible use a dust 
collector to minimize health hazards.

7.

Be sure the spindle has achieved full operating 
speed before beginning to sand.

8.

Be aware of the direction of the spindle rotation 
before feeding the workpiece and always feed the 
workpiece against the rotation.

9.

Do not force the spindle. It will perform better and 
safer at the rate for which it was designed.

10.

Keep children and shop visitors at a safe distance 
when the unit is running – do not permit them to 
operate the machine.

11.

Do not operate with a damaged spindle or with a 
damaged or torn sanding sleeve.

12.

Be sure the sanding spindle is securely installed in 
the machine before starting the machine.

13.

Never leave the machine unattended while run-
ning or with the power on.

14.

Do not sand without a table insert in place. If an 
insert must be removed for maintenance or spindle 
changes make sure it is properly re-installed before 
re-starting the machine.

15.

Hold the workpiece firmly against the table and use 
suitable support if the workpiece does not have a 
flat surface.

16.

Never stand on or lean against this machine.
Serious injury could occur if the sander is tipped 
over or if the sanding spindle is unintentionally 
contacted.

17.

Use only recommended parts and accessories. The 
use of parts or accessories NOT recommended by 
General® International may result in a risk of injury.

18.

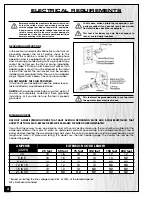
Make sure the machine is properly grounded. If 
equipped with three-prong plug, it should be 
plugged into a three-pole electrical receptacle.
Never remove the third-prong.

19.

Always disconnect the unit from the power source 
before changing accessories such as sanding 
spindles or sleeves or before performing any main-
tenance and adjustments or if the machine will be 
left unattended.

20.

Make sure that switch is in the “Off” position before 
plugging in to a power source.

21.

Be sure that all adjustment tools, wrenches or other 
clutter are removed from the machine and safely 
stored before turning on the unit.

22.

Avoid working from awkward or off balance 
positions. Do not overreach and always keep both 
feet firmly on the floor.

23.

Do not use this spindle sander for other than it’s 
intended use. If used for other purposes, GENERAL® 
INTERNATIONAL disclaims any real or implied 
warranty and holds itself harmless for any injury,
which may result from that use.

Rules for Safe Operation

To help ensure safe operation, please take a moment to learn the machine’s applications and limita-
tions, as well as potential hazards. General International disclaims any real or implied warranty and
hold itself harmless for any injury that may result from the improper use of it’s equipment. 

Содержание 15-220

Страница 1: ...aper 1 1 2 2 spindles come with rubber drums Includes 4 table inserts to accomodate different spindle sizes OSCILLATIONS PER MINUTE 29 LENGTH OF OSCILLATION 15 16 24 mm TABLE SIZE 14 1 2 x 14 1 2 368...

Страница 2: ...d of 24 months from date of purchase any genuine part or parts which upon examination prove to be defective in work manship or material In order to obtain this warranty all defective parts must be ret...

Страница 3: ...tenance or spindle changes make sure it is properly re installed before re starting the machine 15 Hold the workpiece firmly against the table and use suitable support if the workpiece does not have a...

Страница 4: ...ell as damage to the machine If in doubt contact a qualified electrician before connecting to the power source EXTENSION CORDS USE ONLY 3 WIRE EXTENSION CORDS THAT HAVE 3 PRONG GROUNDING PLUGS AND 3 P...

Страница 5: ...VERTICAL OSCILLATING SPINDLE SANDER 15 220 IDENTIFICATION OF MAIN PARTS AND COMPONENTS ACCESSORY STORAGE BASE CAST IRON TABLE SWITCH ASSEMBLY TABLE INSERT TABLE TILT LOCK LEVER SANDING SPINDLE 5...

Страница 6: ...ding sleeve 5 8 1 Sanding sleeve 1 2 1 Sanding sleeve 1 4 1 Spindle 5 8 1 Spindle 1 2 1 Spindle 1 4 1 TABLE INSERT 2 oblong 1 TABLE INSERT 3 4 oblong 1 TABLE INSERT 3 4 round Mounted on the machine 1...

Страница 7: ...e you clean all metal surfaces of the spindles with a mild solvent or kerosene To prevent rust apply a light coating of paste wax or regular applications of General International Top Saver item GC 010...

Страница 8: ...that the sleeve is now on the spindle securely by pulling on the sleeve to make sure it does not slide off the spindle Step 4 For the 1 1 2 and 2 spindles slide the sleeve onto the spindle Step 5 Usin...

Страница 9: ...unplugged Step 1 Select the desired spindle and while holding the spindle seat in place with a 17 mm wrench screw the threaded end into the spindle seat counter clockwise reverse threads until hand t...

Страница 10: ...plains which inserts can be used for different diameter spindles FAILURE TO USE THE PROPER INSERT WITH THE CORRESPONDING SPINDLE MAY RESULT IN INJURY AND OR DAMAGE TO THE MACHINE OR THE WORKPIECE SPIN...

Страница 11: ...ee the accompanying SELECTION GUIDE page 10 to select the correct TABLE INSERT for the spindle being used 2 Loosen both locking levers and tilt the table until the pointer is at the desired angle 3 Ho...

Страница 12: ...is ideal for use in smaller woodworking projects in a hobbyist home shop environment This machine is not designed with a continuous duty rating or for industrial applications CONNECTING TO A POWER SOU...

Страница 13: ...Make sure the table tilt locking levers are secured and that the table is locked in place at the desired angle or tilt 7 Always loosen both table tilt locking levers before changing the angle position...

Страница 14: ...1 4 X 6 120 Grit 15 211F Sanding Sleeve 1 4 X 6 150 Grit 15 212A Sanding Sleeve 1 2 X 6 40 Grit 15 212B Sanding Sleeve 1 2 X 6 60 Grit 15 212C Sanding Sleeve 1 2 X 6 80 Grit 15 212D Sanding Sleeve 1...

Страница 15: ...15 Mod le 15 220...

Страница 16: ...06006 BEARING 6006ZZ 1 15220 24 S0520059 RETAINING RING C TYPE 1 15220 25 30202005 CONNECTING ROD NUT 4 15220 26 S0050506M SET SCREW M5 X 0 8 X 6L 2 15220 27 S05ETW04 RETAINING RING E TYPE 2 15220 28...

Страница 17: ...220 73 SEE LIST ON PG 14 FOR OPTIONAL REPLACEMENT SANDING SLEEVES 15220 74 SEE LIST ON PG 14 FOR OPTIONAL REPLACEMENT SANDING SLEEVES 15220 75 SEE LIST ON PG 14 FOR OPTIONAL REPLACEMENT SANDING SLEEVE...

Страница 18: ...serial number of the machine and part number Also a brief description of each item and quantity desired 15 220 8360 Champ d Eau Montreal Quebec Canada H1P 1Y3 Tel 514 326 1161 Fax 514 326 5565 Parts S...

Отзывы: