ENGLISH
12
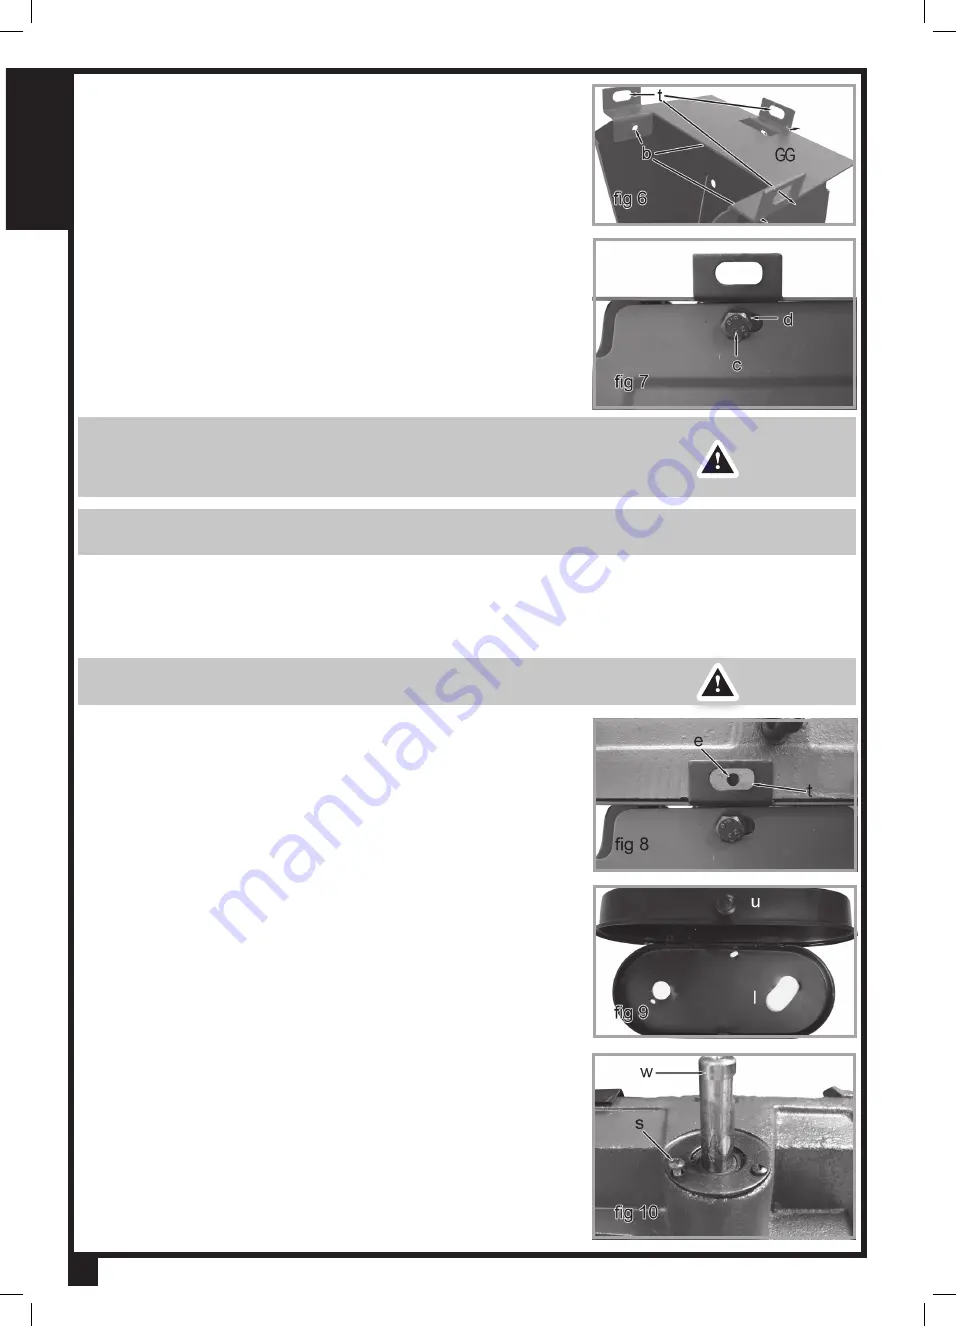
3. Place the 3 bottom tabs of the connecting plates inside the leg
assemblies (b, fig 6
).
4.
Locate 6 M8 washers (d, fig 7), and 6 M8 x 16 hexagon head bolts (c,
fig 7
).
5. Place a washer onto each hexagon head bolt.
6.
Hand thread each hex head bolt, first through the leg assembly, then
into the one of the two connecting plates (fig 7).
7. Do not fully tighten any of the 6 hexagon head bolts at this time; this will
be done later.
BAND SAW HEAD MOUNTING
WARNING!
This item is very heavy. We strongly suggest that two
people be used to unpack and assemble this band saw. Using proper
lifting methods and the help of another person, lift the band saw head
assembly and place it between the brackets of both connecting plates.
NOTE:
The band saw head may be placed with the motor facing either
direction on the stand assembly.
1. Locate the 3 holes at either end of the base of the band saw head
assembly.
2. With the help of another person, adjust the band saw head assemblyso
as to align the 3 holes of the band saw head with the 3 brackets and
holes (t, fig 5 & 6) of each connecting plate.
CAUTION:
The head assembly is heavy (about 55 lb. / 25 kg) and you
will require assistance from a second person.
3. Locate 6 M8 x 25 hexagon head bolts and 6 M8 washers.
4. Place one washer on each hexagon head bolt.
5. Thread one hexagon head bolt through each hole of the connecting
plate bracket (t, fig 8), then into the base of the band saw head head
assembly (e, fig 8).
PULLEY SYSTEM ASSEMBLY
1. Locate the complete pulley cover. The complete pulley cover consists of
the pre-assembled lower pulley cover (l, fig 9
) and the upper pulley
cover (u, fig 9).
2.
Locate the worm gear shaft (w, fig 10
) on the band saw head assembly.
3.
Locate the M4 x 8 screw (s, fig 10), which is already in place near the
worm gear shaft .
4. Un-thread and remove the M4 x 8 screw.
Содержание BS5205
Страница 50: ...FRANÇAIS 50 ...


