5
Section 4 Install On-Lap Proprietary HDMI-A & USB-A to Dock Port Cable
(Only for 1503H/I)
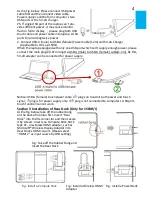
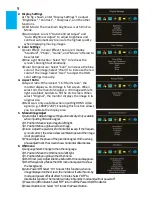
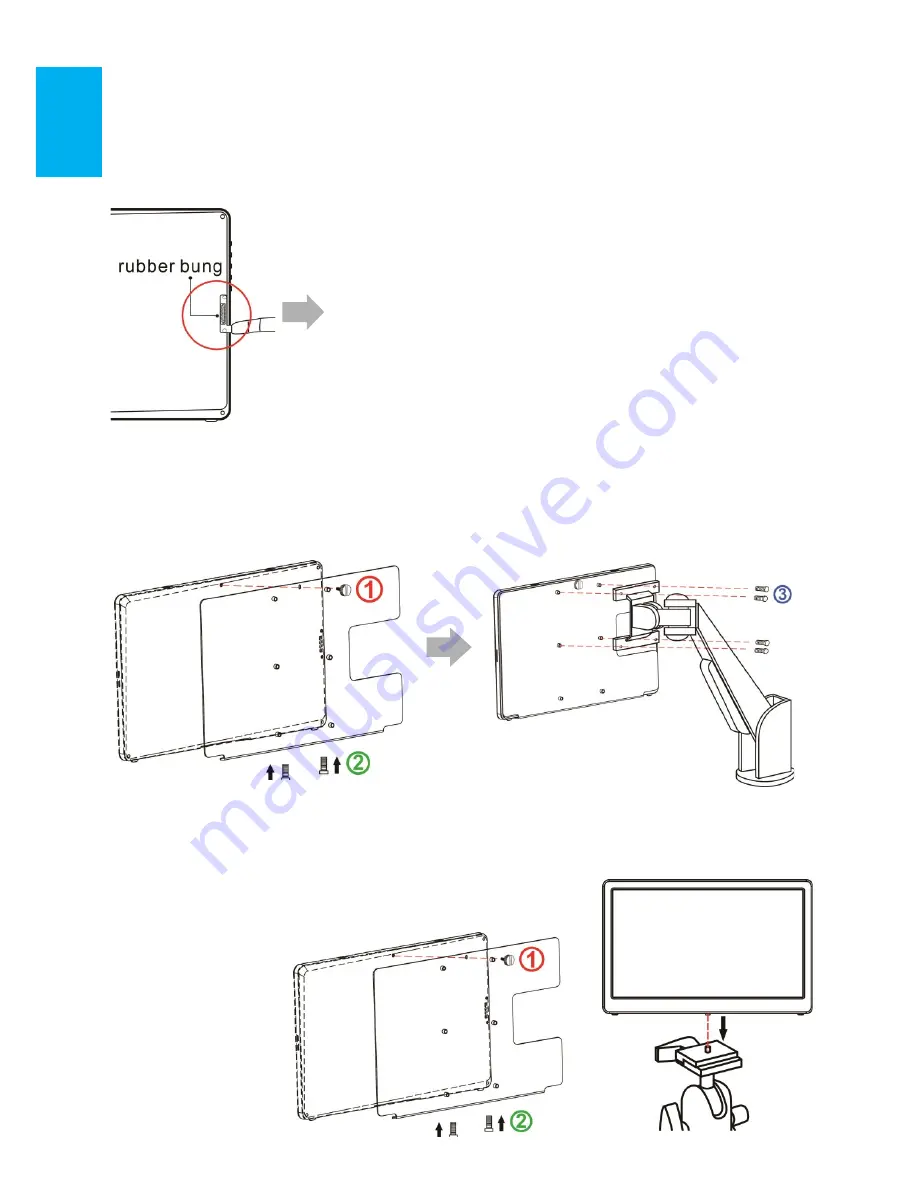
From Fig. below, take off the rubber bung on the back of monitor
first. Insert On-Lap
Proprietary HDMI-A & USB-A to Dock Port Cable into 1503
΄
s port on the back and secure
it by screws. Connect USB-A plug to computer
΄
s USB port and connect HDMI-A plug to
computer
΄
s HDMI port.
(Please select “HDMI 2”as input source by OSD
setting)
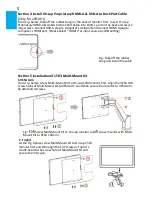
Fig.: Take off the rubber
bung and install the cable
Section 5
Installation of 1503 Multi-Mount Kit
1.VESA Arm
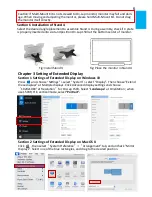
From Fig. below, screw Multi-Mount Kit to On-Lap 1503 monitor
first. Align the VESA 100
screw holes of Multi-Mount Kit to VESA arm
΄
s and then secure the monitor to VESA Arm
by attached 4 screws.
Fig
:
○
1
○
2
Screw Multi-Mount Kit to On-Lap monitor and
○
3
screw monitor with Multi-
Mount Kit to VESA 100 arm.
2. Tripod
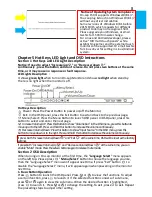
As the Fig. below, screw Multi-Mount Kit to On-Lap 1503
monitor
first and then align the 1/4”screw on Tripod
΄
s
cradle head to the screw hole of Multi-Mount Kit and
secure them by spin.
Содержание On-Lap 1503E
Страница 1: ...On Lap 1503E H I User Manual...
Страница 19: ...99 99 0 01 WEEE Rear Dock EU EU IV...
Страница 20: ...1 On Lap 1503 LED On Lap 1503 13 On Lap 1503E On Lap 1503H I On Lap 1503H I...
Страница 22: ...1 1 15 2 A 4 3 1 B On Lap1503I 3 A A 72 B C...
Страница 25: ...18 2 VESA100 VESA100 1 4 1 4 1 4 3 1 Windows 10 1920x1080 6 4 Stand4 Stand 4 X Stand4 1503 Stand4...
Страница 32: ...1 On Lap1503 No...


