background image

6

Installation Instructions

PRE-INSTALLATION CHECKLIST 

(CONT.)

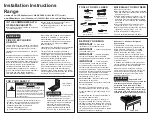
PRE-INSTALLATION CUTOUT
AND REQUIRED CLEARANCES

If cabinets are placed less than 30

above the

range, see Alternate Construction, Step 19E,
on page 16.

NOTE:

Product meets UL requirements for 

0

clearance to back and side walls.

Wall coverings, counters and cabinets around
range must withstand heat (up to 194°F)
generated by the range.

8

12

23-3/16

7

Acceptable
Gas Line &

Electrical

Outlet Area

30

 Min.

30

 Min. 

from 

cooking

surface

 to bottom

of overhead


cabinets

Shave Raised Edge 
To Clear 31-1/8


Wide Control Panel

4

 Min.

From W

alls

13

Max. 
depth

For Optimum 
Installation These
Surfaces Must 
Be Flat & Level

Follow instructions 
packaged with
alternate appliance

Countertop 

Depth 25

″ 

(typical)

35-3/4

 to 36-1

/2

from

 flo

or to

cou

nterto

p

18

 Min. vertical 

distance from the 
bottom of the adjacent
overhead cabinets

1-1/4

″ 

Min. Counter top 

to top of drawer

Drawer

cord, plug,
receptacle box

3.5

 to prevent 

interference 

& gas hookup 

Max. depth of 

with draw

er

9/16

29-15/16"Min.
30-1/16" Max.

29-15/16

″ 

Min.

30-1/16

 Max.

3

15

STANDARD INSTALLATION

If the construction of your cabinet cannot
provide a 1/4

flat area at the back of the

countertop opening, consider changing the
countertop to accommodate this dimension.
See Alternate Construction section. If the area
is not flat, excess tension may be applied to
the glass cooktop, causing breakage and
voiding the warranty.

9

1/4

min.

flat

9/16

min.

flat

29-15/16

–30-1/16

smooth cut

23-3/16

25

typically

Wall

Flat area

R

1/4

9/16

min.

flat

36

Содержание Profile JGSP48BHBB

Страница 1: ...er the Warranty WARNING This appliance must be properly grounded IMPORTANT Leak testing of the appliance shall be conducted according to the manufacturer s instructions Proper installation is the resp...

Страница 2: ...fire department Installation and service must be performed by a qualified installer service agency or the gas supplier 2 Installation Instructions IMPORTANT SAFETY INSTRUCTIONS This range has been des...

Страница 3: ...wiring and hookup of your range connected by a qualified electrician After installation have the electrician show you where your main range disconnect is located Check with your local utilities for el...

Страница 4: ...d range cooktop may occur Forcing the cooktop to fit may cause excessive gaps and could break the glass and void the warranty To obtain Kits a Visit GE Web Site See page 1 b Call GE Answer Center See...

Страница 5: ...position Hinge arm REMOVE THE DOOR IF NECESSARY cont LIFT OFF DOOR Lift door up and out until the hinge arms clear the slots DO NOT LIFT THE DOOR BY THE HANDLE NOTE The oven door is very heavy Be sur...

Страница 6: ...Follow instructions packaged with alternate appliance Countertop Depth 25 typical 35 3 4 to 36 1 2 from floor to countertop 18 Min vertical distance from the bottom of the adjacent overhead cabinets 1...

Страница 7: ...T Please read carefully FOR PERSONAL SAFETY THIS APPLIANCE MUST BE PROPERLY GROUNDED An adequate electrical supply and outlet must be used to operate the electrical parts of your range The power cord...

Страница 8: ...THE CONNECTIONS Install a manual shut off valve in the gas supply line in an easily accessible location Know how and where to shut off the gas supply to the range Shut off gas supply before removing...

Страница 9: ...h the pre marked areas Note the angle of the wall screw in Fig 2 c Mount the Anti Tip bracket with the 4 screws provided INSTALLATION CONCRETE CONSTRUCTIONS a For concrete installation you will need t...

Страница 10: ...countertop Carefully push the range into the opening until the countertop fully engages the control panel The back glass overhang should cover the cutout opening G F E D C B A 13 10 Installation Inst...

Страница 11: ...REPLACE THE STORAGE DRAWER Place the drawer rail on the guides Push the drawer in until it stops Lift the front of the drawer and push in until the stops clear the guides Lower the front of the drawer...

Страница 12: ...detector soap solution at all joints and connections to check for leaks Do not use an open flame to look for leaks Be sure all leaks are stopped before lighting burners B PRESSURE TEST INFORMATION The...

Страница 13: ...steps below WARNING Lighting gas burners with a match is dangerous You should match light the cooktop burners only in an emergency a Light a match and hold the flame near the burner you want to light...

Страница 14: ...iver to loosen the air shutter screw 3 Adjust the air shutter to 11 32 4 Retighten the air shutter screw WHAT ADJUSTMENT TO MAKE a If the flames are yellow open the air shutter more than the original...

Страница 15: ...he gap between the bottom of the glass and the filler trim A 19 When the trim is set in the proper position tighten the 2 mounting screws The top of the trim should be located below the top surface of...

Страница 16: ...lacement parts Recheck Steps Double check to make sure everything in this guide has been completed Rechecking steps will ensure safe use of the Range 20 IN SOME CASES With L P gas some yellow tipping...

Страница 17: ...u consommateur Conservez ces instructions pour r f rence future La garantie ne couvre aucune panne due une mauvaise installation AVERTISSEMENT Cet appareil m nager doit tre bien mis la terre IMPORTANT...

Страница 18: ...seur de gaz appelez les pompiers L installation et le service doivent tre faits par un installateur qualifi une agence de service ou votre fournisseur de gaz 2 Instructions d installation CONSEILS DE...

Страница 19: ...d vous repoussez la cuisini re contre le mur EXIGENCES LECTRIQUES Cet appareil m nager doit tre livr avec le bon voltage et la bonne fr quence et branch son propre circuit de d rivation bien mis la te...

Страница 20: ...our aller dans le comptoir vous pouvez occasionner des carts excessifs et vous pouvez casser la vitre et annuler la garantie Pour obtenir les trousses a Visitez le site Web GE voir page 1 b Appelez le...

Страница 21: ...t vous faciliter la t che Pour enlever la porte D VERROUILLEZ LES CHARNI RES Poussez les deux verrous de charni res vers le bas vers le ch ssis de la porte en position d verrouill e Cela peut n cessit...

Страница 22: ...ent Mur Surface plate R 6 mm 1 4 14 mm 9 16 Plat min 91 4 cm 36 Profondeur totale 70 cm 27 1 2 7 3 cm 2 7 8 Depuis la surface avant du comptoir 52 4 cm 20 5 8 Espace libre pour la porte depuis la surf...

Страница 23: ...NELLE VOUS DEVEZ BIEN METTRE LA TERRE CET APPAREIL Vous devez utiliser une bonne alimentation lectrique et une bonne prise pour faire fonctionner les pi ces lectriques de votre appareil Le cordon d al...

Страница 24: ...nduite d alimentation de gaz dans un emplacement facile d acc s Trouvez comment couper l alimentation de gaz la cuisini re et o se trouve le robinet d alimentation Coupez l alimentation de gaz avant d...

Страница 25: ...e mur dans la figure 2 c Montez le support anti basculement avec les 4 vis fournies INSALLATIONS CONSTRUCTIONS EN CIMENT a Pour une installation dans le ciment vous aurez besoin de deux vis tire fonds...

Страница 26: ...sez avec soin la cuisini re dans l ouverture jusqu ce que le comptoir entre dans le panneau de contr le Le surplomb de verre arri re doit couvrir l ouverture G F E D C B A 13 10 Instructions d install...

Страница 27: ...DE RANGEMENT Placez les rails du tiroir sur les guides Poussez le tiroir l int rieur jusqu ce qu il s arr te Soulevez l avant du tiroir et poussez vers l int rieur jusqu ce que les arr ts sortent des...

Страница 28: ...d tecteur de fuite liquide solution savonneuse sur tous les joints et les connexions pour v rifier qu il n y a pas de fuite N utilisez jamais une flamme vive pour chercher les fuites Assurez vous d ar...

Страница 29: ...d allumer les br leurs gaz avec une allumette Vous ne devez allumer un br leur avec une allumette qu en cas d urgence a Allumez une allumette et tenez la flamme pr s du br leur que vous voulez allumer...

Страница 30: ...ercle recouvrant l orifice 2 Utilisez un tournevis pour desserrer la vis du volet air 3 Ajustez le volet air 11 32 4 Revissez la vis du volet air R GLAGES a Si les flammes sont jaunes ouvrez le volant...

Страница 31: ...entre le bas du verre et la garniture de remplissage A 19 Quand la garniture est pos e dans la bonne position serrez les 2 vis de montage Le haut de la garniture doit se trouver au dessous de la surfa...

Страница 32: ...rivation dans le sens des aiguilles d une montre C B A 16 Imprim aux tats Unis PR PARATIONS POUR UNE AUTRE CONSTRUCTION suite POUR LES OUVERTURES D ARMOIRE D ENVIRON 77 2 CM 30 3 8 Si la cuisini re e...

Отзывы: