


33
07/30/2014
6
– Tap to turn
Adaptive Noise Reduction (ANR) ON
or
OFF
. ANR works to reduce the
amount of noise (which appears as a grainy image) visible when the probe is positioned
in a dark area. The ANR setting (ON or OFF) applies only to live video.
ANR
is automatically
applied to reduce noise in all frozen and saved images, even when the ANR setting is set
to OFF. When turned ON,
appears at the top of the display.
Note:
Keep the probe still when capturing an image. Noise increases with probe movement.
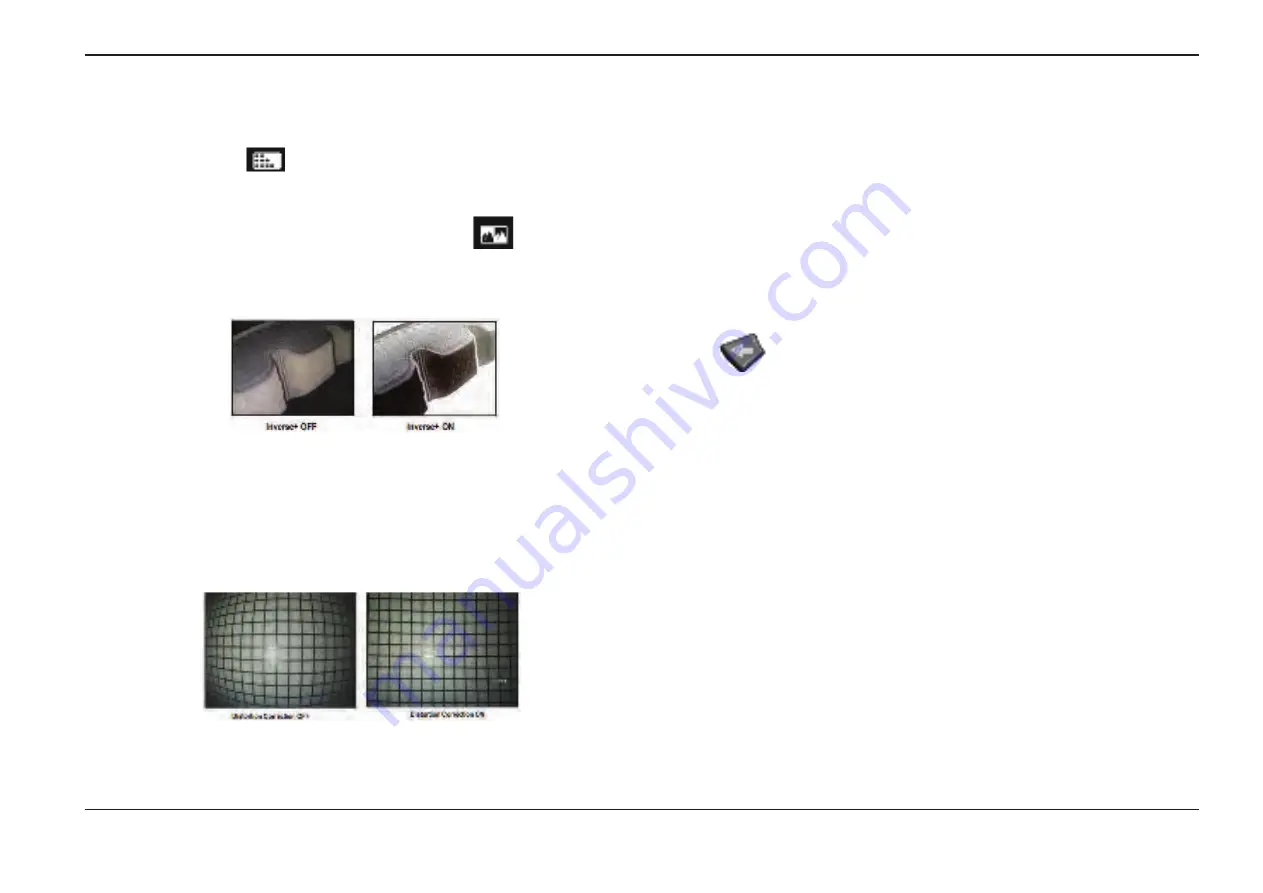
7
– Tap to turn
either
ON
or
OFF
. When turned ON,
appears at the top
of the display. The function enhances image contrast – often making subtle
details more visible in low light or poor contrast images. Turning
ON reverses
the image’s dark and light areas, much the same as a photographic negative.
8
– Tap to turn
Distortion Correction either ON
or
OFF
. The
Distortion Correction
function
corrects the wide-angle edge distortion that occurs when using optical tips with various
angle fields of view
Note:
When saving a corrected image, the face of the image will be labeled 120 Deg.
Note:
When viewing a corrected image, the selected tip field of view (FOV) angle is overlaid
in the lower right corner.
9
– Tap to turn the
Single View
feature
ON
or
OFF
.
Single View
is useful while positioning
a stereo optical tip. This feature makes it easier to navigate the camera by temporarily
eliminating the second image.
10
– Tap the on-screen
icon to
brighten live images
by increasing
the camera’s maximum exposure time.
Exposure settings can vary from 1X to 600X.
Note:
The longer the exposure, the greater the risk of blurring the image. Keep the probe
tip as still as possible when capturing an image with a long exposure.
11
– Tap to turn the illumination LED ON or OFF
12
– Tap on-screen DONE button or press the corresponding key to close the Image
Menu and return to the Soft Key Bar. Any changes to image transformation settings
will remain until manually modified or otherwise altered by recalling a stored Preset.
Pressing
while viewing live video turns off all transforms.
Note:
Any changes made to image transformation settings are lost during power down.
13
– Tap on-screen Preset button or press the corresponding key to create and
name a Preset containing the values currently assigned to each of the eight Image
Transformation settings. Recalling the Preset later allows you to automatically change all
Image Transformation settings to the stored values.
(Click here to learn about Working
with Preset Image Transformation Settings).
14
– Tap on-screen
Reset Transforms
to restore the factory default values for each
of these eight settings.
Содержание Mentor Visual iQ
Страница 1: ...1 07 30 2014 Visual iQ VideoProbe User s Manual MVIQAMANUAL Rev B Mentor ...
Страница 2: ...2 07 30 2014 ...


