


21
07/30/2014
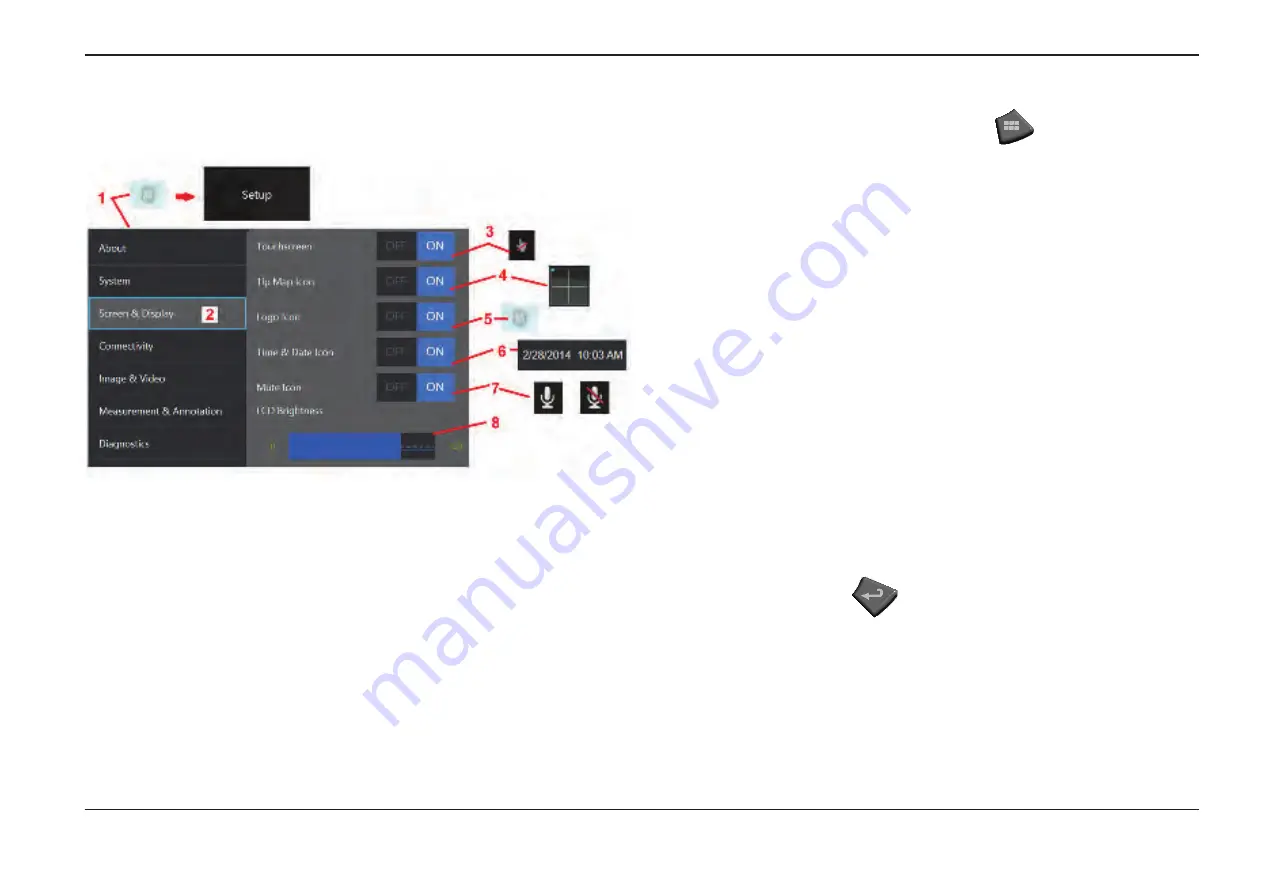
Screen & Display Setup
1
– Tap the on-screen
GE Logo
(or press the
hard key) to open the
Global Menu,
then open the
Setup Menu
.
2
– Select to alter the display-screen appearance and operation.
3
– Turn the display screen’s touch-sensitive control
ON
or
OFF
. Once turned
OFF
, the icon
shown here appears at the top of the display screen. Once disabled, use a combination
of joystick and hard key press to re-enable the touchscreen.
4
– The
Tip Map
(shown here) graphically represents the extent to which the optical
tip is articulated by positioning a bright dot at some distance from the crosshairs. The
closer the dot appears to the center of the crosshairs, the straighter the tip’s position.
5
– The customizable watermark shown here appears in the bottom left corner of the
display screen. Tapping this location opens the
Global Menu.
Turning this icon
OFF
causes it to disappear while tapping in its former location still opens the menu.
6
– Turn the displayed date and time, which appears on the status bar at the display’s
upper right corner,
ON
or
OFF
.
7
– Select to turn the
Sound Recording
and/or
Sound Recording Muted
icons (shown
here)
ON
or
OFF
. These icons appear in the display’s bottom right corner when recording
video with an audio stream. Note that when these icons are visible (turned
ON
), selecting
the onscreen icon mutes or unmutes the sound recording.
8
– Control the display’s brightness by using your finger to drag this bar right or left (or
select with the joystick, press
and then position with the joystick).
Содержание Mentor Visual iQ
Страница 1: ...1 07 30 2014 Visual iQ VideoProbe User s Manual MVIQAMANUAL Rev B Mentor ...
Страница 2: ...2 07 30 2014 ...


