– 25 –
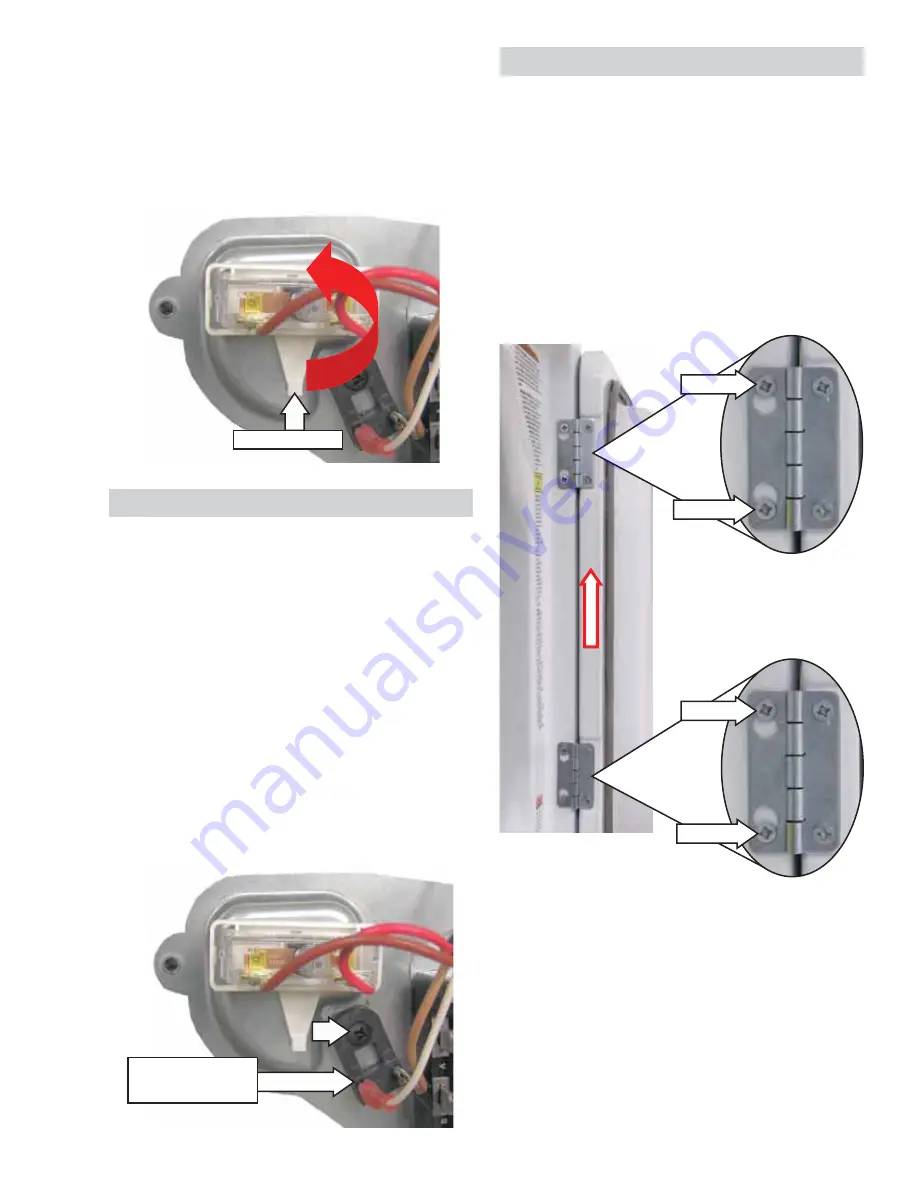
Locking Lever
Front Panel Removal
NOTE:
In the following steps, removing the dryer
door allows for easier manipulation of the dryer
front panel.
1. Remove the bottom screw from each hinge
DQGORRVHQWKHWRSVFUHZWKHQOLIWWKHGRRURႇ
the dryer front panel.
2. Remove the service panel. (See
Service
Panel
in this section of this service guide.)
3. Remove the two Phillips-head screws and the
heat shield from the cabinet.
NOTE:
In the following step, cover the top of the
washer with a protective surface.
4. Disengage the control panel from the
front panel (see
Control Panel
in the
Components
section of this service guide),
then place it on top of the washer.
Loosen
Remove
Loosen
Remove
(Continued Next Page)
The timer voltage-dropping resistor (on electric
models) controls the run-time during automatic
cycles. This 4500-ohm resistor is in series with
the timer motor. When the drum outlet thermostat
RSHQVDQGWXUQVRႇWKHKHDWWKHUHVLVWRUGURSV
the 240 VAC heater circuit to 120 VAC to run the
timer motor.
NOTE:
If an open timer motor is present, or if
the timer fails to advance a properly heating
automatic cycle to the cool down position, check
for 4,500 ohms' resistance at timer contacts A to
7ZLWKWKHWLPHULQWKHRႇRUFRROGRZQSRVLWLRQ
The resistor is held in place on the bracket with
a single Phillips-head screw and has two wires
attached.
7LPHU9ROWDJH'URSSLQJ5HVLVWRU
Dryer Front Panel
Dryer Start Switch Replacement
1. Follow steps 1 and 2 above from
Dryer Timer
Replacement
.
2. Disconnect the wires from the start switch.
3. Lift the locking lever and rotate the start
switch counter-clockwise.
Voltage-Dropping
Resistor
Содержание GUD24ESSMWW
Страница 16: ... 16 LUÀRZ ...
Страница 75: ... 75 Fault Code Binary Display ...
Страница 77: ... 77 LULQJ LDJUDPV To Washer Electric Dryer ...
Страница 78: ... 78 OHFWULF U HU RQJ 9HQW ORZHU 0RWRU LUFXLW ...
Страница 79: ... 79 To Washer Gas Dryer ...
Страница 80: ... 80 Power Supply To Washer Personality Jumper Plugs Washer ...


