background image

40

Limited Warranty

What your warranty covers:

• Defects in materials or workmanship.

For how long after your purchase:

• One year, from date of purchase. 

(The warranty period for rental units begins with the first rental or 45 days from date of 

shipment to the rental firm, whichever comes first.)

What we will do:

•  Provide you with a new unit. The exchange unit is under warranty for the remainder of 

the original product’s warranty period.

How you get service:

•  Properly pack your unit. Include any cables, etc., which were originally provided with the 

product. We recommend using the original carton and packing materials.

•  ”Proof of purchase in the form of a bill of sale or receipted invoice which is evidence 

that the product is within the warranty period, must be presented to obtain warranty 

service.” For rental firms, proof of first rental is also required.  Also print your name and 

address and a description of the defect. Send via standard UPS or its equivalent to:


Thomson Inc. 


11721 B Alameda Ave. 


Socorro, Texas 79927

•  Insure your shipment for loss or damage. Thomson Inc. accepts no liability in case of 

damage or loss.

•  A new unit will be shipped to you freight prepaid.

What your warranty 

does not

 cover:

•  Customer instruction. (Your Owner’s Manual provides information regarding operating 

instructions and user controls. Any additional information, should be obtained from your 

dealer.)

•  Installation and setup service adjustments.
•  Batteries.
•  Damage from misuse or neglect.
•  Products which have been modified or incorporated into other products.
•  Products purchased or serviced outside the USA.
•  Acts of nature, such as but not limited to lightning damage.

Product Registration:

•  Please complete and mail the Product Registration Card packed with your unit. It will 

make it easier to contact you should it ever be necessary. The return of the card is not 

required for warranty coverage.

Содержание 28861

Страница 1: ...Model 28861 DECT 6 0 Telephone with Cordless Handset User s Guide ...

Страница 2: ...our own telephone equipment if you are on a party line Check with your local telephone company Notice must be given to the telephone company upon permanent disconnection of your telephone from your line If your home has specially wired alarm equipment connected to the telephone line ensure the installation of this product does not disable your alarm equipment If you have questions about what will ...

Страница 3: ...he telecommunications equipment into an outlet on a circuit different from that to which the receiving antenna is connected If these measures do not eliminate the interference please consult your dealer or an experienced radio television technician for additional suggestions Also the Federal Communications Commission has prepared a helpful booklet How To Identify and Resolve Radio TV Interference ...

Страница 4: ...e 13 LCD Contrast 13 Key Tone 13 Dial Mode 14 Date Time 14 Message Waiting 15 Reset 15 Handset Menu 16 Handset Setting 16 Ring Melody 16 Ring Volume 16 Low Battery 16 No Coverage 17 Key Tone 17 Auto Talk 17 Daily Alarm 18 Handset Name 18 Language 18 Screen Contrast 19 Reset Handset 19 Base Setting 19 Change PIN 19 Dial Mode 20 Message Waiting VMWI 20 Reset Base 21 Date Time 21 Registration 22 Regi...

Страница 5: ...g CID Records 29 CID Memory Record Storage 29 Reviewing CID Records 30 Dialing a CID Number 30 Deleting CID Records 31 Delete a Single CID Record 31 Delete All CID Records 31 Phonebook 31 Review Phonebook 31 Storing Name and Number into Phonebook32 Storing CID Records in Phonebook 32 Edit Phonebook Entry 33 Delete Phonebook Entry 33 Dial Record from Phonebook 33 Changing the Battery 34 Battery Saf...

Страница 6: ... one phone in your home that isn t cordless in case the power in your home goes out Before You Begin Parts Checklist for Model 28861xx2 Make sure your package includes the items shown here Base Cordless handset 2 AC power adaptors Telephone line cord Handset battery Coiled handset cord Cordless handset charger For Model 28861xx3 there will be ONE additional handset battery pack cover charge cradle...

Страница 7: ...f not properly set these devices may interfere with each other and or your new telephone If you are concerned with interference please refer to the owner s manual for these devices on how to properly set channels to avoid interference Typical devices that may use the 1 9 GHz frequency for communication include wireless audio video senders wireless computer networks multi handset cordless telephone...

Страница 8: ...enu OK button speaker button talk button tone button lock format button off button int intercom button CID caller ID button phonebook button redial button Antenna Internal call Phone Battery Speakerphone AM AM Key lock PM PM Ringer off NEW Missed call Mute RPT Repeat call ...

Страница 9: ...ld button Phone Missed call Speakerphone RPT Repeat call Mute AM AM Internal call PM PM Voice Message Waiting pause button vol volume button ringer switch back of base mute register button speaker button Display erase button flash button redial button exit button 5 6 review buttons format button ...

Страница 10: ...er 1 On the base plug the AC power adaptor cord into the power jack on the back of the base and the other into an electrical outlet CAUTION To reduce risk of personal injury fire or damage use only the 5 2823 base and 5 2824 handset power adaptors listed in the user s guide These power adaptors are intended to be correctly orientated in a vertical or floor mount position 2 On the handset charge cr...

Страница 11: ...e base on the wall 1 Turn the base over and remove the pedestal 2 Rotate the pedestal a half turn and align it with the bottom of the base 3 Attach the pedestal by first inserting the tabs on the pedestal into the slots on the bottom of the base and then push the pedestal down until it snaps into place 4 Plug the telephone line cord into the jack marked PHONE LINE on the back of the base and the o...

Страница 12: ...u must connect the handset battery before using the cordless handsets CAUTION To reduce the risk of fire or personal injury only use the Thomson Inc approved Nickel Metal Hydride battery model 5 2826 which is compatible with this unit 1 Locate battery and battery door which are packaged together inside a plastic bag and are separate from the handset 2 Locate the battery compartment on the back of ...

Страница 13: ...ess the exit button to return to idle mode LCD Contrast There are 8 levels available for selection The default setting is level 6 1 Press the menu button 2 Press the 5 or 6 button to select CONTRAST and press the menu button again 3 Press the 5 or 6 button to select the desired contrast level 4 Press the menu button to confirm the setting 5 Press the exit button to return to idle mode Key Tone Tur...

Страница 14: ...ain the screen displays Year 2008 3 Use the number keypad to input the last two digits of year range 00 99 press the menu button to confirm the setting and then enter month and date settings 4 Input the correct date and month the format is month date date range 01 30 31 month range 01 12 press the menu button to confirm the setting and enter time setting 5 Input the correct time the format is hour...

Страница 15: ...s a subscription through your local service provider Reset Resets the telephone base to the original default settings NOTE All caller ID records stored in base and cordless handset and all the phonebook and redial records stored in base will be cleared upon reset You may wish to write down this information before resetting the base 1 Press the menu button 2 Press the 5 or 6 button to select RESET ...

Страница 16: ...gain to enable the ringer 1 Press the menu ok button 2 Press the 5 or 6 button to select SETUP HS and press the menu okbutton 3 Press the 5 or 6 button to select RING VOLUME and press the menu ok button 4 Press the 5 or 6 button to hear and select the desired ring volume 5 Press the menu ok button to confirm the setting 6 Press the button to return to idle mode Note For the cordless handset the in...

Страница 17: ...t setting is ON 1 Press the menu ok button 2 Press the 5 or 6 button to select SETUP HS and press menu ok button 3 Press the 5 or 6 button to select TONES and press menu ok button 4 Press the 5 or 6 button to select KEY TONE and press menu ok button 5 Press the 5 or 6 button to select ON or OFF 6 Press the menu ok button to confirm the setting 7 Press the button to return to idle mode Auto Talk Al...

Страница 18: ...RM ON blinks for 1 minute Handset Name Set a preferred name to the cordless handset The default name is HANDSET 1 Press the menu ok button 2 Press the 5 or 6 button to select SETUP HS and press the menu ok button 3 Press the 5 or 6 button to select HANDSET NAME and press the menu ok button 4 Enter the desired name using the number keypad Delete incorrect entries by pressing the cancel mute button ...

Страница 19: ...utton to confirm the setting 5 Press the button to return to idle mode NOTE All phonebook and redial records stored in the handset will be cleared upon reset You may wish to write down the information before resetting the handset Base Setting Change PIN The PIN is a security feature to prevent others from changing the stored settings The default PIN is 0000 If you change the PIN please record the ...

Страница 20: ...ct DIAL MODE and press the menu ok button 3 Press the 5 or 6 button to select TONE or PULSE 4 Press the menu ok button to confirm the setting 5 Press the button to return to idle mode Message Waiting VMWI If you have subscribed to a voice message waiting service MESSAGE WAITING displays on handset and the icon displays on the base to alert you that you have received new messages To turn the Visual...

Страница 21: ...le mode Date Time Set the Date Time displayed in idle mode The default setting is 2008 01 01 12 01 pm 1 Press the menu ok button 2 Press the 5 or 6 button to select DATE TIME and press the menu ok button the screen displays YEAR 2008 3 Input the correct last two digits of year range 00 99 press the menu ok button to confirm the setting and then enter month and date settings 4 Input the correct dat...

Страница 22: ...NOTE If base is unable to register NO BASE displays on the screen and the registration process must be repeated 6 After successful registration the screen displays SUCCESSFUL Remove Handset De registration To de register a handset from the base 1 Press the menu ok button 2 Press the 5 or 6 button to select REGISTRATION and press the menu ok button 3 Press the 5 or 6 button to select REMOVE HANDSET...

Страница 23: ...le to hang up or press the speaker button on the base Cordless Handset 1 Press the or speaker button Wait for a dial tone then dial the desired number or 2 Dial the number and then press the or speaker button 3 When finished press the button or place the handset in the charge cradle to hang up Receiving a Call Corded Handset 1 Lift the handset or press the speaker button on the base 2 When finishe...

Страница 24: ... the corded handset To switch to receiver mode pick up the corded handset from the base Switch between Speakerphone Receiver on the Cordless Handset To switch to speakerphone mode press the speaker button To switch to handset press the speaker button again or press the button Special Features Page All Cordless Handsets from Base 1 Press and hold the page intercom button on the base for 3 seconds t...

Страница 25: ...button for 1 5 seconds the screen displays a P Each pause counts as one digit in the dialing sequence Flash Use the flash button to activate custom calling services such as call waiting or call forwarding which are available through your local telephone company The screen displays an R The flash button can also be used to access a new dial tone without hanging up Keypad Lock only for cordless hand...

Страница 26: ...e number is automatically dialed out NOTE If you want to edit the number before dialing out press the menu ok button twice to enter menu and then select the number Save Redial Memory 1 Press the redial button on base or the 5 button on the cordless handset 2 Press the 5 or 6button to select the desired redial number 3 Press the menu button on the base or the menu ok button on the handset to enter ...

Страница 27: ...set number 1 2 3 4 you want to call 3 The receiving handset rings and the screen displays BASE 4 Press the or speaker button of the receiving handset to answer Cordless Handset to Base 1 With the cordless handset in idle mode press the int button the screen displays INT NUMBER 2 Use the number keypad to enter 0 for the base 3 The base rings and the screen displays the calling cordless handset s na...

Страница 28: ... receiving handset presses the or speaker button to answer the intercom call Both intercom users may speak privately The external caller will not hear the intercom conversation 2 When finished the second handset hangs up to end the intercom call and your original telephone conversation resumes Three Way Conference Call After receiving an external call it is possible to include a second handset in ...

Страница 29: ...stored in the history of the base and all handsets in the system When you hear the call waiting beep in the handset receiver press the flash button to put the current call on hold and answer the incoming call Press flash again to return to the original call NOTE The unit cannot receive Call Waiting Caller ID information while an external call is hold Receiving CID Records When you receive a call t...

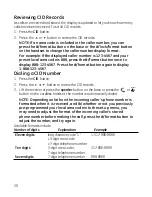
Страница 30: ...Press the CID button 2 Press the 5 or 6 button to review the CID records 3 Lift the receiver or press the speaker button on the base or press the or speaker button on the cordless handset the number is automatically dialed NOTE Depending on a how the incoming caller s phone number is formatted when it is received and b whether or not you previously pre programmed your local area code into the set ...

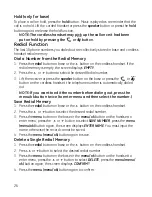
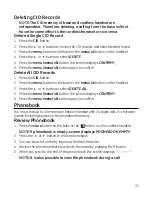
Страница 31: ...he menu button on the base or the menu ok button on the handset 3 Press the 5 or 6 button to select DELETE ALL 5 Press the menu menu ok button the screen displays CONFIRM 6 Press the menu menu ok button again to confirm Phonebook You may store up to 50 entries per base or handset with 24 digits and 15 character names including spaces in the phonebook memory Review Phonebook 1 Press the store butto...

Страница 32: ...cel mute button on the cordless handset to delete any incorrect entries 7 Press the menu menu ok button to save the record NOTE When screen displays MEMORY FULL you must delete one or more records before saving a new record Storing CID Records in Phonebook You may also store CID information in the phone s internal memory NOTE It is important that you format CID records correctly BEFORE storing in ...

Страница 33: ...ore button on the base or the button on the cordless handset 2 Press the 5 or 6 button to select desired record 3 Press the menu button on the base or the menu ok button on the handset 4 Press the 5 or 6 button to select DELETE 5 Press the menu menu ok button the screen displays CONFIRM 6 Press the menu menu ok button again to confirm Dial Record from Phonebook 1 Press the store button on the base...

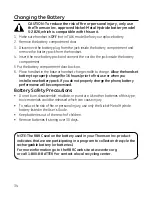
Страница 34: ...battery to properly charge for 16 hours prior to first use or when you install a new battery pack If you do not properly charge the phone battery performance will be compromised Battery Safety Precautions Do not burn disassemble mutilate or puncture Like other batteries of this type toxic materials could be released which can cause injury To reduce the risk of fire or personal injury use only the ...

Страница 35: ...handset name edit menu LINE IN USE Indicates that the telephone line is in use MISSED CALLS Indicates call or calls which have not been answered NOT AVAILABLE The user action is not available in the current status PAGING Indicates the base or another handset is paging RPT Indicates a repeated incoming call SEARCHING In normal use it indicates handset is out of range or the handset cannot find base...

Страница 36: ...ttery may need to be charged Place handset in charge cradle for at least 20 seconds Dial tone is OK but can t dial out Make sure the TONE PULSE setting on the base is set to the type of phone service you are subscribed to Handset Base does not ring Make sure the handset ringer switch is turned on and the base ringer is programmed to HI The cordless handset may be out of range Move closer to the ba...

Страница 37: ...ve the handset battery Wait for 30 seconds and plug the AC power adaptor back into the base and wall outlet Reconnect the battery and charge for 16 hours Caller ID Solutions No Display Is battery fully charged Try replacing the battery Make sure that the unit is connected to a non switched electrical outlet Disconnect the power adaptor from the base and reconnect it Caller ID Error Message The uni...

Страница 38: ...is plugged into AC outlet with other electronic devices Handset battery is low General Product Care To keep your unit working and looking good follow these guidelines Avoid putting the phone near heating appliances and devices that generate electrical noise for example motors or fluorescent lamps DO NOT expose to direct sunlight or moisture Avoid dropping the handset as well as other rough treatme...

Страница 39: ...pproved by Thomson Inc could void the user s authority to operate this product For instructions on how to obtain a replacement unit refer to the warranty included in this guide or call customer service at 1 800 448 0329 Or refer inquiries to Thomson Inc Manager Consumer Relations P O Box 1976 Indianapolis IN 46206 Attach your sales receipt to this booklet for future reference or jot down the date ...

Страница 40: ... is also required Also print your name and address and a description of the defect Send via standard UPS or its equivalent to Thomson Inc 11721 B Alameda Ave Socorro Texas 79927 Insure your shipment for loss or damage Thomson Inc accepts no liability in case of damage or loss A new unit will be shipped to you freight prepaid What your warranty does not cover Customer instruction Your Owner s Manua...

Страница 41: ...y or fitness for a particular purpose on this product is limited to the applicable warranty period set forth above How state law relates to this warranty Some states do not allow the exclusion nor limitation of incidental or consequential damages or limitations on how long an implied warranty lasts so the above limitations or exclusions may not apply to you This warranty gives you specific legal r...

Страница 42: ...ordless Handset to Cordless Handset 27 D Date Time 14 21 Delete a Single CID Record 31 Delete a Single Redial Memory 26 Delete All CID Records 31 Delete All Redial Memory 27 Delete Phonebook Entry 33 Deleting CID Records 31 Dial a Number from the Redial Memory 26 Dial Mode 14 20 Dial Record from Phonebook 33 Dialing a CID Number 30 Digital Security System 7 Display Messages 35 E Edit Phonebook Ent...

Страница 43: ...eset Base 21 Reset Handset 19 Review Phonebook 31 Reviewing CID Records 30 Ring Melody 16 Ring Volume 16 S Save Redial Memory 26 Screen Contrast 19 Selecting the Language 13 Setting the Ringer Volume 11 Speakerphone Operation 24 Special Features 24 Storing CID Records in Phonebook 32 Storing Name and Number into Phonebook 32 Switch between Speakerphone Receiver on the Base 24 Switch between Speake...

Страница 44: ...861 00024792 Rev 0 Dom E S 08 12 Printed in China Thomson Inc 101 West 103rd St Indianapolis IN 46290 1102 2008 Thomson Inc Trademark s Registered Marca s Registrada s Visit the GE website at www GE com phones ...

Страница 45: ...Modelo 28861 DECT 6 0 Sistema de Teléfono con Auricular Inalámbrico Guía del Usuario ...

Страница 46: ...ue ha sido adoptado por la ACTA Un cable telefónico y un enchufe modular que han sido aprobados y están en conformidad con dicho reglamento han sido provistos con este producto Están diseñados para ser conectados a un enchufe modular compatible que también esté en conformidad Para más detalles vea las instrucciones para la instalación NOTAS No se puede usar este equipo con un teléfono de previo pa...

Страница 47: ...s puede causar interferencia dañosa a las transmisiones radiales Sin embargo no hay garantía que la interferencia no ocurrirá en una instalación en particular La aislamiento de comunicaciones no puede ser asegurada al usar este producto Si este equipo causa en efecto una interferencia dañosa a la recepción de la radio o de la televisión lo cual puede ser determinado apagando y prendiendo el equipo...

Страница 48: ...rado a una distancia mínima de 20 centímetros entre el radiador y su cuerpo Este transmisor no debe ser colocado junto u operado en conjunción con cualquier otra antena o transmisor Información para el Producto DECT Teléfono Inalámbrico Digitalmente Expandido Este teléfono cumple con la norma DECT 6 0 que opera en el rango de frecuencia 1 92 GHz a 1 93 GHz La instalación de este tipo está sujeta a...

Страница 49: ...Código de Área 14 Contraste del LCD 14 Tono de Tecla 14 Modo Marcación 14 Fecha Hora 15 Mensaje Esperando 15 Para Reiniciar restablecer los valores 15 Menú del Auricular 16 Ajuste del Auricular 16 Melodía del Timbre 16 Volumen del Timbre 16 Batería Baja 17 No hay Cobertura 17 Tono de Tecla 17 Llamada Automática 18 Diariamente Alarma 18 Nombre del Auricular 18 Langue 19 Contraste de la Pantalla 19 ...

Страница 50: ...as 29 Para Marcar un Número del Identificador de Llamadas 30 Para Eliminar Registros CID 30 Para Eliminar Sólo un Registro CID 30 Para Eliminar Todos los Registros CID30 Directorio Telefónico 31 Review Phonebook 31 Para Almacenar un Nombre y Número en Directorio Telefónico 31 Para Almacenar Archivos del Identificador de Llamadas en Directorio Telefónico 32 Para Editar la Entrada del Directorio Tel...

Страница 51: ...quí Base Para Model 28861xx3 habrá UN auricular paquete de baterías placa base de carga y adaptador de corriente más de lo mostrado anteriormente Requerimientos Para Enchufe Telefónico Para utilizar este teléfono usted puede necesitar un enchufe modular telefónico tipo RJ11C como el ilustrado aquí instalado en su hogar Si usted no tiene este tipo de enchufe llame a su compañía telefónica local par...

Страница 52: ... con esta interferencia refiérase al manual de instrucciones de dichos accesorios para ver cómo puede programar los canales para evitar esta interferencia Los accesorios típicos que pueden utilizar la frecuencia de 5 8 GHz para comunicarse incluyen transmisores inalámbricos de audio o video redes inalámbricas para computadoras sistemas telefónicos inalámbricos con varios auriculares y algunos telé...

Страница 53: ...antalla cancel mute botón cancelar mudo pause botón pausa flash botón colgar y servicios especiales menu OK botón menú OK speaker botón bocina talk botón llamar tone botón icono tono lock format botón cerradura formato end botón terminar int botón intercomunicación CID botón identificador de llamada phonebook botón directorio telefónico redial botón volver a marcar ...

Страница 54: ...ada Perdida Altavoz RPT Llamada Repetida Mudo AM AM Llamada Interna PM PM Correo de Voz En Espera menu botón menu review p or q botón volver p ó q CID botón identificador de llamada redial botón volver a marcar exit botón salir flash botón colgar y servicios especiales speaker botón bocina mute register botón mudo registro page intercom botón localizador intercomunicación hold botón sostener ...

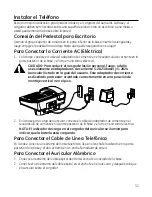
Страница 55: ...es de corriente 5 2823 base y 5 2824 auricular listado en la guia del usuario Este adaptador de corriente es diseñado para estar orientado correctamente en una posición de montaje vertical o en el piso 2 En la base para carga del auricular conecte el cable del adaptador de corriente en el receptáculo de corriente en la parte posterior de la base y el otro en una toma eléctrica NOTA El indicador de...

Страница 56: ...iente a través de las ranuras en el pedestal para permitir que la base quede plana y descanse sobre la pared 6 Coloque los orificios de montaje en el pedestal sobre los postes de la placa de la pared y deslice firmemente la unidad en su sitio La placa para la pared no está incluida 7 Quite el gancho del auricular gírelo a que quede de cabeza y vuelva a ponerlo en la ranura Usted necesita hacer est...

Страница 57: ...puede deteriorarse Operación del Menú Menú Base Selección del Idioma Selecciona el idioma de visualización en pantalla 1 Presione el botón phone menu ok La pantalla muestra IDIOMA 2 Presione el botón phone menu ok otra vez 3 Presione el botón 5 o 6 para seleccionar la langue deseada 4 Presione el botón phone menu ok para confirmar el ajuste 5 Presione el botón exit para volver al modo inactivo NOT...

Страница 58: ... botón exit para volver al modo inactivo Tono de Tecla Gire el botón de tono para la base a la posición CONECTADO u DESCONECTADO El valor predeterminado es CONECTADO 1 Presione el botón phone menu ok 2 Presione el botón 5 o 6 button para seleccionar TONO DE TECLA y presione el botón phone menu ok otra vez 3 Presione el botón 5 o 6 button para seleccionar CONECTADO o DESCONECTADO 4 Presione el botó...

Страница 59: ... modo inactivo NOTA Si el valor que usted ingresa excede el rango usted no puede pasar a la siguiente sección Por favor vuelva a ingresar el valor correcto Mensaje Esperando Si usted está suscrito a un servicio de mensajería de voz el ícono se muestra en la base y MENSAJE se visualiza en el auricular para alertarle de que usted ha recibido mensajes nuevos Para desactivar el Indicador Visual de Men...

Страница 60: ...a seleccionar TONO DE MELODIA y presione el botón menu ok 4 Presione el botón 5 o 6 para escuchar y seleccionar la melodía de tono preferida 5 Presione el botón menu ok para confirmar el ajuste 6 Presione el botón al modo inactivo Volumen del Timbre Hay 5 niveles del timbre disponibles para elegir El valor predeterminado es Nivel 5 El timbre puede ser desactivado presionando el botón por 1 5 segun...

Страница 61: ...ECTADO 1 Presione el botón menu ok 2 Presione el botón 5 o 6 para seleccionar CONFIGURAC TM y presione el botón menu ok 3 Presione el botón 5 o 6 para seleccionar TONO y presione el botón menu ok 4 Presione el botón 5 o 6 para seleccionar FUERA ALCANCE y presione el botón menu ok 5 Presione el botón 5 o 6 para seleccionar CONECTADO o DESCONECTADO 6 Presione el botón menu ok para confirmar el ajust...

Страница 62: ... para entrar HH MM Presione el botón 5 o 6 para seleccionar AM o PM NOTA El formato del date time elimina el formato del tiempo del alarmar así que si usted tiene el tiempo fijado a la exhibición en formato de 24 horas usted no será permitido para seleccionar am pm para el ajuste del alarmar 6 Presione el botón menu ok para confirmar el ajuste NOTA Cuando la alarma está establecida una A se muestr...

Страница 63: ...resione el botón menu ok para confirmar el ajuste 6 Presione el botón al modo inactivo Para Reiniciar el Auricular Usted puede restaurar los valores de su auricular inalámbrico a los valores predeterminados originales 1 Presione el botón menu ok 2 Presione el botón 5 o 6 para seleccionar CONFIGURAC TM y presione el botón menu ok 3 Presione el botón 5 o 6 para seleccionar RESET y presione el botón ...

Страница 64: ...iguración 7 Presione el botón al modo inactivo Modo Marcación Ajuste el modo marcación a TONO o IMPULSO La configuración predeterminada es TONO 1 Presione el botón menu ok 2 Presione el botón 5 o 6 para seleccionar CONFIG BÁSICA y presione el botón menu ok 3 Presione el botón 5 o 6 para seleccionar MODO DE MARCAR y presione el botón menu ok 3 Presione el botón 5 o 6 para seleccionar TONO o IMPULSO...

Страница 65: ...SET 5 Presione el botón menu ok para confirmar el ajuste 6 Presione el botón al modo inactivo Fecha Hora Establece la Fecha Hora visualizada en modo inactivo El valor predeterminado es 2008 01 01 12 01 P M 1 Presione el botón menu ok 2 Presione el botón 5 o 6 para seleccionar FECHA HORA y presione el botón menu ok la pantalla muestra AÑO 2008 3 Ingresar los últimos dos dígitos del año rango 00 99 ...

Страница 66: ...el tiempo se agote NOTA Si la base no puede registrarse SIN BASE se muestra en la pantalla y el proceso de registro debe ser repetido 6 Después del registro acertado La pantalla muestra EXITOSO Para Quitar el Registro del Auricular Desregistro Cancelar el registro un auricular de la base 1 Presione el botón menu ok 2 Presione el botón 5 o 6 para seleccionar REGISTRO y presione el botón menu ok 3 P...

Страница 67: ...ase de carga para colgar o presione el botón speaker en la base Auricular Inalámbrico 1 Presione el botón o speaker Espere al tono de marcar y después marque el número deseado O 2 Marque el número primero y después presione el botón o speaker 3 Cuando haya terminado presione el botón o coloque el auricular en la base de carga para colgar Para Recibir una Llamada Auricular Alámbrico 1 Levante el au...

Страница 68: ...e el botón speaker Para cambiar al auricular presione el botón speaker otra vez o presione el botón Funciones Especiales Pagine Todos Auricular Inalámbrico de la Base 1 Presione y sostenga el botón page intercom en la base por 3 segundos la base pantalla muestra LLAMANDO MÓVIL 2 Los auriculares inalámbricos emitirán un bip y la pantalla muestra LLAMANDO MÓVIL por 30 segundos 3 Presione el botón EX...

Страница 69: ...antalla muestra el ícono bloqueo Para desbloquear el teclado Presione y sostenga el botón lock format hasta que se escuche un bip el icono ya no se muestra NOTA Cuando esté activado el bloqueo de teclado usted todavía puede aceptar llamadas entrantes y realizar llamadas de emergencia al 911 Retener sólo para la base Para colocar una llamada en retención presione el botón hold Se reproduce música c...

Страница 70: ...en la auricular inalámbrico 2 Presione el botón 5 o 6 para seleccionar el número que se desea volver a marcar 3 Presione el botón menu en la base o el botón menu ok en el auricular para entrar a menú presione el botón 5 o 6 para seleccionar BORRAR ENTR presione el botón menu menu ok la pantalla muestra CONFIRMAR 4 Presione el botón menu menu ok en la base o auricular para salvar Delete All Redial ...

Страница 71: ...municación un tono de bip suena en los receptores indicando una llamada entrante Usted debe terminar la intercomunicación antes de responder la llamada entrante Uso de Intercomunicación con Llamadas Telefónicas Externas Durante una llamada telefónica usted puede usar la función intercom paging para buscar otro auricular y tener una conversación de intercomunicación de dos vías privada fuera de lín...

Страница 72: ...tercomunicación está establecida Usted puede colgar para terminar la transferencia de llamada NOTA Si la intercomunicación no es respondida en 100 segundos se cancela y transfiere la llamada de regreso a la base o al auricular que la origina Funciones del Identificador de Llamadas CID IMPORTANTE Para utilizar las características de la identificación de llamador de esta unidad usted debe suscribirs...

Страница 73: ...mación de las 30 últimas llamadas para que sepa quién llamó mientras usted no estuvo disponible Cuando la llamada número 31 es recibida el último archivo del Identificador de Llamadas la primera llamada se borra automáticamente Usted puede revisar la información almacenada en cualquier momento Las llamadas recibidas desde la última revisión se mostrarán NUEVA en la pantalla Llamadas que no han sid...

Страница 74: ...lo Once Dígitos clave de larga distancia 1 1 317 888 8888 3 dígitos de clave de área 7 dígitos de número telefónico Diez Dígitos 3 dígitos de clave de área 317 888 8888 7 dígitos de número telefónico Siete Dígitos 7 dígitos de número telefónico 888 8888 Para Eliminar Registros CID NOTA La memoria CID de la base y el auricular inalámbrico son independientes Por lo tanto eliminar un registro de llam...

Страница 75: ... Para Almacenar un Nombre y Número en Directorio Telefónico 1 Presione el botón store en la base ó el botón en la auricular inalámbrico 2 Presione el botón menu en la base ó presione el botón menu menu ok en el auricular para entrar a menú selecto AÑADIR 3 Presione el botón menu menu ok y la pantalla muestra INTRODUC NÚMERO 4 Ingrese el número usando el teclado numérico Presione y sostenga el botó...

Страница 76: ...nidad no permitirá que este registro sea transferido a la memoria de usuario interna El auricular mostrará NO SE PUEDE GUARDAR Para Editar la Entrada del Directorio Telefónico 1 Presione el botón store en la base ó el botón en la auricular inalámbrico 2 Presione el botón 5 o 6 para seleccionar el archivo deseado 3 Presione el botón menu en la base ó presione el botón menu menu ok en el auricular 4...

Страница 77: ...enchufe de la batería en la conexión dentro del compartimiento y saque la batería del auricular 4 Introduzca el nuevo paquete de baterías y vuelva a conectar la batería dentro del enchufe en el compartimiento 5 Ponga la tapa del compartimiento de la batería en su sitio 6 Coloque el auricular sobre el cargador para que se cargue Deje que el teléfono se cargue durante 16 horas antes de utilizarlo po...

Страница 78: ...fónica está en uso MISSED CALLS Indica llamada o las llamadas que no se han contestado NO DISPONIBLE La acción de usuario no está disponible en el estado actual LOCALIZANDO Indica que la base u otro auricular está buscando RPT Indica una llamada entrante repetida SEARCHING In normal use it indicates handset is out of range or the handset cannot find base In registration mode it means the handset i...

Страница 79: ...se Coloque el auricular sobre el cargador durante por lo menos 20 segundos El tono de marcar está bien pero no da línea Asegúrese que la programación de TONO IMPULSO esté de acuerdo con el servicio al que usted esté suscrito El Auricular Base no Timbra Asegúrese de que el selector del timbre esté en la posición de activado CONECTADO y de la base esté programado en HI El auricular puede estar fuera...

Страница 80: ...nectar la batería y cargue durante 16 horas Soluciones para el Identificador del Llamadas La pantalla no muestra nada Está la batería completamente cargada Intente cambiarla Asegúrese de que el aparato esté conectado a un enchufe eléctrico que no tenga selector para apagarse Desconecte el aparato del enchufe y conéctelo nuevamente Error en el Mensaje del Caller ID El aparato muestra este mensaje s...

Страница 81: ...cargada Está fuera del ámbito de la base Cuidado General del Producto Para mantener su aparato funcionando decuadamente y en buenas condiciones siga las siguientes pautas Evite poner el teléfono cerca de calentadores calefactores de ambiente y dispositivos que generen interferencia eléctrica ejemplo motores o lámparas fluorescentes No lo exponga a la luz solar directa o a la humedad No deje caer l...

Страница 82: ...idor P O Box 1976 Indianápolis IN 46206 Adjunte su recibo al folleto para futura referencia o anote la fecha en la que se compró o recibió este producto como regalo Esta información será valiosa si se llegase a requerir durante el período de garantía Fecha de Compra___________________________________________________________________ Nombre de la Tienda_______________________________________________...

Страница 83: ...quivalente a Thomson Inc 11721 B Alameda Ave Socorro Texas 79927 Asegure su empaque para prevenir pérdida o daño Thomson Inc no acepta responsabilidad en caso de pérdida o daño Un aparato nuevo se le enviará con los cargos pagados Lo que no cubre la garantía Instrucciones al cliente Su manual de propietario le proporciona la información con respecto a las instrucciones de operación y los controles...

Страница 84: ...están reglamentadas por las leyes del estado de Indiana Excepto por el alcance establecido por las leyes aplicables cualquier garnatía implícita de mercado o de salud para cualquier proposito en este producto es limitada al período de garantía especificado anteriormente Cómo se Relaciona la Ley Estatal a esta Garantía Algunos estados no permiten la exclusión ni limitación de daño incidental o deri...

Страница 85: ... 14 Cuidado General del Producto 37 D Delete All Redial Memory 26 Directorio Telefónico 31 E Estatuto sobre la Exposición a la Radiación de la FCC RF 4 F Fecha Hora 15 Fecha Hora 21 Flash 25 Formato del Auricular 9 Formato del Base 10 Funciones del Identificador de Llamadas CID 28 Funciones Especiales 24 G Garantía Limitada 39 H Handset Sound Signals 34 I Identificador de Llamada en Espera 28 Índi...

Страница 86: ...gistro CID 30 Para Eliminar Todos los Registros CID 30 Para Eliminar una sola Memoria de Remarcación 26 Para Guardar en Memoria de Remarcación 26 Para Hacer una Llamada 23 Para Instalar la Batería del Auricular 12 Para Marcar un Número del Identificador de Llamadas 30 Para Marcar un Número desde la Memoria de Remarcación 25 Para Marcar un Registro del Directorio Telefónico 33 Para Quitar el Regist...

Страница 87: ...43 R Tabla de Contenido 5 Tabla de Contenido 6 Tono de Tecla 14 Tono de Tecla 17 Tono Temporal 24 Transferencia de Llamada 28 V Volumen del Timbre 12 Volumen del Timbre 16 Índice ...

Страница 88: ...861 00024792 Rev 0 Dom E S 08 12 Impreso en China Thomson Inc 101 West 103rd St Indianapolis IN 46290 1102 2008 Thomson Inc Trademark s Registered Marca s Registrada s Visite el sitio de GE en www GE com phones ...

Отзывы: