background image

1. 

Open the shipping box.

2.  Remove packing and discard. Remove the loose items.
3.  Remove the System from the shipping container; 

       Note: may require two people.

4.  Place the Formula A & B boxes with the System; you will need a box cutter.  Set the depth of the blade to it’s shortest 

length.  You do not want to cut the Formula


 container inside the box.  Cut the tape very carefully around the outer 

rim of the lid holding it in place; remove the lid and discard. 

5.  Pull up on the formula cap. Twist to open, remove and discard.
6.  Find the plastic AB Formula cap with siphon tubes.
7.  Make sure you are connecting the correct AB Formula cap with siphon tube color to the correct box of Formula; 

VERY IMPORTANT!

8.  Screw the green cap with siphon tube onto the green Formula A box and screw the blue cap with siphon tube to the 

blue Formula B box.

9.  After placing the boxes on the bottom section of the metro rack, find the green and blue tubes.
10. Take the green tube and connect it to the AB Formula A box; Connect the blue tube to the AB Formula 

B box.  Push 

the color coordinated tubes into the locking connector which is in the middle of the cap.

11. Using the zip ties from the hardware kit, use them to attach the manifold by slipping the ties under two bars on the 

metro rack, around the manifold and through the zip tie locking device.  The manifold can be attached on the left or 

the right of the system. Use tube cutter to trim the excess part of the zip tie.

12. The connections for the ice machine, Global


out and feed water are all pre-plumbed.  Using the green tubing, connect 

one end into the feed in and cut the proper length to reach the source water to the system connection.  Push one 

end into the feed in line and the other end into the source feed connector.  

13. Measure the length needed in green tubing for the Global water out to the manifold.  Use the tube cutter to trim the 

tubing to fit and push on end into the Global out connection.  Connect the other end to the manifold “T” connector.

14. Use the remaining green tubing and connect one end into the ice machine connector.  Measure the length of tubing 

needed to reach the ice machine and trim to fit.  Connect the cut end to the ice machine.

15. 

Install is done. 

DO NOT TURN ON YELLOW SWITCH OR PERFORM START UP OF SYSTEM UNTIL TANK IS COMPLETELY 

FULL BY SOURCE FEED WATER.

16. Call for start up.  You can perform the Start-Up procedures.  Start-Ups can be performed by a Global technician or 

local plumbers.  Thank you for purchasing a AB Formulator.

Installation Instructions

DO NOT POWER UP


SYSTEM until 

TANK is filled with water Start-up has 

been performed.

!

CAUTION

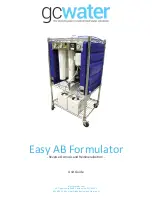
Easy AB Formulator - Unit Guide


Page 7

Содержание Easy Series

Страница 1: ...info gcwater com 20 Opportunity Road Camdenton MO 65020 805 484 1589 www GlobalCustomizedWater com Easy AB Formulator Reverse Osmosis and Remineralization Unit Guide...

Страница 2: ...R P O S ES W I T H O U T S P EC I F I C W R I T T E N P E R M I S S I O N F RO M G LO BA L C U STO M I Z E D WAT E R Table of Contents Troubleshooting Guide Routine System Check Guide Production Rate...

Страница 3: ...footprint as many Global Reverse Osmosis RO systems a Global standard known to many industries OPERATING PARAMETERS Open Flow Rate 4 5 GPM 17 034 LPM Service Flow Rate 3 GPM 1 4 LPM Storage Tank Capac...

Страница 4: ...th the air gap device and back flow device are not supplied as part of the unit These devices are available through your standard plumbing supply house Alternate Bypass If preferred owner installer is...

Страница 5: ...R CITY WATER Easy Series AB Formulator from Global shown above FROM MANIFOLD TO ICE MACHINE TO ESPRESSO BREWER WALL WALL Back Flow Device TO Water Heater TO ICE MACHINE SOFT HARD WATER TO ESPRESSO BRE...

Страница 6: ...In Casters D AB Formula Caps with Siphon Tubes E 3 8 Blue Tubing F Elbow Connectors G Espresso Connectors 35 ft of 3 8 Tubing provided D J AB Formulator on Metro Rack K Tube Cutter J C E F H I K List...

Страница 7: ...e ties under two bars on the metro rack around the manifold and through the zip tie locking device The manifold can be attached on the left or the right of the system Use tube cutter to trim the exces...

Страница 8: ...g up the notches 7 Now the system is ready for you to turn on the water to the system Open the city feed to system Double check the A B Formula box connections It will take about 20 30 minutes to fill...

Страница 9: ...up System pressure gauge should go up to 60 psi 12 Verify that there are no leaks Filter change is now complete Emergency Bypass In some emergency situations it will be necessary to put the unit into...

Страница 10: ...Turn yellow lever on top not front of Easy System from normal mode to test mode Note water should immediately start to flow out of black 1 4 tube 4 Place the black tube into the 500 ml graduated cyli...

Страница 11: ...o bypass Emergency situations which require putting the bypass handle into the bypass position turning the bypass handle yellow handle to point towards the word bypass are 1 System pressure gauge read...

Страница 12: ...brew coffee during troubleshooting procedures equipment damage may result Y STEP INSTRUCTIONS Step 1 Step 1 Check the system pressure gauge reading If the pressure reading is normal 35 60 psi then the...

Страница 13: ...System Service Log Record DATE PRE FILTER POST FILTER MEMBRANE CLEANING OTHER TECH NAME START UP START UP TDS INCOMING DATE BY PPM PSI Easy AB Formulator Unit Guide Page 13...

Страница 14: ...s recommendations and applicable state and local codes The Global Customized Water Limited Warranty extends to the original purchaser of the system This warranty covers all parts and factory labor nee...

Страница 15: ...accompanies the system Neglect improper maintenance abuse or unapproved modifications may invalidate the Warranty Should your unit develop a defect or otherwise fail to perform in accordance with this...

Отзывы: