background image

CHAPITRE 5 : Gestion de l’alimentation

52

Contrôle de la charge de la 

batterie

Votre nouvel ordinateur portable est conçu pour offrir 

un équilibre exceptionnel entre rendement et 

portabilité. Il utilise les plus récentes technologies de 

jeu de puces et de processeur mobile pour gérer la 

consommation et la vitesse du processeur et prolonger 

ainsi la durée de la batterie. Cette conception vous 

offre un rendement maximum en cas de branchement 

sur l’alimentation c.a., ainsi qu’une durée optimale de 

la batterie en cas d’alimentation par batterie.
Contrôlez étroitement la charge de la batterie. 

Lorsque sa charge s’affaiblit, remplacez la batterie ou 

connectez-la immédiatement à l’alimentation c.a. 

pour éviter de perdre tout travail non enregistré. Pour 

contrôler la charge de la batterie :

Placez le pointeur de la souris au-dessus de l’icône 

du cordon d’alimentation

 ou sur l’icône de la 

batterie

 dans la barre des tâches. Un message 

apparaît et montre le temps de batterie restant et 

le mode d’alimentation actuel.

Attendez l’apparition d’un message 

d’avertissement Batterie faible.

Observez le voyant de charge de la batterie.
Si le voyant de charge de la batterie affiche ce 

qui semble être une charge non appropriée, vous 

devez peut-être recalibrer la batterie.

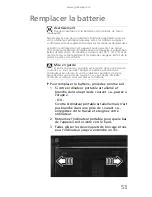
Recharge de la batterie

La batterie se recharge lorsqu’elle est installée et que 

votre ordinateur portable est connecté à 

l’alimentation c.a. Pendant que la batterie se recharge, 

le voyant de charge de la batterie s’illumine.

Astuce

Pour obtenir plus d’informations sur le voyant d’état de 

charge de la batterie, consultez 

“Avant” à la page 6

.

Содержание NV-40

Страница 1: ...NOTEBOOK REFERENCEGUIDE ...

Страница 2: ......

Страница 3: ...anel 12 Chapter 3 Setting Up and Getting Started 13 Working safely and comfortably 14 Reducing eye strain 14 Setting up your computer desk and chair 15 Sitting at your notebook 15 Avoiding discomfort and injury from repetitive strain 16 Connecting the AC adapter 16 Protecting from power source problems 18 Connecting to a broadband modem or network 18 Connecting the optional dial up modem 19 Starti...

Страница 4: ...ive 41 Using the memory card reader 43 Memory card types 43 Inserting a memory card 43 Using a memory card 44 Removing a memory card 44 Installing a printer or other peripheral device 44 Connecting a USB device 45 Viewing the display on a projector monitor or television 46 Adjusting the display properties 48 Using the projector or monitor for a presentation 49 Chapter 5 Managing Power 51 Monitorin...

Страница 5: ...otebook 70 Cleaning your notebook 70 Cleaning the exterior 71 Cleaning the keyboard 71 Cleaning the notebook screen 72 Maintaining the battery 72 Storing batteries 73 Cleaning CDs or DVDs 73 Recovering your system 74 Creating recovery discs 75 Recovering pre installed software and drivers 77 Returning to a previous system condition 78 Returning your system to its factory condition 80 Chapter 8 Tro...

Страница 6: ...Memory card reader 97 Modem cable or DSL 97 Modem dial up 97 Mouse 101 Networks wired 102 Networks wireless 104 Passwords 106 Power 107 Printer 107 Sound 109 Status indicators 109 Touchpad 110 Video 110 Telephone support 110 Before calling Gateway Customer Care 110 Appendix A Legal Information 113 Index 125 ...

Страница 7: ...CHAPTER1 1 About This Reference About this guide Accessing your online User Guide Gateway contact information Microsoft Certificate of Authenticity For more information ...

Страница 8: ...n included on your hard drive Your User Guide is an in depth easy to read manual that includes information on the following topics Help and technical support Using and customizing Windows and other software Using the Internet Protecting your files Playing and recording media Networking To access your online User Guide Click Start All Programs then click Gateway Documentation Gateway contact inform...

Страница 9: ...Authenticity label found on the bottom of your notebook includes the product key code for your operating system For more information For more information about your notebook visit Gateway s Support page at www gateway com or the Web address shown on your notebook s label The Support page also has links to additional Gateway documentation and detailed specifications Important The label shown in thi...

Страница 10: ...CHAPTER 1 About This Reference 4 ...

Страница 11: ...CHAPTER2 5 Checking Out Your Notebook Front Left Right Back Bottom Keyboard area LCD panel ...

Страница 12: ...ture Card cards Ventilation fan Helps cool internal components Warning Do not work with the notebook resting on your lap If the air vents are blocked the notebook may become hot enough to harm your skin Caution Do not block or insert objects into these slots If these slots are blocked your notebook may overheat resulting in unexpected shutdown or permanent damage to the notebook Caution Provide ad...

Страница 13: ...round your notebook so air vents are not obstructed Do not use the notebook on a bed sofa rug or other similar surface Monitor port Plug an analog VGA monitor or projector into this port For more information see Viewing the display on a projector monitor or television on page 46 Ethernet jack Plug an Ethernet network cable into this jack Plug the other end of the cable into a cable modem DSL modem...

Страница 14: ...e 46 Component Icon Description DVD drive Insert CDs or DVDs into this drive For more information see Using the DVD drive on page 40 To determine the type of drive in your notebook examine the drive tray s plastic cover and compare the logo to those listed in Identifying drive types on page 40 USB port Plug a USB device such as a diskette drive flash drive printer scanner camera keyboard or mouse ...

Страница 15: ...tional Plug a dial up modem cable into this optional jack For more information see Connecting the optional dial up modem on page 19 Power connector Plug the AC adapter cable into this connector Modem jack optional Power connector Battery Ventilation slots and cooling fan Battery Battery latch Battery lock Memory Hard drive bay MicroPCI bay ...

Страница 16: ... are located in this bay Hard drive bay The hard drive is located in this bay Ventilation slots and cooling fan Helps cool internal components Warning Do not work with the notebook resting on your lap If the air vents are blocked the notebook may become hot enough to harm your skin Caution Do not block or insert objects into these slots If these slots are blocked your notebook may overheat resulti...

Страница 17: ...l sized computer keyboard For more information see Using the keyboard on page 25 Power indicator LED on Notebook is on LED blinking Notebook is in Sleep or Hybrid Sleep mode LED off Notebook is off Battery charge indicator LED orange Battery is fully charged LED blinking orange Battery is charging LED blinking red Battery charge is very low LED solid red Battery is malfunctioning Important This LE...

Страница 18: ...access capacitive touch key function For more information see Using the capacitive touch keys on page 32 Component Icon Description Webcam Use to let others see who they are communicating with when making VoIP calls For more information see Using the webcam on page 34 Microphone Use to talk through when making Voice over Internet Protocol VoIP calls Component Icon Description Webcam Microphone ...

Страница 19: ... broadband modem or network Connecting the optional dial up modem Starting your notebook Turning off your notebook Restarting rebooting your notebook Using the status indicators Using the keyboard Using the EZ Pad touchpad Using the capacitive touch keys Using the webcam Adjusting the brightness Adjusting the volume ...

Страница 20: ...a Soft surfaces can block your notebook s ventilation openings leading to overheating permanent damage to your notebook and fire danger Instead place your notebook on a rigid hard surface and make sure that you keep the ventilation openings on the sides clear Reducing eye strain Sunlight or bright indoor lighting should not reflect on the screen or shine directly into your eyes Position the comput...

Страница 21: ...r using an adjustable chair to control your arm s height above the keyboard Use an adjustable chair that is comfortable distributes your weight evenly and keeps your body relaxed Position your chair so the keyboard is at or slightly below the level of your elbow This position lets your shoulders relax while you type Adjust the chair height adjust the forward tilt of the seat or use a footrest to d...

Страница 22: ... to disassemble the AC adapter The AC adapter has no user replaceable or user serviceable parts inside The AC adapter has dangerous voltages that can cause serious injury or death Contact Gateway about returning defective AC adapters Caution Make sure that you use the AC adapter that came with your notebook or one of the same type purchased from Gateway Replace the power cord if it becomes damaged...

Страница 23: ...ge indicator turns on see Front on page 6 for the location of the battery charge indicator If the battery charge indicator does not turn on complete the following steps until it turns on Unplug the adapter from your notebook then plug it back in Press FN F1 to toggle the status lights on and off Make sure the power cord is firmly attached to the AC adapter Plug the power cord into a different wall...

Страница 24: ...notebook Connecting to a broadband modem or network Your notebook has a network jack that you can use to connect to a cable or DSL modem or to a wired Ethernet network Important If the battery charge indicator does not turn blue after three hours contact Gateway Customer Care at the location shown on the Customer Care label For more information see Gateway contact information on page 2 Warning Hig...

Страница 25: ...t network jack Connecting the optional dial up modem Your notebook may have a built in 56K modem that you can use to connect to a standard telephone line Tip When using a cable with a sleeve over the plug pull the sleeve back to make sure that the plug locks into the jack Warning To reduce the risk of fire use only No 26 AWG or larger for example No 24 AWG UL listed or CSA certified telecommunicat...

Страница 26: ...0 To connect the optional modem 1 Insert one end of the modem cable into the modem jack on your notebook 2 Insert the other end of the modem cable into a telephone wall jack Important The modem will not work with digital or PBX telephone lines ...

Страница 27: ...ge and time zone and to create your first user account Warning Do not work with the notebook resting on your lap If the air vents are blocked the notebook may become hot enough to harm your skin Caution Provide adequate space around your notebook so air vents are not obstructed Do not use the notebook on a bed sofa rug or other similar surface Tip For more information about changing the power butt...

Страница 28: ...own your notebook Although it does not turn your notebook completely off it turns off or slows down most system operations to save power Sleep mode saves your desktop layout so the next time you restore power the programs are laid out just as you left them Waking your notebook from a Sleep state is much faster than turning on your notebook after it has been turned completely off Hibernate mode is ...

Страница 29: ...o close programs that are not responding If closing unresponsive programs does not restore your notebook to normal operation you may have to restart reboot your notebook To close unresponsive programs on your notebook 1 Press CTRL ALT DEL 2 Click Start Task Manager The Windows Task Manager dialog box opens 3 Click the program that is not responding 4 Click End Task 5 Click X in the top right corne...

Страница 30: ...ff 1 Press and hold the power button for about five seconds then release it 2 Unplug the power cord and remove the battery for more than 10 seconds Important If none of the indicators are on you may need to press FN F1 to toggle the status indicators on Indicator Icon Description Power indicator LED on Notebook is on LED blinking Notebook is in Sleep or Hybrid Sleep mode LED off Notebook is off Ba...

Страница 31: ...eric keypad Caps lock LED on Caps lock is turned on LED off Caps lock is turned off Num lock LED on Num lock is turned on LED off Num lock is turned off Bluetooth LED on Bluetooth communication is turned on LED off Bluetooth communication is turned off Tip You can attach an external keyboard to the notebook using a USB port You do not need to shut down the notebook to connect a USB keyboard Indica...

Страница 32: ...ombination with the FN key to perform specific actions For more information see System key combinations on page 27 Navigation keys Press these keys to move the cursor to the beginning of a line to the end of a line up the page down the page to the beginning of a document or to the end of a document FN key Press the FN key in combination with a colored system key to perform a specific action Window...

Страница 33: ...ojector must be plugged into the monitor port or HDMI port on your notebook Both displays at the same time For more information see Viewing the display on a projector monitor or television on page 46 Turn the optional Bluetooth radio on or off Warning Radio frequency wireless communication can interfere with equipment on commercial aircraft Current aviation regulations require wireless devices to ...

Страница 34: ... backlight off to save power Press any key to return Play Pause Plays or pauses the CD or DVD Stop Stops playing the CD or DVD Previous Skips back one CD track or DVD chapter Next Skips ahead one CD track or DVD chapter Press and hold FN then press this system key To F8 ...

Страница 35: ...d two buttons and a scroll zone When you move your finger on the touchpad the pointer arrow on the screen moves in the same direction You can use the scroll zone to scroll through documents Use of the scroll zone may vary from program to program Left button Right button Touchpad ...

Страница 36: ...have received your notebook with the EZ Pad touchpad set to only accept clicking by using the touchpad buttons You can change this feature to allow tapping on the touchpad to simulate clicking the left button For more information see Changing the mouse touchpad or pointing device settings in your online User Guide To Do this Move the pointer on the screen Move your finger around on the touchpad If...

Страница 37: ... information about an object on the screen Position the pointer over the object Quickly press and release the right button once This action is called right clicking Move an object on the screen Position the pointer over the object Press the left button and hold it down then use the touchpad to move drag the object to theappropriate part of the screen Release the button to drop the object where you...

Страница 38: ... to return to your previous settings only for certain models Programmable key the programmable key will run the Launch Manager you can assign an application as your needed only for certain models MyBackup key launch Gateway MyBackup solution The Gateway MyBackup solution is a simple three step process that allows you to create backup copies of your entire system or selected files and folders accor...

Страница 39: ...vices to be turned off while traveling in an airplane IEEE 802 11 communication devices are examples of devices that provide wireless communication Touchpad toggle turn the internal touchpad on and off Mute mutes the sound Press again to restore the sound For more information see Adjusting the volume on page 35 Decrease volume press to decrease volume For more information see Adjusting the volume ...

Страница 40: ...he brightness To adjust screen brightness Use the increase brightness and decrease brightness keys on the keyboard For more information see System key combinations on page 27 OR Click Start All Programs Accessories then click Windows Mobility Center The Windows Mobility Center window opens Slide the Brightness control to the desired screen brightness Tip For more information about the Windows Mobi...

Страница 41: ...nd capacitive volume control on the capacitive touch key For more information see Using the capacitive touch keys on page 32 OR Click Start All Programs Accessories then click Windows Mobility Center The Windows Mobility Center window opens Slide the Volume control to the desired volume level To adjust the volume from Windows 1 Click Volume on the taskbar The volume control slider opens 2 Click an...

Страница 42: ...volume levels click Mixer The Volume Mixer dialog box opens where you can click and drag sliders for individual devices 5 Click X in the top right corner of the window to close it Tip Adjust the Windows Sounds slider to change system sounds volume independently of general volume such as the volume used for music and game sounds ...

Страница 43: ...eless communication can interfere with equipment on commercial aircraft Current aviation regulations require wireless devices to be turned off while traveling in an airplane IEEE 802 11 and Bluetooth communication devices are examples of devices that provide wireless communication Warning In environments where the risk of interference to other devices or services is harmful or perceived as harmful...

Страница 44: ...player headphone keyboard or mouse To turn the Bluetooth radio on Press FN F6 To turn the Bluetooth radio off Press FN F6 Disabling the Bluetooth radio You should disable the Bluetooth radio while traveling by airplane to prevent it from being accidently turned on while in flight Tip For more information about using your notebook on a Bluetooth Personal Area Network see Bluetooth Networking in you...

Страница 45: ...CHAPTER4 39 Using Drives and Accessories Using the DVD drive Using the memory card reader Installing a printer or other peripheral device Viewing the display on a projector monitor or television ...

Страница 46: ... front of the drive for one or more of the following logos If your drive has this logo This is your drive type Use your drive for DVD drive Installing programs playing audio CDs playing DVDs and accessing data You cannot use this drive to create CDs or DVDs Combination DVD CD RW drive Installing programs playing audio CDs playing DVDs accessing data and recording music and data to recordable CDs Y...

Страница 47: ...mportant Prerecorded DVD discs and DVD drives contain regional codes that help control DVD title exports and help reduce illegal disc distribution To be able to play a prerecorded DVD the disc s regional code and your DVD drive s regional code must match The regional code on your DVD drive is determined by your notebook s delivery address The regional code for the United States and Canada is 1 The...

Страница 48: ...en press down carefully on the disc until it snaps into place 3 Push the tray in until it is closed To remove a CD or DVD 1 Press the eject button on the DVD drive After the tray opens slightly pull the disc tray completely open 2 Carefully lift on the edges of the disc until it snaps off of the spindle 3 Push the tray in until it is closed Tip For information about cleaning a CD or DVD see Cleani...

Страница 49: ...rd types The memory card reader supports Memory Stick Memory Stick Pro MultiMediaCard Secure Digital and xD Picture Card Inserting a memory card To insert a memory card Insert the memory card into the memory card slot with the label facing up and the arrow on the label pointing towards the notebook Tip Your notebook must be turned on to remove CDs and DVDs using this method If you do not want to t...

Страница 50: ...upport plug and play and hot swapping which means that your notebook will usually recognize such a device whenever you plug it into the appropriate port When you use a USB device for the first time your notebook will prompt you to install any software the device needs After doing this you can disconnect and reconnect the device at any time Important Do not use the remove hardware icon in the taskb...

Страница 51: ...e To connect your USB device to your notebook 1 Connect one end of the USB cable to your device 2 Connect the other end of the cable to a USB port on your notebook Important USB devices may have special installation instructions See your USB device s installation guide Important For more information about using the USB port on your device see your device s documentation ...

Страница 52: ...Your notebook supports simultaneous LCD and external display Simultaneous display lets you control a presentation from your notebook at the same time as you face your audience To use a projector monitor or television 1 Turn off your notebook 2 If you are using the VGA port connect one end of the VGA cable to the monitor projector or television OR If you are using the HDMI port connect one end of t...

Страница 53: ... cable into the optional HDMI port on your notebook 4 Turn on your notebook 5 Plug the projector s monitor s or television s power cord into an AC power source and turn it on Windows recognizes the new hardware and the New Display Detected dialog box opens 6 Select the options for the projector monitor or television then click OK ...

Страница 54: ...ou want to use the display as an extension of your notebook desktop you should adjust the display properties To adjust the display properties on a projector monitor or television 1 Click Start All Programs Accessories then click Windows Mobility Center The Windows Mobility Center window opens Important If a monitor projector or television is connected and you close the LCD panel your notebook may ...

Страница 55: ...k box for Extend my Windows desktop onto this monitor 6 To use the monitor projector or television as an extension of your desktop increasing the size of your Windows desktop click to select the check box for Extend my Windows desktop onto this monitor You can click and drag the 2 monitor icon to position it the same way the physical monitor is arranged on your desk 7 Click OK Using the projector ...

Страница 56: ...entation settings The Presentation Settings dialog box opens 3 Adjust properties such as Turn off screen saver and Set the volume to if necessary 4 Click OK 5 Click Turn on to turn on the presentation settings When you are finished giving the presentation click Turn off to return to your standard notebook settings Tip For more information about the Windows Mobility Center see Using the Windows Mob...

Страница 57: ...CHAPTER5 51 Managing Power Monitoring the battery charge Recharging the battery Changing batteries Extending battery life Changing notebook power settings ...

Страница 58: ...attery or connect to AC power immediately to prevent losing any unsaved work To monitor the battery charge Move the mouse pointer over the power cord icon or battery icon in the taskbar A message appears showing the remaining battery time and the current power plan Wait for a Low Battery warning message to appear Look at the battery charge status indicator If your battery charge indicator displays...

Страница 59: ...ry is incorrectly replaced Replace only with a battery specifically manufactured for your Gateway notebook Discard used batteries according to local hazardous material regulations The batteries used in this device may present a fire or chemical burn hazard if mishandled Do not disassemble heat above 212 F 100 C or incinerate Dispose of used batteries promptly Keep away from children Caution If you...

Страница 60: ...use to let it reach its maximum rated capacity Over the long term use the battery at least once a month even if it was kept in a cool dry place for storage but avoid frequent full discharges because this puts additional strain on the battery Several partial discharges with frequent recharges are better for a lithium ion battery than one complete discharge and recharging a partially charged lithium...

Страница 61: ...ouse Decrease or mute speaker volume Turn off all scheduled tasks Turn off auto save features in Microsoft Office and other applications Copy programs from CDs or DVDs to the hard drive so you do not use battery power by running optical drives Use the DVD drive only when necessary This drive uses a large amount of power Recharge the battery often take an extra battery and fully recharge the batter...

Страница 62: ...ower receptacle an automobile power outlet or an automobile cigarette lighter use an airplane automobile power adapter or power inverter Save the battery for times when you cannot use a power adapter To find AC power outlets in airports look for them next to support pillars in large areas such as boarding gates and under banks of telephones Changing power modes You can use the following power mode...

Страница 63: ...ok reads the memory information from the hard drive and opens the programs and documents that were open when you activated Hybrid Sleep mode If the notebook does not experience a power outage while in Hybrid Sleep mode it restarts using the information in current memory thus reducing startup time You must turn on Hybrid Sleep mode to use it For more information see Changing advanced settings on pa...

Страница 64: ... You can select one of the defined power plans or create a custom power plan Three power plans are pre defined for you Balanced This is the default power plan which balances performance and battery life Power saver This power plan sacrifices performance in order to extend battery life Use this plan if you will be away from AC power outlets for an extended period of time Your programs may run slowe...

Страница 65: ...wer plan 1 Click Start All Programs Accessories then click Windows Mobility Center The Windows Mobility Center window opens 2 Click Change power settings The Select a power plan window opens 3 Select the power plan you want to use OR Click Change plan settings modify the power plan you selected then click Save changes Help For more information about changing the power plan click Start then click H...

Страница 66: ...Select a power plan window opens 3 Click a setting on the left side of the screen that you want to change The top three settings are not tied to a power plan The bottom two settings modify the currently selected power plan To turn on Hybrid Sleep mode 1 On the Select a power plan window click Change plan settings for the plan you are using The Change settings for the plan window opens 2 Click Chan...

Страница 67: ...then click the in front of Allow hybrid sleep 4 Change the values to On for On battery and Plugged in Help For more information about hybrid sleep click Start then click Help and Support Type the keyword hybrid in the Search Help box then press ENTER ...

Страница 68: ...CHAPTER 5 Managing Power 62 ...

Страница 69: ...CHAPTER6 63 Traveling with Your Notebook Packing your notebook Traveling by air Dial up modem Radio frequency wireless connections Security Power Additional tips ...

Страница 70: ...o start your notebook Have your notebook hand inspected or sent through the X ray scanner but never carry it through the metal detector Turn off you notebook for takeoff and landing Turn off all wireless devices while in the aircraft Dial up modem Take a telephone cord to connect the modem to telephone jacks If you are traveling internationally take telephone jack adapters or an acoustic handset c...

Страница 71: ...tion can interfere with equipment on commercial aircraft Current aviation regulations require wireless devices to be turned off while traveling in an airplane IEEE 802 11 and Bluetooth communication devices are examples of devices which use wireless to communicate Important If your notebook came equipped with an internal embedded wireless device see Legal Information on page 113 for general wirele...

Страница 72: ...s until you can be sure of privacy Use a startup password to restrict access to your notebook The startup password is set using the BIOS utility To create a startup password 1 Restart your notebook As soon as you see a startup screen press F2 The BIOS Setup utility opens 2 Open the Security menu highlight Set Supervisor Password then press ENTER and follow the instructions You must set the supervi...

Страница 73: ...nationally take power plug adapters Take a portable surge protector to protect your notebook from power surges To get the best performance from your notebook avoid using the battery whenever possible monitor the battery charge and use the most efficient power management settings For information on conserving battery power using alternate power sources and monitoring the battery charge see Managing...

Страница 74: ... notebook has been exposed to cold temperatures let it warm to room temperature before turning it on Carry proof of ownership or a merchandise passport when traveling internationally Consult your insurance company and credit card company to learn about emergency travel assistance if your notebook is lost or damaged Take your recovery discs in case you need to install an additional driver or softwa...

Страница 75: ...CHAPTER7 69 Maintaining Your Notebook Caring for your notebook Cleaning your notebook Maintaining the battery Cleaning CDs or DVDs Recovering your system ...

Страница 76: ...ither extreme is not covered by your warranty As a general rule your notebook is safest at temperatures that are comfortable for you Keep all liquids away from your notebook When spilled onto notebook components almost any liquid can result in expensive repairs that are not covered under a standard warranty Avoid dusty or dirty work environments Dust and dirt can clog the internal mechanisms and c...

Страница 77: ...pt to clean dust from the inside of your notebook with the exception of the memory bay Cleaning the keyboard You should clean the keyboard occasionally by using an aerosol can of air with a narrow straw like extension to remove dust and lint trapped under the keys If you spill liquid on the keyboard turn off your notebook and turn the notebook upside down Let the liquid drain then let the keyboard...

Страница 78: ... but do not try to fully discharge the battery frequently This only adds strain Several partial discharges regular use with frequent recharges are better for lithium ion than one total discharge Recharging a partially charged lithium ion battery does not cause any harm because it has no memory Batteries with fuel gauges notebooks should be calibrated by applying a deliberate full discharge once ev...

Страница 79: ... old stock even if it is sold at clearance prices While it makes sense to have 2 or 3 extra batteries so that you always have a fresh one charged up and ready to go if you buy batteries and store them for years they may not work when you decide to use them Consider removing the battery from your notebook when running on fixed power However remember that when you have removed the battery from your ...

Страница 80: ... recover software and drivers that were pre installed at the factory see Recovering pre installed software and drivers on page 77 For instructions on reinstalling software and drivers that were not pre installed see that product s documentation or technical support Web site 3 Revert to a previous system condition If reinstalling software or drivers does not help then the problem may be solved by r...

Страница 81: ...recovery discs 1 Click Start All Programs Gateway then click Gateway Recovery Management Gateway Recovery Management opens 2 To create recovery discs for the hard drive s entire original contents including Windows Vista and all factory loaded software and drivers click Create factory default disc OR To create recovery discs for only the factory loaded software and drivers click Create driver and a...

Страница 82: ...he drive indicated in the Burn to list then click Next The first disc begins recording and you can watch its progress on the screen When the disc finishes recording the drive ejects it 4 Remove the disc from the drive and mark it with a permanent marker 5 If multiple discs are required insert a new disc when prompted then click OK Continue recording discs until the process is complete Important Wr...

Страница 83: ...lation instructions New device drivers If you need to recover device drivers that did not come pre installed on your computer follow the instructions provided with the device To recover your pre installed software and drivers 1 Click Start All Programs Gateway then click Gateway Recovery Management Gateway Recovery Management opens OR If you are recovering from your driver and application recovery...

Страница 84: ...System Restore periodically takes snapshots of your system settings and saves them as restore points In most cases of hard to resolve software problems you can return to one of these restore points to get your system running again Windows automatically creates an additional restore point each day and also each time you install software or device drivers Help For more information about using Micros...

Страница 85: ... On the left side of the window click Repair Windows using System Restore then click Next The Choose a restore point dialog box opens 3 Click the restore point you want click Next then click Finish A confirmation message box appears 4 Click Yes Your system is restored using the restore point you specified This process may take several minutes and may restart your computer ...

Страница 86: ...e 81 If you cannot run Windows Vista and your original hard drive has been completely re formatted or you have installed a replacement hard drive see Recovering from your recovery discs on page 82 Recovering from within Windows Vista To reinstall Windows Vista and all pre installed software and drivers 1 Click Start All Programs Gateway then click Gateway Recovery Management Gateway Recovery Manag...

Страница 87: ... computer 5 Click OK Your computer restarts 6 Follow the on screen prompts for first time system setup Recovering from the hard drive during startup To reinstall Windows Vista and all pre installed software and drivers 1 Turn on your computer then press ALT F10 during startup Gateway Recovery Management opens 2 Click Completely Restore System to Factory Defaults 3 Click Next to continue Your hard ...

Страница 88: ...boot menu The boot menu is where you can select which device to start from such as the hard drive or an optical disc 3 Use your arrow keys to select CDROM DVD then press ENTER Windows installs from the recovery disc you inserted 4 Insert the second recovery disc when prompted then follow the on screen prompts to complete the recovery Caution Before using your recovery discs open the BIOS setup uti...

Страница 89: ...CHAPTER8 83 Troubleshooting Safety guidelines First steps Troubleshooting Telephone support ...

Страница 90: ... replace the battery before you start your notebook First steps If you have problems with your notebook try these things first Make sure that the AC power adapter is connected to your notebook and an AC outlet and that the AC outlet is supplying power Make sure that the power cord is firmly connected to the AC power adapter If you use a power strip or surge protector make sure that it is turned on...

Страница 91: ...down the exact message The message may help Gateway Customer Care in diagnosing and fixing the problem If you added or removed peripheral devices review the installation procedures you performed and make sure that you followed each instruction If an error occurs in a program see the program s printed documentation or the online help Troubleshooting Troubleshooting topics are listed in alphabetical...

Страница 92: ...nnot be read by the diskette drive You see a Disk is full error message Delete unnecessary files on the diskette Try a different diskette Occasionally diskettes are flawed and cannot be read by the diskette drive Run Error checking on the diskette If errors are detected and corrected try using the diskette again For instructions on running Error checking see Checking the hard drive for errors in y...

Страница 93: ...splay settings For instructions on changing the display settings see Changing screen settings in your online User Guide Move your notebook away from sources of electrical interference such as televisions unshielded speakers microwaves fluorescent lights and metal beams or shelves The display has pixels that are always dark or too bright This condition is normal and inherent in the TFT technology u...

Страница 94: ...not be able to play these CDs on your notebook Your notebook may be experiencing some temporary memory problems Shut down and restart your notebook Clean the disc For more information see Cleaning CDs or DVDs on page 73 An audio CD does not produce sound Make sure that the CD label is facing up then try again Some music CDs have copy protection software You may not be able to play these CDs on you...

Страница 95: ...n and restart your notebook Clean the DVD For more information see Cleaning CDs or DVDs on page 73 Make sure that the disc s regional code and your DVD drive s regional code match Make sure that a DVD player program has been installed on your notebook For instructions on playing a DVD see Playing music and movies in your online User Guide A DVD does not produce sound on a television Audio is trans...

Страница 96: ...dia then delete them from the hard drive You see a Data error message This may be the result of a defective area on the hard drive To fix hard drive problems run the Error checking program For instructions on fixing hard drive problems see Checking the hard drive for errors in your online User Guide Caution If a file was deleted while holding down the SHIFT key or if the Recycle Bin has been empti...

Страница 97: ...e optional modem jack and not the Ethernet network jack For the location of your modem jack see Back on page 9 OR If you are using a cable or DSL modem make sure that the modem cable is plugged into the Ethernet network jack and not the optional modem jack For the location of your network jack see Left on page 7 Make sure that you do not have a problem with your modem For more information see Mode...

Страница 98: ...r residence or at your local telephone service The condition of the Internet computers to which you connect and the number of users accessing those computers The complexity of graphics and multimedia on Web pages Having multiple Web browsers open performing multiple downloads and having multiple programs open on your notebook People are sending you e mail messages but you have not received any mai...

Страница 99: ...dries you may need to replace it Media Center This section only covers problems relating to Media Center mode Media Center mode is available only on Windows Vista Home Premium and Windows Vista Ultimate versions To view Media Center troubleshooting information that is not covered in this section go to the Gateway support Web Site at www gateway com The Media Center video display looks bad on your ...

Страница 100: ...ct type of video cables can cause problems and affect the video quality Gateway recommends using high quality video cables that can be purchased from Gateway Screen resolution By default the notebook uses a screen resolution optimized for the LCD screen Many older TVs cannot display this high of a resolution and may shift scramble or scroll the picture For a better picture on a TV display you may ...

Страница 101: ...ill most likely flicker when displaying thin lines and small text An interlaced video display device will produce a lower quality display especially when viewing and using the notebook functions Progressive scan video displays a video frame with one pass of sequential scan lines A progressive scan TV displays the entire picture drawn sequentially from top to bottom without the odd even interlacing...

Страница 102: ...r Windows XP with Service Pack SP 1 or 2 Windows Media Player 9 or later and the Windows patch Q810243 Update You want to know whether you can play recorded videos on your home DVD player Yes you can DVDs recorded with the Media Center can be played on a home DVD player Memory You see a Memory error message Make sure that the memory module is inserted correctly in the memory bay slot Use the Memor...

Страница 103: ... Ethernet network jack and not the optional modem jack For the location of your network jack see Left on page 7 See the documentation that came with your modem for additional troubleshooting information Modem dial up Your modem does not dial or does not connect Make sure that the modem cable is plugged into the optional modem jack and not the Ethernet network jack For the location of your modem ja...

Страница 104: ...ce to get the correct code to temporarily disable the service Also make sure that the modem dialing properties are set appropriately To check the dialing properties 1 Click Start then click Control Panel The Control Panel window opens 2 Click Hardware and Sound 3 Click the Phone and Modem Options The Phone and Modem Options dialog box opens 4 Click the Dialing Rules tab 5 Click the location from w...

Страница 105: ...makes a difference Make sure that the connectors are free from corrosion and all screws in the wall or telephone wall jack are secure You can also call your telephone service and have the telephone line checked for noise or low line levels Try another telephone line either a different telephone number in your house or a telephone line at a different location If you can connect on this line call yo...

Страница 106: ...not recognized by your notebook Make sure that the line connected to the modem is working and plugged into the appropriate port on your notebook For the location of your optional modem jack see Back on page 9 If the modem shares the telephone line with another device make sure that the telephone line is not in use for example someone is on the telephone or another modem is in use Use a different m...

Страница 107: ...ay hear unusual handshaking sounds when the modems first connect If the handshaking sounds are too loud you can turn down the modem volume To turn down the modem volume 1 Click Start then click Control Panel The Control Panel window opens 2 Click Hardware and Sound 3 Click Phone and Modem Options The Phone and Modem Options dialog box opens 4 Click the Modems tab 5 Click the modem you want to adju...

Страница 108: ... plugged into a powered electrical outlet and turned on Make sure that the router is plugged into a powered electrical outlet and turned on Most routers have lights that indicate they are working For more information see the documentation that came with your router Make sure that all computers on your network have the same workgroup name Make sure that all computers are using the same Subnet Mask ...

Страница 109: ...on between your Internet Service Provider and your modem and between your modem and your access point If you previously accessed the Internet through a dial up modem Internet Explorer may not be set up to access the Internet through a network Remove the dial up connection in the Internet Options in Internet Explorer You cannot connect to your home network If your notebook is a member of a domain a...

Страница 110: ...xpect you should check your network signal strength If you find the signal strength is low try moving to a new location to increase the signal strength To check the signal strength 1 Click Start right click Network then click Properties The Network and Sharing Center window opens 2 Click View status for the network connection The Wireless Network Connection Status dialog box opens The meter shows ...

Страница 111: ... wireless utility You may want to try entering ANY as the SSID which will make the computer try to auto detect the network Your wireless network is listed as a preferred network but it has an x on it An x means your preferred network is not currently available or you are not currently in range to connect Internet Explorer is unable to access the Internet Reset the power on your cable or DSL modem ...

Страница 112: ...you may not be able to connect your notebook to your home network workgroup to access shared files or printers on your home network You may however be able to access the Internet through your home network Passwords Your notebook does not accept your password Make sure that CAPS LOCK and NUM LOCK are turned off then retype the password You forgot your startup password The password feature which is ...

Страница 113: ...k is not working on battery power Check the power management settings For more information about using power management settings see Changing notebook power settings on page 58 Make sure that the battery is installed correctly For instructions on inserting your battery see Changing batteries on page 53 Make sure that the battery is fully recharged For more information about recharging the battery ...

Страница 114: ...e If the printer you want to print to is not the default printer make sure that you have selected it in the printer setup To set a default printer 1 Click Start then click Control Panel The Control Panel window opens 2 Click Hardware and Sound 3 Click Printers 4 Right click the name of the printer you want to be the default printer then click Set as Default Printer Reinstall the printer driver See...

Страница 115: ...adding paper Sound You are not getting sound from the built in speakers Make sure that headphones are not plugged into the headphone jack Make sure that the volume control on your notebook is turned up For more information about using your volume control see Adjusting the volume on page 35 Make sure that the Windows volume control is turned up For instructions on how to adjust the volume control i...

Страница 116: ... Adjust the touchpad settings For instructions on how to adjust the touchpad settings see Changing mouse touchpad or pointing device settings in your online User Guide Video The projector monitor or television is not working Make sure that you have pressed FN F4 to activate the external monitor option Make sure that the monitor is turned on and that the video cable is connected correctly Telephone...

Страница 117: ... See the troubleshooting section of this chapter Have your customer ID serial number and order number available along with a detailed description of your problem including the exact text of any error messages and the steps you have taken Make sure that your notebook is nearby at the time of your call The technician may have you follow troubleshooting steps The Setup Guide includes the Gateway Cust...

Страница 118: ...CHAPTER 8 Troubleshooting 112 ...

Страница 119: ...APPENDIXA 113 Legal Information Important safety information Regulatory compliance statements Environmental information Notices ...

Страница 120: ...tion openings Some notebook are equipped with a three wire power cord to make sure that the notebook is properly grounded when in use The plug on this cord will fit only into a grounding type outlet This is a safety feature If you are unable to insert the plug into an outlet contact an electrician to install the appropriate outlet If you use an extension cord with this notebook make sure that the ...

Страница 121: ...otebook The notebook does not operate properly when the operating instructions are followed The notebook was dropped or the cabinet is damaged The notebook performance changes Replacement parts and accessories Use only replacement parts and accessories recommended by Gateway Regulatory compliance statements Wireless guidance Low power Radio transmitting type devices radio frequency RF wireless com...

Страница 122: ...is prohibited Some circumstances require restrictions on wireless devices United States of America Warning In environments where the risk of interference to other devices or services is harmful or perceived as harmful the option to use a wireless device may be restricted or eliminated Airports Hospitals and Oxygen or flammable gas laden atmospheres are limited examples where use of wireless device...

Страница 123: ...gital device pursuant to Part 15 of the FCC rules These limits are designed to provide reasonable protection against harmful interference in a residential installation This equipment generates uses and can radiate radio frequency energy and if not installed and used in accordance with the instructions may cause harmful interference to radio or television reception However there is no guarantee tha...

Страница 124: ...elephone line cord with a modular plug is required for use with this device The modem is designed to be connected to the telephone network or premises wiring using a compatible modular jack which is Part 68 compliant See installation instructions for details The Ringer Equivalence Number REN is used to determine the number of devices which may be connected to the telephone line Excessive RENs on a...

Страница 125: ...other entity or other individual sending the message and the telephone number of the sending machine or such business other entity or individual Refer to your fax communication software documentation for details on how to comply with the fax branding requirement Canada Industry Canada IC Intentional emitter per RSS 210 Low power Radio transmitter type devices radio frequency RF wireless communicat...

Страница 126: ...pment will operate to the users satisfaction Before installing this equipment users should make sure that it is permissible to be connected to the facilities of the local telecommunications company The equipment must also be installed using an acceptable method of connection In some cases the inside wiring associated with a single line individual service may be extended by means of a certified con...

Страница 127: ... into the environment and to maximize the use of our natural resources Gateway provides the following information on how you can responsibly recycle or reuse most of the materials in your end of life product Waste Electrical and Electronic Equipment commonly known as WEEE should never be disposed of in the municipal waste stream residential garbage collection The Crossed Out Waste Bin label affixe...

Страница 128: ...your effort Finally we suggest that you practice other environmentally friendly actions by understanding and using the energy saving features of this product where applicable recycling the inner and outer packaging including shipping containers this product was delivered in and by disposing of or recycling used batteries properly With your help we can reduce the amount of natural resources needed ...

Страница 129: ...ibility of such damages In the interest of continued product development Gateway reserves the right to make improvements in this manual and the products it describes at any time without notices or obligation Trademark Acknowledgments Gateway and the Black and White Spot Design are trademarks or registered trademarks of Gateway Inc in the U S and other countries Intel Intel Inside logo and Pentium ...

Страница 130: ...APPENDIX A Legal Information 124 ...

Страница 131: ...ibrating 72 changing 53 charge indicator 11 24 52 charge status 52 charging 16 52 conserving power 54 extending life 72 fuel gauges 72 icons 52 installing 53 latch 10 life span 72 locating 9 10 managing power 54 maximizing performance 54 monitoring charge 52 recharging 16 52 release latch 10 replacing 53 storing 73 troubleshooting 107 bays battery 53 hard drive 10 memory 10 Bluetooth system key 27...

Страница 132: ...oard 25 external monitor 46 keyboard 25 mouse 30 printer 44 projector 46 scanner 44 television 46 to wired Ethernet 18 USB device 45 video camera 45 connections audio 8 broadband Internet 7 18 cable modem 7 18 dial up modem 9 19 digital camera 7 8 DSL modem 7 18 Ethernet 7 external audio 8 external diskette drive 7 8 45 external speakers 8 flash drive 7 8 45 HDMI TV out 8 headphone 8 keyboard 7 8 ...

Страница 133: ...8 41 troubleshooting 86 88 90 types 40 DSL modem 7 18 connecting 18 troubleshooting 97 DVD cleaning 73 controlling playback 28 eject button 41 42 inserting 41 42 manual eject hole 41 42 playing 46 regional code 41 troubleshooting 88 DVD drive identifying 40 locating 8 troubleshooting 88 using 40 DVD CD RW drive See DVD drive DVD RW drive See DVD drive E eject button CD 41 42 DVD 41 42 eject hole C...

Страница 134: ...ces 44 digital camera 44 digital video camera 44 peripheral devices 44 printer 44 scanner 44 Internet troubleshooting 91 Internet chat program 34 J jacks See connections K Kensington cable lock 66 lock slot 7 key combinations 27 keyboard buttons 25 cleaning 71 connecting 25 features 25 keys 25 locating 11 troubleshooting 92 USB port 7 8 keys application 26 arrow 26 directional 26 Fn 26 27 function...

Страница 135: ...l up 20 64 DSL 7 18 international adapter 64 jack dial up 9 20 troubleshooting 97 monitor adding external 46 color quality 49 port 7 screen resolution 49 troubleshooting external 110 using 27 using external 49 mouse connecting 30 troubleshooting 101 USB port 7 8 moving pointer 30 screen objects 31 MP3 player memory cards 43 multimedia adjusting volume 35 using DVD drive 40 Mute 27 mute button 33 m...

Страница 136: ...7 management 51 54 plans 58 Sleep mode 22 27 56 source problems 18 SpeedStep settings 58 status indicator 11 24 surge protector 18 troubleshooting 107 turning off notebook 22 turning on notebook 21 PowerSave key 32 printer default 108 installing 44 troubleshooting 107 USB port 7 8 Programmable key 32 programs closing unresponsive 23 opening 31 re installing 74 77 projector adding 46 color quality ...

Страница 137: ...ting up computer 15 sitting at computer 15 scanner installing 44 USB port 7 8 screen resolution 49 troubleshooting 87 110 Screen blank 28 screen objects getting information 31 moving 31 selecting 30 scroll zone 29 security startup password 66 while travelling 66 security features Kensington cable lock 7 serial number 3 66 setting up safety precautions 114 shipping notebook 64 shortcut menus access...

Страница 138: ...29 30 moving screen objects 31 opening files folders and programs 31 opening shortcut menu 31 right clicking 31 scroll zone 29 selecting screen objects 30 troubleshooting 110 Touchpad toggle 33 travel tips 63 troubleshooting audio 109 battery 107 diskette drive 86 display 87 DVD drive 88 external monitor 110 faxes 100 files 90 general guidelines 84 hard drive 90 Internet connection 91 99 keyboard ...

Страница 139: ...ort 7 47 video HDMI out jack 8 monitor port 7 projector port 7 troubleshooting 110 VGA port 7 video camera connecting 45 volume adjusting 35 adjusting modem 101 controls 35 muting 33 35 troubleshooting 109 W waking up notebook 22 webcam 12 34 Windows key 26 Product Key Code 3 Windows System Restore 74 wired Ethernet troubleshooting 102 wireless Ethernet button 33 status indicator 25 troubleshootin...

Страница 140: ...134 Index ...

Страница 141: ......

Страница 142: ...MU WD100 001 MAN SJV40 REF GDE R0 ...

Страница 143: ...ORDINATEUR PORTABLE GUIDE DU MATÉRIEL NOTEBOOK REFERENCEGUIDE ...

Страница 144: ......

Страница 145: ...ran ACL 12 Chapitre 3 Installation et initiation 13 Travailler confortablement et en toute sécurité 14 Diminution de la fatigue visuelle 14 Préparation du bureau et de la chaise 15 Position devant l ordinateur portable 15 Évitez les douleurs et les blessures dues à la fatigue répétitive 16 Branchement de l adaptateur c a 16 Protection contre les problèmes de source d alimentation 18 Connexion à un...

Страница 146: ... Utilisation du lecteur DVD 40 Identification de types de lecteur 40 Utilisation d un lecteur DVD 41 Utilisation du lecteur de carte mémoire 43 Types de carte mémoire 43 Insertion d une carte mémoire 43 Utilisation d une carte mémoire 44 Retrait d une carte mémoire 44 Installation d une imprimante ou d un autre périphérique 44 Connexion d un périphérique USB 45 Visualisation de l affichage sur un ...

Страница 147: ... Modem commuté 64 Connexions sans fil à fréquence radioélectrique 65 Sécurité 66 Alimentation 67 Autres conseils 68 Chapitre 7 Maintenance de votre ordinateur portable 69 Entretien de votre ordinateur portable 70 Nettoyage de votre ordinateur portable 71 Nettoyage de l extérieur 71 Nettoyage du clavier 71 Nettoyage de l écran de l ordinateur portable 72 Maintenance de la batterie 72 Rangement des ...

Страница 148: ...ers 90 Disque dur 90 Internet 91 Clavier 93 Media Center 93 Mémoire 97 Lecteur de carte mémoire 98 Modem câble ou DSL 98 Modem commuté 98 Souris 103 Réseaux câblés 103 Réseaux sans fil 105 Mots de passe 108 Alimentation 108 Imprimante 109 Son 111 Voyants d état 111 Pavé tactile 112 Vidéo 112 Support par téléphone 112 Avant d appeler le service d assistance clientèle Gateway 112 Annexe A Informatio...

Страница 149: ...CHAPITRE1 1 À propos de ce guide À propos de ce guide Accès à votre Manuel de l utilisateur en ligne Coordonnées de Gateway Certificat d authenticité Microsoft Pour plus d informations ...

Страница 150: ...clus sur votre disque dur Le Manuel de l utilisateur est un manuel approfondi facile à lire contenant des informations sur les sujets suivants Aide et support technique Utilisation et personnalisation de Windows et d autres logiciels Utilisation d Internet Protection de vos fichiers Lecture et enregistrement multimédia Réseaux Pour accéder à votre Manuel de l utilisateur en ligne Cliquez sur Démar...

Страница 151: ... bas de votre ordinateur portable inclut le code d identification de produit de votre système d exploitation Pour plus d informations Pour plus d informations sur votre ordinateur portable visitez la page Support de Gateway à www gateway com ou à l adresse Web indiquée sur l étiquette de votre ordinateur portable La page Support contient également des liens pour obtenir de la documentation complém...

Страница 152: ...CHAPITRE 1 À propos de ce guide 4 ...

Страница 153: ...CHAPITRE2 5 Vérification de votre ordinateur portable Avant Gauche Droite Arrière Bas Zone du clavier Écran ACL ...

Страница 154: ...ernes Avertissement Ne travaillez pas en laissant l ordinateur portable sur vos genoux Si les trous d aération sont bloqués l ordinateur portable peut devenir suffisamment chaud pour endommager votre peau Attention Ne bloquez pas ou n insérez pas d objets dans les logements Si les logements sont bloqués votre ordinateur portable peut surchauffer ce qui peut résulter en un arrêt imprévu de l appare...

Страница 155: ...r portable de manière à ne pas obstruer les trous d aération Ne placez pas votre ordinateur portable sur un lit un sofa un tapis ou une autre surface semblable Port de moniteur Branchez un moniteur VGA analogique ou un projecteur dans ce port Pour obtenir plus d informations consultez Visualisation de l affichage sur un projecteur moniteur ou téléviseur à la page 46 Prise Ethernet Branchez un câbl...

Страница 156: ...eur DVD Insérez des CD ou des DVD dans ce lecteur Pour obtenir plus d informations consultez Utilisation du lecteur DVD à la page 40 Afin de déterminer le type de lecteur dans votre ordinateur examinez le couvercle en plastique du plateau du lecteur et comparez le logo à ceux énumérés dans la section Identification de types de lecteur à la page 40 Port USB Branchez les périphériques USB tels que l...

Страница 157: ... un câble de modem commuté dans cette prise en option Pour obtenir plus d informations consultez Branchement du modem commuté en option à la page 19 Connecteur d alimentation Branchez le câble d adaptateur c a dans ce connecteur Batterie Prise de modem en option Connecteur d alimentation Baie de mémoire disque dur Baie MicroPCI Verrou de batterie Ventilateur Loquet de batterie Batterie ...

Страница 158: ...ette baie Baie de disque dur Le s disque s dur s se trouve nt dans cette baie Ventilateur Helps cool internal components Warning Ne travaillez pas en laissant l ordinateur portable sur vos genoux Si les trous d aération sont bloqués l ordinateur portable peut devenir suffisamment chaud pour endommager votre peau Attention Ne bloquez pas ou n insérez pas d objets dans les logements Si les logements...

Страница 159: ...ons consultez Utilisation des voyants d état à la page 24 Clavier Provides all the features of a full sized computer keyboard Pour obtenir plus d informations consultez Utilisation du clavier à la page 25 Voyant d alimentation t Voyant DEL allumé L ordinateur portable est activé t Voyant DEL clignote L ordinateur portable est en mode Veille ou Veille hybride t Voyant DEL éteint L ordinateur portab...

Страница 160: ...très faible Pavé tactile Fournit toutes les fonctions d une souris Pour obtenir plus d informations consultez Utilisation du pavé tactile EZ Pad à la page 29 Touches tactiles de type capacitif Appuyez pour accéder aux fonctions des touches tactiles de type capacitif Pour obtenir plus d informations consultez Utilisation des touches tactiles de type capacitif à la page 32 Composant Icône Descriptio...

Страница 161: ... Branchement du modem commuté en option Démarrage de l ordinateur portable Arrêt de votre ordinateur portable Redémarrage réinitialisation de l ordinateur portable Utilisation des voyants d état Utilisation du clavier Utilisation du pavé tactile EZ Pad Utilisation des touches tactiles de type capacitif Utiliser la webcam Réglage de la luminosité Réglage du volume ...

Страница 162: ...aces molles peuvent bloquer les orifices d aération de l ordinateur pouvant causer une surchauffe endommager l ordinateur et créer un danger d incendie Placez plutôt votre ordinateur portable sur une surface rigide et dure et assurez vous que les orifices d aération ne sont pas obstrués Diminution de la fatigue visuelle La lumière du jour et l éclairage intérieur ne devraient pas être reflétés sur...

Страница 163: ...eur de vos bras audessus du clavier Utilisez une chaise confortable et ajustable qui répartit uniformément votre poids et sur laquelle vous pouvez détendre votre corps Positionnez votre chaise de sorte que le clavier soit au niveau de vos coudes ou légèrement en dessous Cette position permet de détendre vos épaules pendant que vous tapez Ajustez la hauteur de la chaise l inclinaison du dossier ou ...

Страница 164: ... interne pouvant être remplacée ou réparée par l utilisateur L adaptateur c a est pourvu d une tension dangereuse pouvant causer de graves blessures voire la mort Contactez Gateway pour savoir comment retourner des adaptateurs c a défectueux Attention Veillez à utiliser l adaptateur c a fourni avec votre ordinateur portable ou un adaptateur du même type vendu chez Gateway Remplacez le cordon d ali...

Страница 165: ...consultez Avant à la page 6 pour connaître l emplacement du voyant de charge de la batterie Si le voyant de charge de la batterie ne s allume pas effectuez les étapes suivantes jusqu à ce qu il s allume Débranchez l adaptateur de votre ordinateur portable puis rebranchez le Appuyez sur FN F1 pour allumer éteindre les voyants d état respectivement Assurez vous que le cordon d alimentation est corre...

Страница 166: ...au Votre ordinateur portable est équipé d une prise réseau pouvant servir à un branchement à un modem câble ou DSL ou à un réseau Ethernet Important Si l indicateur de charge de la batterie ne vire pas au bleu au bout de trois heures contactez le Service à la clientèle Gateway à l endroit indiqué sur l étiquette Service à la clientèle Pour obtenir plus d informations consultez Coordonnées de Gatew...

Страница 167: ...teur portable peut être équipé d un modem de 56 Kbit s intégré à brancher à une ligne téléphonique standard Astuce Lors de l utilisation d un câble avec un manchon sur la prise tirez le manchon vers l arrière pour assurer que la prise se verrouille dans le connecteur Avertissement Afin de réduire les risques d incendie utilisez uniquement un cordon d alimentation pour télécommunications répertorié...

Страница 168: ...dez comme suit 1 Insérez une extrémité du câble de modem dans la prise de modem en option de l ordinateur 2 Insérez l autre extrémité du câble de modem dans une prise téléphonique murale Important Le modem ne fonctionne pas avec des lignes téléphoniques numériques ou PBX ...

Страница 169: ...ilisateur Avertissement Ne travaillez pas en laissant l ordinateur portable sur vos genoux Si les trous d aération sont bloqués l ordinateur portable peut devenir suffisamment chaud pour endommager votre peau Attention Laissez suffisamment d espace autour de votre ordinateur portable de manière à ne pas obstruer les trous d aération Ne placez pas votre ordinateur portable sur un lit un sofa un tap...

Страница 170: ...dinateur L ordinateur ne sera pas totalement hors tension mais il désactive ou ralentit la plupart des opérations du système d exploitation pour économiser l énergie Le mode de veille enregistre la présentation sur le bureau de sorte que lorsque l ordinateur est rallumé les programmes reviennent à l état dans lequel ils étaient lors de la mise en veille La réactivation de l ordinateur portable à p...

Страница 171: ...es qui ne répondent pas Si la fermeture des programmes qui ne répondent pas ne permet pas de remettre votre ordinateur dans son état normal il est possible que vous ayez à redémarrer réinitialiser votre ordinateur Pour fermer les programmes qui ne répondent pas sur l ordinateur 1 Appuyez sur CTRL ALT SUPPR 2 Cliquez sur Démarrer le Gestionnaire des tâches La boîte de dialogue Gestionnaire des tâch...

Страница 172: ...se sous tension et tenez le enfoncé pendant environ 5 secondes puis relâchez le 2 Débranchez le cordon d alimentation et enlevez la batterie pendant plus de 10 secondes Important Si aucun des voyants n est allumé vous devrez peut être appuyer sur FN F1 pour les activer Indicator Icon Description Voyant d alimentation t Voyant DEL allumé L ordinateur portable est activé t Voyant DEL clignote L ordi...

Страница 173: ...édé Verr Maj t DEL allumée Verr Maj activé t DEL éteinte Verr Maj désactivé Verrouillage numérique t Voyant DEL allumé Verrouillage numérique est activé t oyant DEL éteint Verrouillage numérique est désactivé Bluetooth t Diode allumée la communication Bluetooth est activée t Diode éteinte la communication Bluetooth est désactivée Astuce Vous pouvez brancher un clavier externe à l ordinateur portab...

Страница 174: ...ectuer des tâches spécifiques Pour obtenir plus d informations consultez Combinaisons de touches du système à la page 27 Clavier numérique Appuyez sur ces touches pour déplacer le curseur au début de la ligne à la fin d une ligne en haut de la page au bas de la page au début d un document ou à la fin d un document Touche FN Appuyez sur la touche FN et simultanément sur une touche de système couleu...

Страница 175: ... l ordre suivant t L affichage à cristaux liquides ACL t externe un moniteur ou un projecteur doit être branché dans le port de moniteur ou le port HDMI de l ordinateur portable t Les deux affichent en même temps Pour obtenir plus d informations consultez Visualisation de l affichage sur un projecteur moniteur ou téléviseur à la page 46 TActiver ou désactiver la radio Bluetooth en option Avertisse...

Страница 176: ...e de l écran d affichage pour économiser de l énergie Appuyez sur n importe quelle touche pour revenir Lecture Pause Lancer ou interrompre la lecture du CD ou DVD Arrêt Arrêter la lecture du CD ou du DVD Précédent Saute en arrière d une piste CD ou d un chapitre DVD Suivant Saute en avant d une piste CD ou d un chapitre DVD Appuyez sur FN et tenez cette touche enfoncée puis appuyez sur cette touch...

Страница 177: ...défilement Lorsque vous déplacez votre doigt sur le pavé tactile le pointeur flèche sur l écran se déplace dans la même direction Vous pouvez vous servir de la zone de défilement pour faire défiler les documents L utilisation de la zone de défilement varie d un programme à l autre Bouton gauche Bouton droit Pavé tactile ...

Страница 178: ...t vous avoir été vendu avec un pavé tactile EZ Pad pouvant permettre seulement de cliquer à l aide des boutons du pavé tactile Vous pouvez changer cette caractéristique pour permettre de taper sur le pavé tactile pour simuler le clic du bouton gauche de la souris Pour obtenir plus d informations consultez Changement des paramètres de souris du pavé tactile ou du pointeur dans votre Manuel de l uti...

Страница 179: ...t à l écran Positionnez le pointeur sur l objet Appuyez rapidement puis relâchez le bouton droit une fois C est ce qu on appelle cliquer avec le bouton droit de la souris Sélectionner un objet sur l écran Positionnez le pointeur sur l objet Appuyez sur le bouton gauche etmaintenez le enfoncé puis utilisez le pavé tactile pour déplacer faire glisser l objet dans la partie appropriée de l écran Relâ...

Страница 180: ...r dans le mode d origine disponible avec certains modèles seulement Touche programmable la touche programmable exécutera le Launch Manager vous pouvez affecter une application au besoin pour certains modèles seulement Touche MyBackup lance la solution de sauvegarde MyBackup de Gateway La solution de sauvegarde MyBackup de Gateway est un processus simple en trois étapes qui vous permet de créer des...

Страница 181: ...activés lors d un voyage en avion Les dispositifs de communication IEEE 802 11 sont des exemples de dispositifs qui permettent la communication sans fil Touchpad toggle Active ou désactive le pavé tactile Active ou désactive le pavé tactile interne Silence Coupe le son Pressez à nouveau pour réactiver le son Pour obtenir plus d informations consultez Réglage du volume à la page 35 Réduire le volum...

Страница 182: ...ran Utilisez les touches de clavier permettant d augmenter et de diminuer la luminosité Pour obtenir plus d informations consultez Combinaisons de touches du système à la page 27 OU Cliquez sur Démarrer Tous les programmes Accessoires puis cliquez sur Centre de mobilité Windows La fenêtre Centre de mobilité Windows s ouvre Faites glisser le curseur de luminosité pour contrôler la luminosité de l é...

Страница 183: ...ntrôle du volume capacitif sur les touches tactiles de type capacitif Pour obtenir plus d informations consultez Utilisation des touches tactiles de type capacitif à la page 32 OU Cliquez sur Démarrer Tous les programmes Accessoires puis cliquez sur Centre de mobilité Windows La fenêtre Centre de mobilité Windows s ouvre Faites glisser le curseur de volume jusqu à obtention du volume désiré Pour r...

Страница 184: ...r des niveaux de volume spécifiques aux périphériques cliquez sur Mélangeur La boîte de dialogue Mélangeur de volume s ouvre dans laquelle vous pouvez faire glisser des curseurs pour contrôler plusieurs périphériques 5 Cliquez sur X dans le coin supérieur droit de la fenêtre pour la fermer Astuce Ajustez le curseur des sons Windows pour changer le volume de sons du système indépendamment du volume...

Страница 185: ...ique peut interférer avec un équipement à bord d un avion commercial Les réglementations aériennes actuelles exigent que les appareils sans fil soient désactivés lors d un voyage en avion Les appareils de communication IEEE 802 11 et Bluetooth sont des exemples d appareils qui fournissent une communication sans fil Avertissement Dans des environnements où le risque d interférence avec d autres app...

Страница 186: ...ris Pour activer la radio Bluetooth Appuyez sur FN F6 Pour désactiver la radio Bluetooth Appuyez sur FN F6 Désactivation de la radio Bluetooth Il est fortement conseillé de désactiver la radio Bluetooth quand vous voyagez par avion pour empêcher son activation par mégarde en cours de vol Astuce Pour plus d informations sur l utilisation de votre ordinateur portable sur un réseau personnel Bluetoot...

Страница 187: ...on de lecteurs etd accessoires Utilisation du lecteur DVD Utilisation du lecteur de carte mémoire Installation d une imprimante ou d un autre périphérique Visualisation de l affichage sur un projecteur moniteur ou téléviseur ...

Страница 188: ...ants Cherchez à l avant du lecteur un des logos suivants Si votre lecteur a ce logo Ceci est votre type de lecteur Utilisez votre lecteur pour Lecteur DVD Installation de programmes lecture de CD audio lecture de DVD et accès à des données Ce lecteur ne permet pas de créer des CD ou DVD Combinaison lecteur DVD CD RW Installation de programmes lecture de CD audio lecture de DVD accès à des données ...

Страница 189: ... et disques DVD préenregistrés contiennent des codes régionaux qui aident à contrôler les exportations de titres de DVD et à réduire la distribution illégale de disques Pour que vous puissiez lire un DVD préenregistré le code régional du disque et celui du lecteur de DVD doivent correspondre Le code régional de votre lecteur de DVD est déterminé par l adresse de livraison de votre ordinateur porta...

Страница 190: ...z avec soin sur le disque jusqu à ce qu il s enclenche 3 Poussez le plateau jusqu à ce qu il se referme Pour retirer un CD ou un DVD 1 Appuyez sur le bouton d éjection du lecteur DVD Une fois le plateau légèrement ouvert tirez le plateau du disque pour l ouvrir complètement 2 Soulevez avec soin le disque par ses bords jusqu à ce qu il se déclenche du pivot 3 Poussez le plateau jusqu à ce qu il se ...

Страница 191: ...cteur de carte mémoire prend en charge les cartes Memory Stick Memory Stick Pro MultiMediaCard Secure Digital et xD Picture Card Insertion d une carte mémoire Pour insérer une carte mémoire Insérez la carte mémoire dans le logement de la carte mémoire en vous assurant que l étiquette soit face vers le haut et que la flèche sur l étiquette pointe vers l ordinateur portable Astuce Votre ordinateur p...

Страница 192: ...lacement à chaud ce qui signifie que votre ordinateur peut habituellement reconnaître de tels périphériques lorsque vous les branchez dans le port approprié Lorsque vous utilisez un périphérique USB pour la première fois l ordinateur portable vous invite à installer tout logiciel nécessaire au périphérique Après l installation initiale vous pouvez déconnecter et reconnecter le périphérique n impor...

Страница 193: ... à l ordinateur portable 1 Branchez une extrémité du câble USB à votre périphérique 2 Branchez l autre extrémité du câble au port USB sur votre ordinateur portable Important Les périphériques USB peuvent posséder des consignes d installation particulières Reportez vous au guide d installation de votre périphérique USB Important Pour obtenir plus d informations sur l utilisation du port USB de votr...

Страница 194: ...ble prend en charge en même temps l affichage ACL et l affichage externe Un affichage simultané vous permet d avoir le contrôle de votre présentation depuis votre ordinateur portable tout en faisant face à l auditoire Pour utiliser un projecteur un moniteur ou un téléviseur 1 Éteignez votre ordinateur portable 2 Si vous utilisez le port VGA connectez une extrémité du câble VGA au moniteur projecte...

Страница 195: ...n sur votre ordinateur portable 4 Allumez votre ordinateur portable 5 Branchez le cordon d alimentation du projecteur du moniteur ou du téléviseur dans la source d alimentation c a et allumez l appareil Windows reconnaît le nouveau matériel et la boîte de dialogue Nouvel affichage détecté s ouvre 6 Sélectionnez les options du projecteur du moniteur ou du téléviseur puis cliquez sur OK ...

Страница 196: ... bureau de votre ordinateur portable vous devez ajuster les propriétés d affichage Pour ajuster les propriétés d affichage sur un projecteur moniteur ou téléviseur 1 Cliquez sur Démarrer Tous les programmes Accessoires puis cliquez sur Centre de mobilité Windows La fenêtre Centre de mobilité Windows s ouvre Important Si un moniteur projecteur ou téléviseur est branché et que vous fermez l écran AC...

Страница 197: ... case à cocher Étendre mon bureau Windows à ce moniteur 6 Pour utiliser le projecteur moniteur ou téléviseur en tant que complément du bureau augmenter la taille de votre bureau Windows cliquez pour activer la case à cocher Étendre mon bureau Windows à ce moniteur Vous pouvez faire glisser l icône du moniteur 2 pour le positionner de la même manière que le moniteur réel est arrangé sur votre burea...

Страница 198: ...te de dialogue Paramètres de présentation s ouvre 3 Ajustez les propriétés telles que Désactiver l économiseur d écran ou Régler le volume sur au besoin 4 Cliquez sur OK 5 Appuyez sur Activer pour activer les paramètres de présentation Lorsque vous avez terminé votre présentation cliquez sur Désactiver pour revenir aux paramètres standard de votre ordinateur portable Astuce Pour obtenir plus d inf...

Страница 199: ...estion de l alimentation Contrôle de la charge de la batterie Recharge de la batterie Remplacer la batterie Prolongation de la durée de la batterie Modification des paramètres d alimentation de l ordinateur portable ...

Страница 200: ...ur éviter de perdre tout travail non enregistré Pour contrôler la charge de la batterie Placez le pointeur de la souris au dessus de l icône du cordon d alimentation ou sur l icône de la batterie dans la barre des tâches Un message apparaît et montre le temps de batterie restant et le mode d alimentation actuel Attendez l apparition d un message d avertissement Batterie faible Observez le voyant d...

Страница 201: ...e façon inadéquate Ne remplacez que par une batterie fabriquée spécialement pour votre ordinateur portable Gateway Jetez les batteries usagées conformément aux règlements locaux sur les matières dangereuses La batterie utilisée dans cet appareil peut présenter un risque d incendie ou de brûlure chimique en cas de mauvaise manipulation Évitez de démonter de chauffer au dessus de 100 C 212 F et de m...

Страница 202: ... plusieurs fois durant les premières semaines d utilisation pour lui permettre d atteindre sa capacité nominale maximale Au long terme utilisez la batterie au moins une fois par mois même si elle est rangée dans un endroit frais et sec mais évitez de la décharger complètement fréquemment car ce n est pas bon pour la batterie Plusieurs décharges partielles accompagnées de recharges fréquentes sont ...

Страница 203: ...hes planifiées Désactivez les fonctions d enregistrement automatique de Microsoft Office et des autres applications Copiez les programmes des CD ou DVD vers le disque dur pour éviter d utiliser l énergie de la batterie en utilisant les disques optiques N utilisez le lecteur DVD que si c est nécessaire Ce lecteur utilise une grande quantité d énergie Rechargez souvent la batterie emportez une batte...

Страница 204: ...iser un adaptateur d alimentation Pour trouver les sorties d alimentation c a dans les aéroports regardez près des piliers dans les zones importantes telles les portes d embarquement et sous les centres téléphoniques Modification des modes d alimentation Vous pouvez utiliser les modes d alimentation suivants pour prolonger la durée de la batterie de votre ordinateur portable Veille lorsque votre o...

Страница 205: ...ybride pour l utiliser Pour obtenir plus d informations consultez Modification des paramètres avancés à la page 60 Utilisation des modes d économie d énergie Enregistrez toujours votre travail avant d utiliser le mode de veille En mode de veille votre ordinateur portable réduit ou coupe l alimentation de la plupart des dispositifs sauf la mémoire Toutefois l information en mémoire n est pas enregi...

Страница 206: ...sque dur sont automatiquement arrêtés Vous pouvez sélectionner un des modes de gestion de l alimentation définis ou créer un mode personnalisé Il y a trois modes d alimentation prédéfinis pour vous Équilibré Il s agit du mode par défaut qui équilibre la durée de vie de la batterie et les performances Économique Ce mode sacrifie les performances pour prolonger la durée de vie de la batterie Utilise...

Страница 207: ... alimentation La fenêtre Sélectionner un mode d alimentation s ouvre 3 Sélectionnez le mode d alimentation que vous voulez utiliser OU Cliquez sur Modifier les paramètres et modifiez le mode selon vos souhaits puis cliquez sur Enregistrer les changements Aide Pour de plus amples informations sur la modification du mode d alimentation cliquez sur Démarrer puis sur Aide et support Tapez les mots clé...

Страница 208: ...es puis cliquez sur Centre de mobilité Windows La fenêtre Centre de mobilité Windows s ouvre 2 Cliquez sur Modifier les paramètres d alimentation La fenêtre Sélectionner un mode d alimentation s ouvre 3 Cliquez sur un paramètre que vous voulez modifier à gauche de l écran Les trois premiers paramètres ne sont pas liés à un mode d alimentation Les trois derniers paramètres modifient le mode d alime...

Страница 209: ...tres d alimentation avancés La boîte de dialogue Options d alimentation s ouvre 3 Cliquez sur le signe en regard du mode Veille puis sur le signe en regard de l option Autoriser le mode de veille hybride 4 Changez les valeurs sur Activé pour Batterie et Courant électrique Aide Pour obtenir plus d informations sur la veille hybride cliquez sur Démarrer puis sur Aide et support Tapez le mot clé hybr...

Страница 210: ...CHAPITRE 5 Gestion de l alimentation 62 ...

Страница 211: ...CHAPITRE6 63 Voyager avec votre ordinateur portable Emballer votre ordinateur portable Voyage en avion Modem commuté Connexions sans fil à fréquence radioélectrique Sécurité Alimentation Autres conseils ...

Страница 212: ...r portable dans vos bagages enregistrés Chargez la batterie au cas où le personnel de sécurité de l aéroport vous demanderait d allumer votre ordinateur portable Faites examiner manuellement votre ordinateur portable par une personne de la sécurité ou en le passant dans le scanneur à rayons X mais ne le passez jamais par le détecteur de métal Éteignez votre ordinateur portable durant le décollage ...

Страница 213: ...l égard d un appareil sans fil dans le pays de votre destination Une communication sans fil peut interférer avec un équipement à bord d un avion commercial Les réglementations aériennes actuelles exigent que les appareils sans fil soient désactivés lors d un voyage en avion Les appareils de communication IEEE 802 11 et Bluetooth sont des exemples d appareils qui utilisent la technologie sans fil p...

Страница 214: ...ez d ouvrir des fichiers confidentiels si vous n êtes pas seul Utilisez un mot de passe de démarrage pour restreindre l accès à votre ordinateur portable Le mot de passe de démarrage est configuré à l aide de l utilitaire du BIOS Pour créer un mot de passe de démarrage 1 Redémarrez l ordinateur Dès que vous voyez apparaître un écran de démarrage appuyez sur F2 L utilitaire de configuration BIOS s ...

Страница 215: ... Si vous voyagez à l étranger emportez des adaptateurs de prises électriques Emmenez un limiteur de surtension portable pour protéger votre ordinateur portable contre les surtensions Pour obtenir une performance optimale de votre ordinateur portable évitez autant que possible d utiliser la batterie contrôlez la charge de la batterie et utilisez les paramètres de gestion de l alimentation les plus ...

Страница 216: ...tures attendez qu il soit à la température ambiante avant de l allumer Emmenez une preuve de propriété ou un passeport de marchandise si vous voyagez à l étranger Contactez votre compagnie d assurance ou de carte de crédit pour en apprendre davantage sur l assistance voyage d urgence au cas où votre ordinateur portable serait perdu ou endommagé Emmenez vos disques de récupération au cas où vous de...

Страница 217: ...ITRE7 69 Maintenance de votre ordinateur portable Entretien de votre ordinateur portable Nettoyage de votre ordinateur portable Maintenance de la batterie Nettoyage des CD ou des DVD Récupération du système ...

Страница 218: ...gile et se briser facilement à des températures froides et fondre ou se déformer à des températures élevées Les dommages causés par ces températures extrêmes ne sont pas couverts par la garantie En règle générale votre ordinateur portable est plus en sécurité à des températures qui sont également confortables pour vous Gardez tout liquide éloigné de votre ordinateur portable Si l on en renverse su...

Страница 219: ...le est refroidi par l air qui circule par les orifices de ventilation du boîtier Par conséquent maintenez ces orifices exempts de toute poussière Lorsque votre ordinateur portable est éteint et débranché enlevez la poussière des orifices de ventilation avec un chiffon humide Prenez soin de ne pas laisser couler de l eau dans les orifices de ventilation N essayez pas d enlever la poussière de l int...

Страница 220: ...e batterie froide ne crée pas beaucoup d énergie Une courte durée de vie de la batterie est probablement due à la chaleur et non aux cycles de recharge décharge Conservez votre batterie lithium ion dans un endroit frais Évitez de la ranger dans une voiture en plein soleil par exemple Chargez la souvent mais essayez de ne pas la décharger complètement trop souvent Cela endommage la batterie à long ...

Страница 221: ...Ne gelez pas la batterie N utilisez pas de vielles batteries Évitez d acheter des batteries lithium ion de rechange et de les ranger en vue d un usage futur Évitez d acheter des batteries d un vieux stock même si le prix est plus intéressant Bien qu il soit logique de disposer de deux ou trois batteries de rechange acheter des batteries et les ranger sans les utiliser pendant plusieurs années peut...

Страница 222: ...ériques concernés Pour récupérer des logiciels ou des pilotes préinstallés à l usine consultez Récupération des logiciels et des pilotes préinstallés à la page 77 Pour obtenir des instructions sur la réinstallation des logiciels et des pilotes qui n ont pas été préinstallés à l usine consultez la documentation ou le site Web de support technique de ces produits 3 Revenez à un état antérieur du sys...

Страница 223: ...n 1 Cliquez sur Démarrer Tous les programmes Gateway puis sur Gateway Recovery Management La fenêtre Gateway Recovery Management s ouvre 2 Pour créer des disques de récupération pour le contenu d origine du disque dur y compris Windows Vista et tous les logiciels et pilotes installés en usine cliquez sur Créer le disque par défaut de l usine OU Pour créer des disques de récupération pour les logic...

Страница 224: ...liste Graver sur puis cliquez sur Suivant L enregistrement du premier disque démarre et vous pouvez suivre la progression sur l écran Une fois l enregistrement du disque terminé le lecteur l éjecte 4 Retirez le disque du lecteur et inscrivez le titre à l aide d un marqueur indélébile 5 Si plusieurs disques sont nécessaires insérez un autre disque quand le système vous le demande puis cliquez sur O...

Страница 225: ...installation de ce logiciel Nouveaux pilotes de périphérique Pour récupérer des pilotes de périphérique qui n étaitent pas préinstallés sur votre ordinateur suivrez les instructions d installation de ces pilotes de périphérique Pour récupérer des logiciels et des pilotes préinstallés 1 Cliquez sur Démarrer Tous les programmes Gateway puis sur Gateway Recovery Management La fenêtre Gateway Recovery...

Страница 226: ...e d installation pour l élément que vous souhaitez installer et suivez les instructions affichées à l écran pour terminer l installation Répétez cette étape pour chaque élément que vous souhaitez installer Revenir à une condition antérieure du système Le programme Restauration du système de Microsoft prend régulièrement des instantanés des paramètres de votre système et les enregistre en tant que ...

Страница 227: ...e de sauvegarde et de restauration Le Backup and Restore Center Centre de sauvegarde et de restauration s ouvre 2 Sur le côté gauche de la fenêtre cliquez sur Réparer Windows en utilisant la Restauration du système puis sur Suivant La boîte de dialogue Choisir un point de restauration s ouvre Aide Pour de plus amples informations sur l option Restauration de système de Microsoft cliquez sur Démarr...

Страница 228: ...tir du disque dur soit à partir des disques de récupération que vous avez créés Si vous pouvez encore exécuter Windows Vista consultez Récupération à partir de Windows Vista à la page 81 Si vous ne pouvez pas exécuter Windows Vista et que le disque dur d origine fonctionne toujours consultez Récupération à partir du disque dur lors du démarrage à la page 82 Si vous ne pouvez pas exécuter Windows V...

Страница 229: ...ion s ouvre 3 Cliquez sur Oui puis sur Démarrer Une boîte de dialogue affichera des informations concernant le disque dur utilisé par le système d exploitation pour la restauration 4 Cliquez sur OK Le processus de récupération commence par redémarrer votre ordinateur avant de copier les fichiers sur votre disque dur Ce processus peut prendre plusieurs minutes mais l écran de Gateway Recovery Manag...

Страница 230: ...dinateur et insérez le premier disque de récupération dans le lecteur de disque optique puis redémarrez votre ordinateur 2 Lors du démarrage appuyez sur F12 pour ouvrir le menu Démarrage Le menu de démarrage est l endroit où vous choisissez le périphérique à partir duquel le démarrage s effectuera par exemple le disque dur ou un disque optique 3 Utilisez les touches fléchées pour sélectionner CDRO...

Страница 231: ...CHAPITRE8 83 Dépannage Directives de sécurité Premières étapes Dépannage Support par téléphone ...

Страница 232: ...otre ordinateur portable Premières étapes Si vous avez des problèmes avec votre ordinateur portable essayez d abord ce qui suit Assurez vous que l adaptateur c a est connecté à votre ordinateur portable et à une sortie c a et que cette sortie fournit l alimentation Assurez vous que le cordon d alimentation est correctement branché à l adaptateur c a Si vous utilisez un limiteur de surtension assur...

Страница 233: ...ur apparaît à l écran prenez note du message exact Le message peut aider le service d assistance clientèle de Gateway à poser le diagnostic et à résoudre le problème Si vous avez ajouté ou retiré des périphériques examinez les procédures d installation que vous avez exécutées et assurez vous d avoir suivi chaque instruction Si une erreur se produit dans un programme consultez la documentation impr...

Страница 234: ...r Vous voyez apparaître un message d erreur Le disque est plein Supprimez les fichiers obsolètes de la disquette Essayez une disquette différente Les disquettes sont parfois imparfaites et ne peuvent pas être lues par le lecteur Exécutez le programme de vérification d erreur sur la disquette Si des erreurs sont détectées et corrigées essayez à nouveau d utiliser la disquette Pour obtenir plus d in...

Страница 235: ...e réglage de la luminosité reportez vous à la section Réglage de la luminosité à la page 34 Modifiez les paramètres d affichage Pour obtenir plus d informations sur les paramètres d affichage consultez Modification des paramètres d écran dans votre Manuel de l utilisateur en ligne Éloignez votre ordinateur portable des sources d interférence électrique telles que les téléviseurs haut parleurs non ...

Страница 236: ...enue maintiennent le disque en place Assurez vous que l étiquette du disque est orientée vers le haut et essayez de nouveau Essayez un autre disque Les disques sont parfois imparfaits et ne peuvent pas être lus dans le lecteur Certains CD musicaux comportent un logiciel de protection contre la copie Vous ne pouvez peut être pas lire ces CD sur votre ordinateur portable Votre ordinateur portable pe...

Страница 237: ...obtenir plus d informations consultez Nettoyage des CD ou des DVD à la page 73 Votre ordinateur portable peut avoir des problèmes temporaires de mémoire Arrêtez et redémarrez votre ordinateur portable Réinstallez les pilotes de périphériques audio Pour obtenir plus d informations consultez Récupération des logiciels et des pilotes préinstallés à la page 77 Un film DVD ne fonctionne pas Assurez vou...

Страница 238: ...utilisateur en ligne Disque dur Vous voyez apparaître un message d erreur Espace disque insuffisant Supprimez les fichiers inutiles du disque dur au moyen de l utilitaire Nettoyage de disque Pour obtenir plus d informations sur la suppression de fichiers inutiles consultez Suppression de fichiers inutiles dans votre Manuel de l utilisateur en ligne Videz la Corbeille en cliquant sur le bouton droi...

Страница 239: ... vous que votre disque dur est installé de façon adéquate Retirez le réinsérez le fermement et redémarrez ensuite votre ordinateur portable Si votre ordinateur portable a été exposé à l électricité statique ou a subi un choc vous devez peut être réinstaller le système d exploitation Internet Vous ne pouvez pas vous connecter à Internet Si vous utilisez un modem téléphonique assurez vous que le câb...

Страница 240: ... éprouve peut être des difficultés techniques La connexion à un site Web prend trop de temps Plusieurs facteurs peuvent entraver les performances d Internet L état des lignes téléphoniques de votre résidence ou du service téléphonique local L état des ordinateurs Internet auxquels vous vous connectez et le nombre d utilisateurs qui accèdent à ces ordinateurs La complexité des graphiques et des mul...

Страница 241: ...la poussière et les peluches coincées sous les touches Essayez un clavier en bon état pour vous assurer que le port du clavier fonctionne Si vous avez renversé du liquide sur le clavier éteignez l ordinateur et débranchez le clavier Nettoyez le clavier et retournez le pour enlever le liquide Laissez sécher le clavier avant de le réutiliser Si le clavier ne fonctionne pas lorsqu il est sec vous dev...

Страница 242: ...ort HDMI de l ordinateur portable au port d entrée HDMI du téléviseur La qualité d affichage HDMI est généralement supérieure pour les images télévisées HDMI transmet également l audio sur votre téléviseur De nombreux téléviseurs anciens ne disposent pas d un port HDMI VGA Si votre téléviseur ne dispose pas d un port HDMI mais dispose d un port VGA branchez le câble VGA du port VGA moniteur de l o...

Страница 243: ...ndard ne sont généralement pas optimisés pour la lecture vidéo Bien qu ils offrent des résolutions et des taux de rafraîchissement excellents ils sont conçus pour permettre la lecture d un arrière plan blanc statique avec du texte noir L affichage vidéo en couleurs n est pas optimal sur certains périphériques d affichage de petite taille En règle générale l affichage vidéo sera optimal sur un péri...

Страница 244: ...ve affiche une trame vidéo avec un seul passage de lignes de balayage séquentielles Un téléviseur à balayage progressif affiche l image toute entière en la dessinant séquentiellement de haut en bas sans entrelacement de lignes paires impaires Cela résulte en une image plus riche et nette et une meilleure qualité d affichage lors de l utilisation des fonctions Media Center Le balayage progressif of...

Страница 245: ...rdinateur non Media Center Vous voulez savoir si vous pouvez lire des vidéos enregistrées sur votre lecteur de DVD de salon Oui vous pouvez Les DVD enregistrés avec l ordinateur Media Center peuvent être lus sur un lecteur de DVD de salon Mémoire Vous voyez apparaître un message Erreur de mémoire Assurez vous que le module de mémoire est convenablement inséré dans la fente de baie de mémoire Utili...

Страница 246: ... dans la prise modem optionnelle Pour connaître l emplacement de la prise de modem consultez Gauche à la page 7 Consultez la documentation fournie avec votre modem pour obtenir des informations supplémentaires sur le dépannage Modem commuté Votre modem ne compose pas les numéros ou n établit pas la connexion Assurez vous que le câble du modem est branché dans la sortie modem en option et non dans ...

Страница 247: ...irement le service Assurez vous également que les propriétés de numérotation du modem sont bien déterminées Pour vérifier les propriétés de numérotation 1 Cliquez sur Démarrer puis sur Panneau de configuration La fenêtre Panneau de configuration s ouvre 2 Cliquez sur Matériel et audio 3 Cliquez sur Options de modems et téléphonie La boîte de dialogue Options de modems et téléphonie s ouvre 4 Cliqu...

Страница 248: ...ce Assurez vous que les connecteurs ne sont pas corrodés et que toutes les vis de la prise murale ou de téléphone sont bien vissées Vous pouvez également appeler votre service téléphonique et faire vérifier le niveau de bruit ou de ligne faible Essayez une autre ligne téléphonique soit un numéro de téléphone différent chez vous soit une ligne téléphonique d un autre endroit Si vous pouvez établir ...

Страница 249: ... n envoie et ne reçoit des télécopies qu à 14 400 bit s si vous disposez d un modem de 56 Kbit s La technologie actuelle de télécopie n accueille qu un rythme maximum d envoi et de réception de 14 400 bit s Le modem n est pas reconnu par votre ordinateur portable Assurez vous que la ligne connectée au modem fonctionne et est branchée dans le port approprié de votre ordinateur portable Pour connaît...

Страница 250: ...Le modem est bruyant lorsqu il compose un numéro et établit la connexion Lorsque le modem essaie de se connecter à un autre modem il commence l établissement d une connexion L établissement d une connexion est une conversation numérique de prise de contact entre deux modems établissant les vitesses de connexion et les protocoles de communication Vous pouvez entendre des sons d établissement de con...

Страница 251: ...tile à la page 112 La souris externe ne fonctionne pas Assurez vous que le câble de la souris est bien branché Arrêtez et redémarrez votre ordinateur portable Enlevez tous les câbles de rallonge et boîtes de commutateur Essayez une souris en bon état pour vous assurer que le port de la souris fonctionne La souris externe fonctionne de façon irrégulière Nettoyez la souris Certains modèles de tapis ...

Страница 252: ...us avez attribué des adresses IP aux ordinateurs assurez vous qu ils ont tous des adresses IP différentes Pour les réseaux familiaux les adresses IP devraient être 192 168 N N où N est un nombre que vous attribuez entre 0 et 254 Le premier N devrait être identique pour tous les ordinateurs de votre réseau et le deuxième N devrait être différent pour tous les ordinateurs de ce réseau Votre réseau E...

Страница 253: ...teur au groupe de travail de votre réseau domestique pour accéder aux imprimantes ou aux fichiers partagés de ce réseau Toutefois vous pouvez avoir accès à Internet par le biais de votre réseau domestique Chaque réseau domestique est unique Consultez la documentation fournie avec votre équipement réseau pour obtenir des informations sur le dépannage Réseaux sans fil Vous avez activé le réseau sans...

Страница 254: ...n réseau sans fil s ouvre Le compteur indique l intensité du signal du réseau sans fil sur votre ordinateur si d autres ordinateurs ayant un nom de réseau identique sont à portée du vôtre Vous êtes sur un réseau sans fil vous voyez le réseau mais vous ne pouvez pas communiquer envoyer des fichiers imprimer ou accéder au Web Si votre point d accès utilise le chiffrement WEP accédez à la fenêtre Pro...

Страница 255: ...e votre modem et votre point d accès Si vous accédiez auparavant à Internet en utilisant un modem commuté Internet Explorer peut ne pas être configuré pour accéder à Internet via un réseau Retirez la connexion commutée dans les Options Internet du programme Internet Explorer Vous ne pouvez pas voir les autres ordinateurs sur votre réseau Votre ordinateur portable peut ne pas avoir le même nom de g...

Страница 256: ... de passe établie dans l utilitaire Configuration BIOS est très sûre Il n est donc pas facile de récupérer un mot de passe oublié Vous devez renvoyer votre ordinateur portable pour réparation Appelez le service d assistance clientèle de Gateway pour obtenir des instructions Alimentation Votre ordinateur portable ne fonctionne pas sur l alimentation c a Assurez vous que l adaptateur c a est bien co...

Страница 257: ...sultez Modification des paramètres d alimentation de l ordinateur portable à la page 58 Assurez vous que la batterie est bien installée Pour obtenir plus d informations sur l insertion de la batterie consultez Remplacer la batterie à la page 53 Assurez vous que la batterie est complètement chargée Pour obtenir plus d informations sur la recharge de la batterie consultez Recharge de la batterie à l...

Страница 258: ...liser n est pas l imprimante par défaut assurez vous de l avoir sélectionnée dans la configuration d imprimante Pour définir une imprimante par défaut 1 Cliquez sur Démarrer puis sur Panneau de configuration La fenêtre Panneau de configuration s ouvre 2 Cliquez sur Matériel et audio 3 Cliquez sur Imprimantes 4 Cliquez avec le bouton droit de la souris sur le nom de l imprimante et cliquez ensuite ...

Страница 259: ...un bouton sous tension hors tension sur lequel vous devez appuyer après avoir ajouté du papier Son Les haut parleurs intégrés n émettent aucun son Assurez vous que le casque d écoute est branché dans la sortie casque Assurez vous que la commande de volume de votre ordinateur portable est en fonction Pour obtenir plus d informations sur l utilisation du multimédia consultez Réglage du volume à la p...

Страница 260: ...éplace de façon inattendue Nettoyez le pavé tactile avec un chiffon humide eau uniquement et essuyez le Réglez les paramètres du pavé tactile Pour obtenir des instructions sur le réglage des paramètres du pavé tactile consultez Changement des paramètres de souris du pavé tactile ou du pointeur dans votre Manuel de l utilisateur en ligne Vidéo Le projecteur moniteur ou téléviseur ne fonctionne pas ...

Страница 261: ...indows Le site Web des éditeurs de logiciels Consultez la section Dépannage de ce chapitre Ayez sous la main votre ID de client le numéro de série et le numéro de commande ainsi qu une description détaillée de votre problème notamment le texte exact de tous les messages d erreur et les mesures que vous avez prises Assurez vous que votre ordinateur portable est à proximité au moment de votre appel ...

Страница 262: ...CHAPITRE 8 Dépannage 114 ...

Страница 263: ...ANNEXE A 115 Informations légales Informations de sécurité importantes Énoncés sur la conformité aux règlements Informations d ordre environnemental Avis ...

Страница 264: ... un cordon d alimentation à trois fils pour assurer une mise à la terre adéquate de l ordinateur lorsqu il est en marche La fiche de ce cordon ne s insère que dans une prise électrique de type mise à la terre Il s agit ici d une caractéristique de sécurité Si vous êtes incapable d insérer la fiche dans la prise de courant contactez un électricien pour installer une prise appropriée Si vous utilise...

Страница 265: ...pas correctement lorsque les directives de fonctionnement sont suivies L ordinateur est tombé ou la console est endommagée La performance de l ordinateur change Pièces de rechange et accessoires Utilisez seulement les pièces de rechange et les accessoires recommandés par Gateway Énoncés sur la conformité aux règlements Directives concernant le sans fil Des appareils à faible puissance et de type t...

Страница 266: ...e premier tiers supérieur du couvercle doit être utilisée de manière à maintenir une distance de 20 cm du corps de l utilisateur ou de celui des personnes à proximité Les appareils sans fil installés dans ce système ont été conçus pour un usage intérieur Dans certaines régions l utilisation de ces appareils à l extérieur est interdite Certaines situations exigent que des restrictions soient imposé...

Страница 267: ... été conçus pour un usage intérieur Dans certaines régions l utilisation de ces appareils à l extérieur est interdite Le fonctionnement de cet appareil est sujet aux conditions suivantes 1 Cet appareil ne peut pas causer une interférence nuisible et 2 cet appareil doit accepter toute interférence reçue incluant une interférence pouvant causer un fonctionnement non désiré de l appareil Important Ch...

Страница 268: ...e récepteur Brancher l équipement dans une prise de courant d un circuit différent de celui dans lequel le récepteur est branché Consulter le détaillant ou un technicien qualifié en radio télévision pour obtenir de l aide Accessoires de conformité les accessoires associés à cet équipement sont les suivants un câble vidéo blindé lorsqu un moniteur externe est branché Ces accessoires doivent être ut...

Страница 269: ...z la compagnie de téléphone locale Si cet appareil nuit au réseau de téléphone la compagnie de téléphone vous avisera à l avance qu une interruption temporaire de service peut s avérer nécessaire La compagnie de téléphone peut vous demander de débrancher l équipement jusqu à ce que le problème soit résolu La compagnie de téléphone peut apporter des changements à ses installations à son équipement ...

Страница 270: ...ette du système Une ligne directrice générale a été établie selon laquelle une distance de 20 cm séparant l appareil sans fil et le corps pour l utilisation d un appareil sans fil à proximité du corps ceci ne comprend pas les extrémités est normale Cet appareil devrait être utilisé à plus de 20 cm du corps lorsque les appareils sans fil sont sous tension L alimentation des appareils sans fil qui p...

Страница 271: ...e Dans certains cas le câblage interne associé à un service individuel à une ligne peut être prolongé grâce à un connecteur homologué Le consommateur doit être au courant qu une conformité avec les conditions ci dessus peut quand même entraîner une dégradation du service dans certaines situations Toutes les réparations effectuées sur un équipement homologué doivent être faites par un service d ent...

Страница 272: ...me Produits laser de Classe 1 en vertu de la norme sur le rendement en matière de radiation de l US Department of Health and Human Services DHHS Si l appareil doit être réparé contactez un service autorisé Avertissement L utilisation de commandes ou de réglages ou procédures autres que ceux précisés dans le présent manuel peut entraîner une exposition dangereuse aux radiations Pour empêcher une ex...

Страница 273: ...al pour qu il soit recyclé Dans la plupart des cas votre produit une fois arrivé à la fin de sa vie peut être échangé contre un crédit applicable à l achat d un nouvel équipement Gateway Appelez Gateway pour savoir si ce programme est disponible dans votre région Si vous avez besoin d aide pour le recyclage la réutilisation ou l échange de votre produit à la fin de sa vie vous pouvez nous contacte...

Страница 274: ...e but d effectuer un développement continu du produit Gateway se réserve le droit d apporter des améliorations au manuel et aux produits décrits à tout moment et ce sans préavis ou obligation Reconnaissance des marques de commerce Gateway et Black and White Spot Design sont des marques de commerce ou des marques de commerce déposées de Gateway Inc aux États Unis et dans d autres pays Intel le logo...

Страница 275: ...ortable 25 mise sous tension de l ordinateur portable 23 mode de veille 24 32 66 mode de veille hybride 32 66 mode de veille prolongée 66 modes de gestion 68 69 modification des modes 67 paramètres avancés 68 71 paramètres SpeedStep 69 problèmes de source 20 prolongation de la durée de la batterie 64 voyant 6 24 voyant d état 6 anti vol câble 76 câble Kensington 9 appareil photo numérique lecteur ...

Страница 276: ...4 caractéristiques de sécurité câble anti vol Kensington 9 ajout 51 dépannage 104 insertion 51 installation 51 logement 51 retrait 51 carte PCMCIA cartes cartes mémoire prises en charge 50 dépannage de carte mémoire 113 insertion d une carte mémoire 50 logement de carte mémoire 6 logements 50 51 retrait d une carte mémoire 50 CD bouton d éjection 47 48 contrôle de la lecture 37 insertion 47 48 net...

Страница 277: ... 7 9 sortie HDMI TV 7 souris 7 9 télévision 54 USB 7 9 53 VGA 7 55 connexions sans fil à fréquence radioélectrique 75 conseils de voyage 73 Corbeille suppression de fichiers 105 vider 105 coupleur acoustique 74 D démarrage ordinateur portable 23 programmes 35 dépannage affichage 101 alimentation 124 audio 126 batterie 124 clavier 108 connexion Internet 106 116 directives de sécurité 98 directives ...

Страница 278: ... 21 prise 7 21 Ethernet câblé dépannage 119 Ethernet sans fil bouton 31 dépannage 121 mise hors tension 41 mise sous tension 41 utilisation lors des voyages 75 voyant d état 28 étiquettes Certificat d authenticité Microsoft 3 numéro de modèle 2 numéro de série 2 expédier l ordinateur portable 74 F fermeture d un programme qui ne répond pas 26 fichiers dépannage 105 ouverture 35 G Gateway coordonné...

Страница 279: ...CD RW 9 46 DVD RW 9 47 DVD RW multiformat 9 47 identification de types de lecteur 46 types 46 limiteur de surtension 20 logiciels réinstallation 86 89 loquet batterie 11 luminosité réglage 33 39 M maintenance nettoyage 81 85 Media Center dépannage 109 mémoire baie 11 dépannage 113 menus de raccourcis accès 36 microphone intégré 14 prise 8 mise en sourdine du son 39 mise hors tension Bluetooth 32 E...

Страница 280: ...o de série 76 O objets à l écran déplacement 36 obtenir de l information 36 sélection 35 orifice d éjection CD 47 48 DVD 47 48 ouverture dossiers 35 fichiers 35 menu de raccourcis 36 programmes 35 P panneau multimédia 13 37 pavé tactile boutons 33 34 cliquer 35 cliquer avec le bouton droit de la souris 36 dépannage 127 déplacement d objets à l écran 36 déplacement du pointeur 34 35 double cliquer ...

Страница 281: ...de l ordinateur portable 26 réinitialisation de l ordinateur portable 26 réinstallation avec Gateway Recovery Center 89 avec Restauration du système Windows 90 logiciels 85 86 89 pilotes 86 89 programmes 85 89 valeurs par défaut 93 Windows 85 remplacement Voir installation remplacement à chaud 51 53 réseau dépannage 119 121 mise en fonction de Bluetooth 43 mise en fonction du réseau Ethernet sans ...

Страница 282: ...MI 7 54 visualisation de l affichage sur 54 testeur de ligne 74 touche d application 30 touche de système ACL CRT 32 touche Fn 30 31 touches ACL CRT 32 application 30 bascule d affichage 32 combinaisons de touches du système 31 direction 30 Ethernet sans fil 31 flèche 30 Fn 30 31 fonction 30 navigation 30 système 30 veille 32 veille hybride 32 Windows 30 touches de direction 30 touches de fonction...

Страница 283: ...age du modem 118 voyant d état Ethernet sans fil 28 Voyant Verr Maj 28 voyants Voir voyants d état voyants d état activer ou désactiver 31 127 alimentation 6 charge de la batterie 6 60 dépannage 127 emplacement 13 Verr Maj 28 W webcam 14 38 Windows Code d identification de produit 3 touche 30 Z zone de défilement 33 ...

Страница 284: ...136 Index ...

Страница 285: ......

Страница 286: ...MU WC400 002 MAN SJM50 REF GDE R0 MU WC400 002 ...

Отзывы: