background image

25

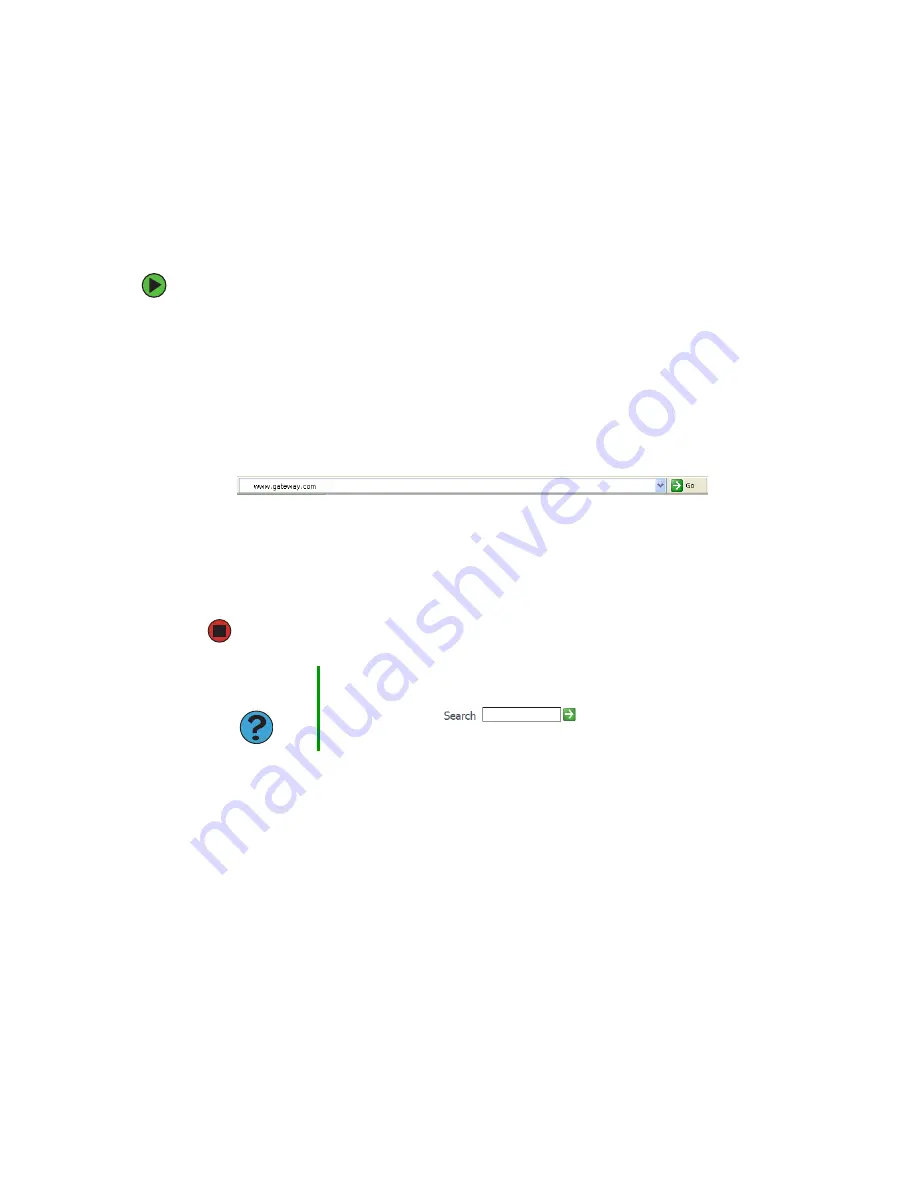
www.gateway.com

Using the World Wide Web

Connecting to a Web site

After you set up an account with an Internet service provider (ISP), you can access the 
many information sources on the World Wide Web.

To connect to a Web site:

1

Connect to your Internet account.

2

Depending on the method you use to connect to your Internet account, you may 
need to start your Web browser. Click 

Start

, then click 

Internet

. Your default Web 

browser opens showing an opening page or welcome screen.

3

To go to a different Web site, type the 

address

 (called a 

URL

 for “Universal Resource 

Locator”) in the browser address bar (for example 

www.gateway.com

), then click 

GO 

on the browser address bar.

- OR - 

On the current Web page, click a link to a Web site.

The Web browser locates the server computer on the Internet, 

downloads

 (transfers) 

data to your computer, and displays the page on the site that you requested.

Sometimes Web pages display slowly. The speed that a Web page displays on your screen 
depends on the complexity of the Web page and other Internet conditions. Additionally, 
the speed of your connection will determine how fast Web pages display.

Help and 

Support

For more information about connecting to a Web site, click 

Start

, then 

click 

Help and Support

. Type the keyword 

connecting to Web site 

in the 

Search

 box 

, then click the arrow.

Содержание M360

Страница 1: ...UsingYour Computer ...

Страница 2: ......

Страница 3: ...6 Creating a new document 16 Saving a document 17 Opening a document 18 Printing a document 19 Shortcuts 20 2 Using the Internet 21 Learning about the Internet 22 Setting up an Internet account 23 Accessing your Internet account 23 Using the World Wide Web 24 Connecting to a Web site 25 Downloading files 26 Using e mail 27 Sending e mail 27 Checking your e mail 28 3 Sending and Receiving Faxes 29 ...

Страница 4: ...eo DVD 69 Advanced features 72 Editing videos 72 Transferring your video to your computer 73 Editing your video 75 Saving your video 75 5 Customizing Your Computer 77 Adjusting the screen and desktop settings 78 Adjusting the color depth 78 Adjusting the screen resolution 80 Changing the colors on your Windows desktop 81 Changing the desktop background 82 Selecting a screen saver 83 Using an exten...

Страница 5: ...er or scanner 109 Installing a USB printer or scanner 109 Installing a parallel port printer 110 Installing your old programs 111 8 Maintaining Your Computer 113 Setting up a maintenance schedule 114 Protecting your computer from viruses 115 Updating Windows 117 Using BigFix 118 Managing hard drive space 119 Checking hard drive space 119 Using Disk Cleanup 120 Checking the hard drive for errors 12...

Страница 6: ...iv www gateway com ...

Страница 7: ...Chapter 1 1 Using Windows XP Using the Windows desktop Managing files and folders Working with documents Using shortcuts ...

Страница 8: ...of a real desk Think of the desktop as your personalized work space where you open programs and perform other tasks Your desktop may be different from this example depending on how your computer is set up Help and Support For more information about the Windows desktop click Start then click Help and Support Type the keyword Windows desktop in the Search box then click the arrow ...

Страница 9: ...uter tools and utilities Click the Start button then open a file or program by clicking an item on the menu that opens The Recycle Bin is where files folders and programs that you discarded are stored You must empty the Recycle Bin to permanently delete them from your computer For instructions on how to use the Recycle Bin see Deleting files and folders on page 11 The Windows Security Center icon ...

Страница 10: ...ens showing you the first level of menu items 2 Click All Programs to see all programs and files in the Start menu When you move the mouse pointer over any menu item that has an arrow next to it another menu called a submenu opens and reveals related files programs or commands 3 Click a file or program to open it Help and Support For more information about the Windows Start menu click Start then c...

Страница 11: ...en click All Programs 2 Right click press the right mouse or touchpad button the program that you want to add to the desktop 3 Click Send To then click Desktop create shortcut A shortcut icon for that program appears on the desktop Help and Support For more information about desktop icons click Start then click Help and Support Type the keyword desktop icons in the Search box then click the arrow ...

Страница 12: ...these items Window item Description The title bar is the horizontal bar at the top of a window that shows the window title Clicking the minimize button reduces the active window to a button on the taskbar Clicking the program button in the taskbar opens the window again Clicking the maximize button expands the active window to fit the entire computer display Clicking the maximize button again rest...

Страница 13: ... drives Drives are like file cabinets because they hold files and folders A computer almost always has more than one drive Each drive has a letter usually Local Disk C for the hard drive and 3 Floppy A for the diskette drive You may also have more drives such as a CD or DVD drive To view the drives on your computer Click Start then click My Computer on the Start menu Help and Support For more info...

Страница 14: ...s Folders are much like the folders in a file cabinet They can contain files and other folders Files are much like paper documents letters spreadsheets and pictures that you keep on your computer In fact all information on a computer is stored in files Help and Support For more information about files and folders click Start then click Help and Support Type the keyword files and folders in the Sea...

Страница 15: ... to copy and move files are called copying cutting and pasting When you copy and paste a file or folder you place a copy of the file or folder on the Windows clipboard which temporarily stores it Then when you decide what folder you want the copy to go in the destination folder you paste it there When you cut and paste a file or folder you remove the file or folder from its original location and p...

Страница 16: ...folder to another folder 1 Locate the file or folder you want to move For more information see Viewing drives on page 7 and Searching for files on page 14 2 Right click press the right mouse or touchpad button the file or folder that you want to move A pop up menu opens on the desktop 3 Click Cut on the pop up menu 4 Open the destination folder 5 With the pointer inside the destination folder righ...

Страница 17: ...and folders see Shortcuts on page 20 If you cannot find the file you want to delete see Searching for files on page 14 2 Click File then click Delete Windows moves the files and folders to the Recycle Bin To recover files or folders from the Recycle Bin 1 Double click the Recycle Bin icon The Recycle Bin window opens and lists the files and folders you have thrown away since you last emptied it 2 ...

Страница 18: ...nside a folder that may be inside yet another folder and so on Windows drives folders and files are organized in the same way as a real file cabinet in that they may have many levels usually many more levels than a file cabinet in fact So you usually will have to search through levels of folders to find the file or folder that you need This is called browsing Caution Emptying the Recycle Bin perma...

Страница 19: ...you want to find If you do not see the contents of a folder click Show the contents of this drive or Show the contents of this folder 3 Continue double clicking folders and their subfolders until you find the file or folder you want Help and Support For more information about browsing for files and folders click Start then click Help and Support Type the keyword files and folders in the Search box...

Страница 20: ...or part of a name Creation date Modification date File type Text contained in the file Time period in which it was created or modified You can also combine search criteria to refine searches Files and folders found using this utility can be opened copied cut renamed or deleted directly from the list in the results window Using the Windows Search utility To find files and folders using the Search u...

Страница 21: ...s lists the files and folders whose names contain the text that you searched for 4 Open a file folder or program by double clicking the name in the list Using advanced search options Search can find files meeting more criteria than file name You can narrow your search by selecting the search options that you want You can search by the Date the file was created or modified Size of the file Type of ...

Страница 22: ...create save open and print a document using Microsoft WordPad Similar procedures apply to other programs such as WordPerfect Microsoft Word and Microsoft Excel For more information about using a program click Help on its menu bar Creating a new document To create a new document 1 Click Start All Programs Accessories then click WordPad Microsoft WordPad starts and a blank document opens 2 Begin com...

Страница 23: ...row button to open the Save in list then click the folder where you want to save the file If you do not see the folder you want browse through the folders listed below the Save in list 3 Type a new file name in the File name box 4 Click Save Help and Support For more information about saving documents click Start then click Help and Support Type the keyword saving in the Search box then click the ...

Страница 24: ...e then click Open 3 Click the arrow button to open the Look in list then click the folder you want to open If you do not see the folder you want browse through the folders listed below the Look in list 4 Double click the document file name The document opens Help and Support For more information about opening documents click Start then click Help and Support Type the keyword opening files in the S...

Страница 25: ...the printer documentation To print a document 1 Make sure that the printer is turned on and loaded with paper 2 Start the program and open the document 3 Click File then click Print The Print dialog box opens 4 Set the print options then click OK The document prints Help and Support For more information about printing documents click Start then click Help and Support Type the keyword printing in t...

Страница 26: ...ld down the CTRL key then click each of the remaining items Select multiple adjacent items in a list or window Click the first item in the list press and hold down the SHIFT key then click the last item in the list Permanently delete a file or folder Click the file or folder then press SHIFT DELETE The file or folder is permanently deleted The file or folder is not stored in the Recycle Bin Rename...

Страница 27: ...hapter 2 21 Using the Internet Setting up and accessing an Internet account Connecting to a Web site using a browser Downloading files from the Internet Sending and receiving e mail using Outlook Express ...

Страница 28: ...connect to your computer through an Ethernet jack and provide a faster connection speed than a standard telephone modem An Internet service provider a company that provides access to the Internet through an ISP server When you connect to an ISP the ISP server lets you access the Internet and your e mail messages Check your telephone book for a list of Internet service providers available locally I...

Страница 29: ...al up connections are designed to be temporary connections to the Internet dial up charges with both your telephone company and Internet service provider often increase the longer you connect to the Internet To minimize the cost for dial up Internet users we suggest that you only connect to the Internet during your e mail and Web browsing session then disconnect when you are finished Your Internet...

Страница 30: ...gator Web pages can contain text animations music and other multimedia features A group of related Web pages is called a Web site You can access Web sites to shop track investments read the news download programs and much more You can explore a Web site or visit other Web sites by clicking areas on a Web page called links or hyperlinks A link may be colored or underlined text a picture or an anima...

Страница 31: ... Resource Locator in the browser address bar for example www gateway com then click GO on the browser address bar OR On the current Web page click a link to a Web site The Web browser locates the server computer on the Internet downloads transfers data to your computer and displays the page on the site that you requested Sometimes Web pages display slowly The speed that a Web page displays on your...

Страница 32: ...4 Click the link on the Web page for the file that you want to download 5 Follow the on screen instructions for saving the file in the folder that you want A copy of the file is downloaded to your computer The time that it takes to transfer the file to your computer depends on file size and Internet conditions 6 Open the folder that you created 7 Install or view the downloaded file by double click...

Страница 33: ...ith an ISP For example a person with an account with Hotmail might have an e mail address that is similar to this one Sending e mail To send e mail using Outlook or Outlook Express 1 Connect to your Internet service provider 2 Click Start then click E Mail Your default e mail program opens 3 Click New 4 Type the e mail address of the recipient you want to send e mail to in the To box 5 Type the su...

Страница 34: ...you want to read For more information about managing and organizing your e mail messages see the online help in your e mail program Tips Tricks To protect your computer from viruses check any e mail attachments using Norton Antivirus For more information see Protecting your computer from viruses on page 115 Help and Support For general information about using e mail click Start then click Help and...

Страница 35: ...ing and Receiving Faxes Installing and configuring Fax Creating and sending a new fax Setting up a fax cover page template Faxing a document you scanned or created in another program Receiving viewing and printing a fax ...

Страница 36: ...nents Wizard opens 2 Click Fax Services then click Next 3 Click Finish to exit the Windows Components Wizard 4 Click Exit to close the Welcome to Microsoft Windows XP dialog box OR Click Close to close the Add or Remove Programs dialog box Important This chapter describes using Microsoft Fax and your dial up modem You cannot send or receive a fax using a cable or DSL modem by following these instr...

Страница 37: ...click Next The Sender Information screen opens 3 Type the information about yourself that you want to appear on your fax cover page then click Next The Select Device for Sending or Receiving Faxes screen opens 4 Click the arrow to open the Please select the fax device list then click the modem you are using to send and receive faxes 5 If you want the modem to automatically answer the telephone in ...

Страница 38: ...pe the receiving fax identifier information then click Next This identifier information is required by law and can be the same identifier that you typed in Step 7 The Routing Options screen opens 10 If you set up your computer to receive faxes select a folder you want to store received faxes in and a printer you want to print received faxes on then click Next The Configuration Summary screen opens...

Страница 39: ...ents To send a simple fax 1 Click Start All Programs Accessories Communications Fax then click Send a Fax The Send Fax Wizard opens 2 On the Welcome to Fax Configuration Wizard screen click Next The Recipient Information screen opens 3 Type the name and fax number of the recipient of your fax 4 If you need to use the area code for your recipient click Use dialing rules to type the full ten digit f...

Страница 40: ...reen opens 7 Click the arrow to open the Cover page template then click the cover page template you want to use 8 Type the subject text in the Subject line area 9 Type the message text in the Note area then click Next The Schedule screen opens 10 Select when you want to send the fax and a priority for the fax then click Next The Completing the Send Fax Wizard screen opens 11 Click Finish 12 If the...

Страница 41: ...ed from the Send Fax Wizard or the Fax Configuration Wizard such as To or From add them to the page by using the Insert menu then move them to the appropriate place on your template You can also use the Insert menu to include information that is automatically calculated such as number of pages or date and time sent If you want to include text that always appears on your cover page such as a letter...

Страница 42: ...nt The Send Fax Wizard opens 5 Complete the wizard by following the instructions in Sending a simple fax on page 33 Faxing a scanned document To fax a document that you have scanned 1 Scan the document using the program for your scanner 2 With the scanned file open click File then click Print The Print dialog box opens 3 Click the arrow button to open the Name list then click the Fax printer 4 Cli...

Страница 43: ...ox 2 To view a fax click Inbox then double click the fax you want to view The fax viewer opens where you can view and print the fax Canceling a fax You can cancel a fax that you have set up to send at a time in the future To cancel a fax that has not been sent 1 If Fax is not open click Start All Programs Accessories Communications Fax then click Fax Console The Fax Console opens 2 Click Outbox th...

Страница 44: ... Printers and Other Hardware Click View installed printers or fax printers The Printers and Faxes window opens OR If your Control Panel is in Classic View double click the Printers and Faxes icon The Printers and Faxes window opens 3 Right click Fax then click Properties The Fax Properties dialog box opens 4 Click the Devices tab then click Properties The Modem dialog box opens 5 Specify the numbe...

Страница 45: ...ategory View click Printers and Other Hardware Click View installed printers or fax printers The Printers and Faxes window opens OR If your Control Panel is in Classic View double click the Printers and Faxes icon The Printers and Faxes window opens 3 Right click Fax then click Properties The Fax Properties dialog box opens 4 Click the Devices tab then click Properties The Modem dialog box opens 5...

Страница 46: ...40 www gateway com Chapter 3 Sending and Receiving Faxes ...

Страница 47: ...Chapter 4 41 Using Multimedia Adjusting the volume Recording and playing audio Playing a CD or DVD Creating a CD or DVD Editing videos ...

Страница 48: ...your Control Panel is in Category View click Sounds Speech and Audio Devices 2 Click Double click the Adjust the system volume or Sounds and Audio Devices The Sounds and Audio Devices Properties dialog box opens 3 Click the Volume tab 4 Drag the Device Volume slider to change the volume or click to select the Mute check box then click OK Help and Support For more information about adjusting the vo...

Страница 49: ...Sounds Speech and Audio Devices 2 Click Double click the Adjust the system volume or Sounds and Audio Devices The Sounds and Audio Devices Properties dialog box opens 3 Click the Volume tab 4 Click Advanced in the Device volume area If the device you want to adjust does not appear in the window click Options Properties the check box next to the audio device you want to adjust then click OK ...

Страница 50: ...udio recording 1 Plug a microphone into one of the Microphone jacks on your computer For the location of the Microphone jacks see your desktop or notebook user guide or setup poster 2 Click Start All Programs Accessories Entertainment then click Sound Recorder The Sound Recorder opens 3 Click record then speak into the microphone 4 When you finish recording click stop 5 Click File then click Save ...

Страница 51: ...n dialog box opens 3 Click the file you want to play then click Open 4 Play the file by clicking play then stop playing the file by clicking stop Help and Support For more information about making or playing an audio recording click Start then click Help and Support Type the keyword recording audio or playing audio in the Search box then click the arrow ...

Страница 52: ...more information about using the Windows Media Player click Help To play a file using the Windows Media Player 1 Click Start All Programs then click Windows Media Player The Windows Media Player opens 2 Click File then click Open The Open dialog box opens 3 Click the file you want to play then click Open 4 Play the file by clicking play then stop playing the file by clicking stop Video file inform...

Страница 53: ... open with a list of CD players or DVD players click Start All Programs then click Windows Media Player Windows Media Player opens Important Some music CDs have copy protection software You may not be able to play these CDs on your computer Important To watch a DVD you must have a DVD drive in your computer If you do not have a DVD drive and would like to add an internal drive desktops or external...

Страница 54: ... want to change the volume see Adjusting the volume on page 42 Help and Support For more information about playing CDs or DVDs click Start then click Help and Support Type the keyword playing CDs or playing DVDs in the Search box then click the arrow Play pause Stop Next Previous Mute Volume ...

Страница 55: ...sion WMA To create WMA files 1 Insert a music CD into your CD or DVD drive 2 If a dialog box opens with a list of CD players click Windows Media Player The Windows Media Player opens OR If a dialog box does not open with a list of CD players click Start then click Windows Media Player The Windows Media Player opens Important Some music CDs have copy protection software You cannot copy tracks from ...

Страница 56: ...track you do not want to record 5 Click Rip Music Windows Media Player records the tracks to your hard drive as WMA files A progress bar appears next to each track as it is recorded Editing track information After you add a WMA or MP3 file to your music library you can edit the track s information To edit track information 1 Open Windows Media Player 2 Click the Library tab ...

Страница 57: ...ures and add information to a music file You can add music tracks to your music library by Creating WMA files When you create WMA files from the tracks on your music CD Windows Media Player automatically adds these files to your music library Dragging and Dropping Drag and drop files from Windows Explorer or your desktop to the music library Downloading files from the Internet When you are connect...

Страница 58: ... a music CD 1 Open Windows Media Player 2 Insert a blank writable CD into your CD or DVD drive 3 If a dialog box opens click Take no action then click OK 4 Click the Burn tab The Select files to burn window opens Tips Tricks You can also use Nero Express to create music CDs For more information see Creating a music CD on page 66 ...

Страница 59: ... to add them to the playlist After all the songs are added to your list click OK 7 Click Start Burn Using advanced features You can also use Windows Media Player to transfer WMA and MP3 files to your portable music player to listen to Internet radio and to watch Internet TV For more information see the Windows Media Player online help ...

Страница 60: ...the speakers are turned on or headphones are plugged in and that the volume is turned up 2 Turn off your screen saver see Selecting a screen saver on page 83 3 Turn off your standby timers see Changing the power scheme on page 94 and Changing the power scheme on page 99 Important To watch a DVD you must have a DVD drive in your computer If you do not have a DVD drive and would like to add an inter...

Страница 61: ... DVD into the DVD drive then click play The DVD plays To specifically control the DVD or adjust the volume use the controls in PowerDVD For more information on using CyberLink PowerDVD see its online help Help and Support For more information about playing DVDs click Start then click Help and Support Type the keyword playing DVDs in the Search box then click the arrow ...

Страница 62: ...on from the copyright owner Otherwise you may be violating copyright law and be subject to payment of damages and other remedies If you are uncertain about your rights contact your legal advisor Important Some CDs have copy protection software You cannot create MP3 files from these CDs and you may not be able to listen to these CDs on your computer Tips Tricks If your computer does not include Ner...

Страница 63: ... writable CD or DVD into your CD or DVD drive 3 If a dialog box opens click Take no action then click OK 4 If you have a recordable DVD drive or more than one recordable disc drive click the arrow button to open the Which recorder would you like to use list then select the recordable drive and the media type you are using OR If you have only one recordable disc drive and it is a recordable CD driv...

Страница 64: ...58 www gateway com Chapter 4 Using Multimedia 5 Move your pointer over Data then click Data Disc The Disc Content screen opens 6 Click Add The Select Files and Folders dialog box opens ...

Страница 65: ...k Add You can continue to select files and click Add 9 After you select all your files click Finished 10 Click Next The Final Burn Settings screen opens 11 Click the arrow to open the Current recorder list then click your recordable CD or DVD drive 12 Click Burn The Burning Process screen opens and Nero Express burns the files to the CD or DVD 13 When a message tells you that the recording is comp...

Страница 66: ...ress Nero Express opens 2 Click Copy entire disc The Select source and destination screen opens 3 Insert the music CD data CD or data DVD you want to copy into your CD or DVD drive 4 Click the arrow to open the Source drive list then click the drive that contains your source disc 5 Click the arrow to open the Destination drive list then click your recordable CD or DVD drive 6 Click Burn ...

Страница 67: ...61 www gateway com Using Nero Express 7 If you are copying a music CD the Nero s Title and CD Database dialog box opens ...

Страница 68: ... copies the tracks from the source disc to the blank recordable disc 9 If you are using one drive a message prompts you to insert a CD or DVD Remove the source CD or DVD insert a blank writable CD or DVD then wait for the message box to close Nero Express copies the files from your hard drive to the writable CD or DVD 10 When a message tells you that the recording is complete click OK 11 Click Nex...

Страница 69: ...uality MP3 files end in the file extension MP3 To create MP3 files 1 Click Start All Programs Burn a CD or Data DVD Nero Programs then click Nero Express Nero Express opens 2 Insert the music CD that has the tracks you want to copy into your CD or DVD drive 3 If an Audio CD dialog box opens click Take no action then click OK 4 Click More The Nero Toolbar opens Tips Tricks You can use Windows Media...

Страница 70: ...64 www gateway com Chapter 4 Using Multimedia 5 Click the Save Tracks icon The Nero s Title and CD Database dialog box opens 6 Wait until the dialog box closes OR Click Cancel ...

Страница 71: ...utton to open the Output file format list then click the format you want for the saved tracks 9 To record all the tracks click GO The recording process begins OR To record selected tracks hold down the CTRL key click the tracks you want then click GO The recording process begins 10 After the recording is complete click Close ...

Страница 72: ...wing options Audio CD to create a music CD that will play on all CD players Nero Express converts MP3 and WMA files to Audio CD format Audio and Data CD to create a CD that contains tracks and data files You can play the music files in a CD player and you can view all files on your computer MP3 Disc to create a CD using MP3 files You can play the CD on your computer or a player that supports MP3 f...

Страница 73: ...67 www gateway com Using Nero Express The screen you use to add files opens 5 Click Add The Select Files and Folders dialog box opens ...

Страница 74: ... files 7 Click Add You can continue to select files and click Add 8 After you select all your files click Finished 9 Click Next The Final Burn Settings screen opens 10 Click the arrow to open the Current recorder list then click your CD or DVD drive 11 Click Burn The Burning Process screen opens and Nero Express burns the files to the CD 12 When a message tells you that the recording is complete c...

Страница 75: ...n click Nero Express Nero Express opens 2 Insert a blank writable DVD into your DVD drive 3 If a dialog box opens click Take no action then click OK 4 Click the arrow button to open the Which recorder would you like to use list then select the recordable DVD drive and the DVD media type 5 Click DVD Video Files The screen you use to add files opens ...

Страница 76: ...ialog box opens Add existing DVD Video files with extensions such as VOB IFO BUP To make sure that the DVD Video disc functions it is best to add all the files of the VIDEO_TS folder 7 Click Add You can continue to select files and click Add 8 After you select all your files click Finished ...

Страница 77: ...the arrow to open the Current recorder list then click your DVD drive 11 Click Burn The Burning Process screen opens and Nero Express burns the files to the DVD 12 When a message tells you that the recording is complete click OK 13 Click Next to return to the main Nero Express screen 14 Click Exit ...

Страница 78: ...All Programs Burn a CD or Data DVD Nero Programs then click the program you want For more information see the online help in the programs and the online user s guides To access the user s guides click Start All Programs Burn a CD or Data DVD User s Guides then click the guide you want Editing videos Windows Movie Maker is a video capture program that lets you capture and edit full motion video sin...

Страница 79: ...era manufacturer s instructions 2 If a dialog box opens with a list of video editing programs click Windows Movie Maker Windows Movie Maker opens OR If a dialog box does not open with a list of video editing programs click Start All Programs then click Windows Movie Maker Windows Movie Maker opens Windows Movie Maker should recognize your camera and the Video Capture Wizard opens ...

Страница 80: ...ideo tape in your camera and captures it onto your hard drive For information about the settings in the Video Capture Wizard click Learn more about video settings in the wizard or click Help then Help Topics in Windows Movie Maker Caution Video files may require a significant amount of free hard drive space depending on your settings A one hour tape may require more than 10 GB of hard drive space ...

Страница 81: ...s For information about the editing your video click Help then Help Topics in Windows Movie Maker Saving your video After you finish editing your video you can save it to one of the following places Under Movie Tasks Click Save to My Computer to save your movie to your hard drive Click Save to CD to save your movie to a recordable CD Click Send in e mail to send your video as an e mail attachment ...

Страница 82: ...76 www gateway com Chapter 4 Using Multimedia ...

Страница 83: ...tomizing Your Computer Changing screen and display settings Changing the background and screen saver Using an extended desktop Adjusting the mouse or touchpad settings Managing user accounts Modifying security settings ...

Страница 84: ...choose from several color depth settings We recommend that you use the 32 bit True Color setting at all times If the color in your images seems false or jumpy especially after you have played a game or run a video intensive program check the color depth setting and return it to 32 bit True Color if necessary To change the color depth 1 Click Start then click Control Panel The Control Panel window ...

Страница 85: ...ty list then click the color depth you want 5 Click OK then click Yes Help and Support For more information about adjusting display settings click Start then click Help and Support Type the keyword changing display settings in the Search box then click the arrow Single monitor desktop computer Notebook or dual monitor desktop computer ...

Страница 86: ...t then click Control Panel The Control Panel window opens If your Control Panel is in Category View click Appearance and Themes 2 Click Double click the Display icon The Display Properties dialog box opens 3 Click the Settings tab 4 Drag the Screen resolution slider to the size you prefer 5 Click OK then click Yes Help and Support For more information about adjusting screen resolution click Start ...

Страница 87: ...ck Control Panel The Control Panel window opens If your Control Panel is in Category View click Appearance and Themes 2 Click Double click the Display icon The Display Properties dialog box opens 3 Click the Appearance tab 4 Click the arrow button to open the Color scheme list click the color scheme you want then click OK The new colors appear on your desktop OR If you want to create a new color s...

Страница 88: ...pe a name for the new theme then click OK twice The new colors appear on your desktop Changing the desktop background You can change the Windows desktop background picture Windows provides several backgrounds or you can use pictures that you have created or retrieved from other sources To change the desktop background 1 Click Start then click Control Panel The Control Panel window opens If your Co...

Страница 89: ...omputer Windows supplies a variety of screen savers that you can choose from and many more are available from the Internet and as commercial products To select a screen saver 1 Click Start then click Control Panel The Control Panel window opens If your Control Panel is in Category View click Appearance and Themes 2 Click Double click the Display icon The Display Properties dialog box opens Help an...

Страница 90: ...n is not available you cannot customize the screen saver you selected If you want to display the Welcome Login screen whenever you exit the screen saver click the On resume display Welcome screen check box If you want to change the time before the screen saver is activated click the up or down arrows next to the Wait box 5 Click OK Help and Support For more information about selecting a screen sav...

Страница 91: ...itional windows To turn on extended desktop 1 Right click any empty space on the desktop then click Properties The Display Properties dialog box opens 2 Click the Settings tab 3 Click the second monitor icon labeled 2 then click Extend my Windows desktop onto this monitor 4 Click Apply 5 You can open windows in your desktop and drag them over to the second monitor Help and Support For more informa...

Страница 92: ... then click Control Panel The Control Panel window opens If your Control Panel is in Category View click Printers and Other Hardware 2 Click Double click the Mouse icon The Mouse Properties dialog box opens 3 Click one of the tabs to change your mouse settings 4 Click OK to save changes Help and Support For more information about changing mouse settings click Start then click Help and Support Type...

Страница 93: ... 1 Click Start then click Control Panel The Control Panel window opens If your Control Panel is in Category View click Printers and Other Hardware 2 Click Double click the Mouse icon The Mouse Properties dialog box opens 3 Click the Device Settings tab then click the device you want to modify ...

Страница 94: ... Tips Tricks You may have received your notebook with the EZ Pad touchpad set to only accept clicking by using the touchpad buttons You can change this feature to allow tapping on the touchpad to simulate clicking the left button To turn on tapping click Tapping then click Enable Tapping Help and Support For more information about changing mouse settings click Start then click Help and Support Typ...

Страница 95: ...it may not be available in other accounts If this happens install the program or device in the accounts that need it Files created in one account are not accessible from other accounts unless the files are stored in the Shared Documents folder The Shared Documents folder is accessible from all accounts on that computer and from other computers on the network To add delete or modify user accounts 1...

Страница 96: ... Log Off Windows dialog box opens 2 Click Switch User The Windows Welcome screen opens 3 Click the user account that you want to use When you switch between user accounts any programs that were running for the previous user continue to run Caution If you click Log Off any programs that were running may be turned off ...

Страница 97: ...all automatic Windows updates third party virus protection software security options in Internet Explorer To modify security settings Click Start All Programs Accessories System Tools then click Security Center The Windows Security Center dialog box opens For more information about the Windows Security Center click Get help about Security Center ...

Страница 98: ...92 www gateway com Chapter 5 Customizing Your Computer ...

Страница 99: ...Chapter 6 93 Changing Power Saving Settings Changing desktop power settings Changing notebook power settings ...

Страница 100: ... settings Changing the power scheme Power schemes groups of power settings let you change power saving options such as when the monitor or hard drive is automatically turned off You can select one of the defined power schemes or create a custom power scheme To change the power scheme 1 Click Start then click Control Panel The Control Panel window opens If your Control Panel is in Category View cli...

Страница 101: ...g advanced power settings Advanced power settings let you assign different power saving modes to the power button To change advanced power management settings 1 Click Start then click Control Panel The Control Panel window opens If your Control Panel is in Category View click Performance and Maintenance 2 Click Double click the Power Options icon The Power Options Properties dialog box opens Help ...

Страница 102: ...arrow button to open a Power buttons list then click the power setting mode you want to use 5 Click OK Help and Support For more information about changing the power management settings click Start then click Help and Support Type the keyword power management in the Search box then click the arrow ...

Страница 103: ... and documents that were open when you activated Hibernate mode To activate Hibernate mode 1 Click Start then click Control Panel The Control Panel window opens If your Control Panel is in Category View click Performance and Maintenance 2 Click Double click the Power Options icon The Power Options Properties dialog box opens 3 Click the Hibernate tab 4 Click the Enable hibernation check box then c...

Страница 104: ...ck the Advanced tab Hibernate is now an option in the Power buttons lists As a manually selected power savings mode Click Start then click Turn Off Computer Press and hold SHIFT then click Hibernate Setting up an uninterruptible power supply To install an uninterruptible power supply UPS 1 Click Start then click Control Panel The Control Panel window opens If your Control Panel is in Category View...

Страница 105: ...f power settings let you change power saving options such as when the display or hard drive is automatically turned off You can select one of the defined power schemes or create a custom power scheme The processor installed in your notebook may use Intel SpeedStep technology to conserve battery power A SpeedStep equipped processor can change its operating speed according to the power source Your n...

Страница 106: ...Click Double click the Power Options icon The Power Options Properties dialog box opens 3 Click the arrow button to open the Power Schemes list then click the power scheme you want OR Set the timers then click Save As and type a name for the scheme 4 Click OK Help and Support For more information about changing the power scheme click Start then click Help and Support Type the keyword power scheme ...

Страница 107: ...dow opens If your Control Panel is in Category View click Performance and Maintenance 2 Click Double click the Power Options icon The Power Options Properties dialog box opens 3 Click the Alarms tab 4 Adjust the alarm settings 5 Click OK Help and Support For more information about changing the alarm options click Start then click Help and Support Type the keyword alarm options in the Search box th...

Страница 108: ...lick Control Panel The Control Panel window opens If your Control Panel is in Category View click Performance and Maintenance 2 Click Double click the Power Options icon The Power Options Properties dialog box opens 3 Click the Advanced tab 4 Click the arrow button to open a Power buttons list then click the power setting mode you want to use 5 Click OK Help and Support For more information about ...

Страница 109: ...ents that were open when you activated Hibernate mode To activate Hibernate mode 1 Click Start then click Control Panel The Control Panel window opens If your Control Panel is in Category View click Performance and Maintenance 2 Click Double click the Power Options icon The Power Options Properties dialog box opens 3 Click the Hibernate tab 4 Click the Enable hibernation check box then click Apply...

Страница 110: ...then click the time you want to use OR Open the Power Options Properties dialog box then click the Advanced tab Hibernate is now an option in the Power buttons lists As a manually selected power savings mode Click Start then click Shut Down Press and hold SHIFT then click Hibernate Help and Support For more information about using Hibernate mode click Start then click Help and Support Type the key...

Страница 111: ...7 105 Moving from Your Old Computer Using the Windows XP Files and Settings Transfer Wizard Transferring Files Transferring Internet Settings Installing your old printer or scanner Installing your old programs ...

Страница 112: ...movable media such as a diskette writable CD or DVD USB flash drive or Zip disk or by using a home network For more information see Using Nero Express on page 56 the printed networking guide or the networking information in your desktop or notebook user guide Finding your files Many programs automatically save your personal data files in the My Documents folder Look in your old computer s My Docum...

Страница 113: ... the file s extension the part of the file name following the last period For example a document file might have a DOC extension and a spreadsheet file might have an XLS extension To find files using Find or Search 1 In Windows XP click Start then click Search The Search Results window opens OR In Windows 98 Windows Me or Windows 2000 click Start Find or Search then click For Files or Folders The ...

Страница 114: ... their software and install it on your new computer If you use MSN as your ISP or if you know your ISP settings use the Windows Internet Connection Wizard To use the Internet Connection Wizard 1 Click Start All Programs Accessories Communications then click New Connection Wizard The New Connection wizard opens 2 Configure your Internet settings by following the on screen instructions Help and Supp...

Страница 115: ...icrosoft Internet Explorer favorites For more information see your Internet browser program s online help Installing your old printer or scanner Windows may have built in support for older printers scanners or other peripheral devices This means you do not need any additional software Newer devices however usually require your original software installation discs or diskettes If you have trouble a...

Страница 116: ...k Start then click Control Panel The Control Panel window opens If your Control Panel is in Category View click Printers and Other Hardware 6 Click Double click the Printers and Faxes then click Add Printer The Add Printer wizard opens 7 Install your printer by following the on screen instructions See your peripheral device s user guide for installation information and tips Because most installati...

Страница 117: ...ld contain any serial numbers or product ID keys that may be required for program installation and registration Remember to check the publisher s Web site for important program updates If you have trouble after installing your old programs you can restore your computer s previous settings using System Restore Tips Tricks If your new computer comes with a newer version of a program it is usually be...

Страница 118: ...112 www gateway com Chapter 7 Moving from Your Old Computer ...

Страница 119: ...Chapter 8 113 Maintaining Your Computer Protecting from viruses Updating Windows Managing hard drive space Backing up files ...

Страница 120: ... needed See Check for viruses X X page 115 Update Windows XP X X page 117 Manage hard drive space X page 119 Clean up hard drives X X page 120 Scan hard drive for errors X X page 121 Defragment hard drive X X page 122 Back up files X X page 124 Recalibrate the notebook battery X Your notebook user guide Clean computer case and peripheral devices X Your desktop or notebook user guide ...

Страница 121: ...r Using the Norton AntiVirus program to check files and programs that are attached to e mail messages or downloaded from the Internet Checking all programs for viruses before installing them Disabling macros on suspicious Microsoft Word and Excel files These programs will warn you if a document that you are opening contains a macro that might have a virus Periodically updating the Norton AntiVirus...

Страница 122: ...aining Your Computer To scan for viruses 1 Click Start All Programs Norton AntiVirus then click Norton AntiVirus 2005 Norton AntiVirus opens 2 Click Scan for Viruses 3 Click the type of scan you want to make in the Scan for Viruses area ...

Страница 123: ...e online extension of Windows that helps you to keep your computer up to date Use Windows Update to choose updates for your computer s operating system software and hardware New content is added to the site regularly so you can always get the most recent updates and fixes to protect your computer and keep it running smoothly Windows Update scans your computer and provides you with a tailored selec...

Страница 124: ...lem click on that icon to open BigFix To start BigFix Click Start All Programs Accessories System Tools then click BigFix To learn more about using BigFix From the BigFix program click Help then click Tutorial Important Windows Update can be controlled through the Windows Security Center For more information see Modifying security settings on page 91 Help and Support For more information about Win...

Страница 125: ...ral utilities you can use to manage your hard drive Checking hard drive space To check hard drive space 1 Click Start then click My Computer The My Computer window opens 2 Right click the drive that you want to check for available file space then click Properties Drive space information appears ...

Страница 126: ... then click Properties The Properties dialog box opens at the General tab 3 Click Disk Cleanup The Disk Cleanup dialog box opens 4 Make sure that the check box beside each file type you want to delete is selected For more information about file types you can delete read the descriptions in the Disk Cleanup dialog box 5 Click OK then click Yes Help and Support For more information about keeping the...

Страница 127: ... Error checking if you encounter hard drive problems To check the hard drive for errors 1 Click Start then click My Computer The My Computer window opens 2 Right click the hard drive that you want to check for errors for example Local Disk C then click Properties The Properties dialog box opens 3 Click the Tools tab 4 Click Check Now 5 Click the options you want to use then click Start For help pr...

Страница 128: ...nformation stored on the drive can improve hard drive performance While the Disk Defragmenter program is running do not use your keyboard or mouse because using them may continuously stop and restart the defragmenting process Also if you are connected to a network log off before starting Disk Defragmenter Network communication may stop the defragmentation process and cause it to start over To defr...

Страница 129: ...s its progress on the computer display When finished Disk Defragmenter asks if you want to quit the program 6 Click Close then click the X in the top right corner to close the Disk Defragmenter window Help and Support For more information about defragmenting the hard drive click Start then click Help and Support Type the keyword defragmenting in the Search box then click the arrow ...

Страница 130: ...e information see Using Nero Express on page 56 If you do not have a high capacity backup device and you want to purchase one you can visit the Accessories Store at accessories gateway com Using the Scheduled Task Wizard The Scheduled Task Wizard lets you schedule maintenance tasks such as running Disk Defragmenter and Error checking To start the Scheduled Task Wizard 1 Click Start All Programs Ac...

Страница 131: ...nstructions to customize the task Important Your computer must be on during scheduled tasks If your computer is off scheduled tasks will not run Help and Support For more information about using the Scheduled Tasks Wizard click Start then click Help and Support Type the keyword Scheduled Task Wizard in the Search box then click the arrow ...

Страница 132: ...126 www gateway com Chapter 8 Maintaining Your Computer ...

Страница 133: ...r 9 127 Traveling with Your Notebook Using the modem Using your radio frequency wireless connections Transferring files Protecting your notebook from loss and theft Managing your notebook s power efficiently ...

Страница 134: ...our notebook hand inspected or sent through the X ray scanner but never carry it through the metal detector Turn off you notebook for takeoff and landing Turn off all wireless devices while in the aircraft Do not check your notebook as luggage Modem Take a telephone cord to connect the modem to telephone jacks If you are traveling internationally take telephone jack adapters or an acoustic handset...

Страница 135: ...ide Files Copy your working files from your desktop computer to your notebook before you travel If you need to access your desktop computer files from your notebook while traveling set up your desktop computer for remote access Contact your network administrator for more information about remote access Take extra recordable media for transferring files between computers and backing up files Securi...

Страница 136: ... plan to use several USB peripheral devices take a portable USB hub to provide additional USB ports Take a network cable if you need to connect to a network Some hotels provide Internet connectivity only through their networks If your notebook has been exposed to cold temperatures allow it to warm to room temperature before turning it on Carry proof of ownership or a merchandise passport when trav...

Страница 137: ... at www gateway com In no event will Gateway be liable for direct indirect special exemplary incidental or consequential damages resulting from any defect or omission in this manual even if advised of the possibility of such damages In the interest of continued product development Gateway reserves the right to make improvements in this manual and the products it describes at any time without notic...

Страница 138: ...132 www gateway com Chapter 9 Traveling with Your Notebook ...

Страница 139: ...em 23 capturing video to computer 73 CD adding tracks to your library 51 copying 60 creating audio 52 66 creating data 57 creating label 72 creating music 66 editing track information 50 playing music 47 CD drive See DVD drive clipboard 9 close button 6 closing program 6 20 window 6 20 color changing depth 78 changing number of 78 changing scheme 81 connecting to Internet 23 to Web site 25 connect...

Страница 140: ... printing 19 saving 17 downloading files 26 drives backing up files 124 checking for errors 121 checking for free space 119 defragmenting 122 viewing contents 7 viewing files and folders 7 DSL modem 23 DVD copying 60 creating data 57 creating label 72 creating video 69 playing 47 54 DVD drive testing 72 testing speed 72 E editing music track information 50 video 75 e mail 23 27 address 27 checking...

Страница 141: ...EE 802 11 using while traveling 129 installing Fax 30 peripheral devices 109 printer 109 programs 111 scanner 109 Internet 22 account 23 connecting to 23 downloading files 26 requirements to access 22 transferring settings from old computer 108 Internet radio 53 Internet service provider ISP 22 connecting to 23 disconnecting from 23 setting up account 23 transferring settings from old computer 108...

Страница 142: ...laying 46 MPEG file 46 multimedia adjusting volume 42 playing audio CD 47 playing DVD 47 54 recording audio 44 using Windows Media Player 46 multiple monitors 85 music library building 51 music tracks copying 49 63 muting sound 42 N Nero Express 56 Norton Antivirus 115 O opening documents 18 files 4 folders 7 programs 4 P password 129 pasting files and folders 9 20 text and graphics 20 playing aud...

Страница 143: ...Wizard 124 screen adjusting settings 78 changing color depth 78 changing number of colors 78 changing resolution 80 saver 83 Search utility 14 searching for files and folders 12 14 106 security settings modifying 91 security while travelling 129 serial number 129 shortcuts adding to desktop 5 closing programs 20 closing windows 20 copying 20 cutting 20 deleting files and folders 20 keyboard 20 pas...

Страница 144: ... 75 transferring to computer 73 Video Capture Wizard 74 virus protecting against 91 115 removing 115 volume adjusting 42 controls 42 muting 42 W WAV file 46 Web browser 23 24 Web page 24 Web site 24 connecting to 25 downloading files 26 window 6 close button 6 closing 6 20 maximize button 6 menu bar 6 minimize button 6 title bar 6 Windows clipboard 9 desktop 2 Files and Settings Transfer Wizard 10...

Страница 145: ...139 www gateway com using while traveling 129 WMA file creating 49 editing track information 50 playing 46 Wordpad 16 World Wide Web WWW 24 downloading files 26 Z Zip drive 124 ...

Страница 146: ...140 www gateway com ...

Страница 147: ......

Страница 148: ...NSK DWL GW GEN CMPTR USRGDE R2 2 05 ...

Отзывы: