


Input of Pattern
29
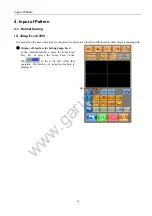
①
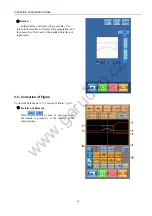
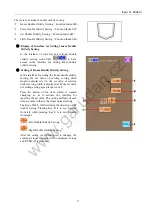
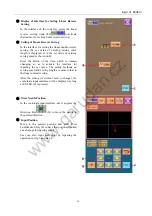
Display of Interface for Setting Arc normal
Sewing
In the interface of code list, select the arc normal
sewing (code 025)
to activate the
interface for setting the arc normal sewing.
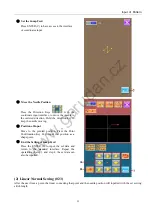
②
Setting of Arc Normal Sewing
In the interface for setting the arc normal sewing,
the set value of existing sewing stitch length is
displayed at A, while the set value of existing
sewing speed is shown on B.
Press the button of the item, which is wanted
changing, so as to activate the interface for
inputting the set value. The setting methods on the
sewing speed and the stitch length of the arc
normal sewing are same to that of the linear
normal sewing.
After the setting (or without need to change), the
coordinate input interface will be displayed as
long as ENTER (C) is pressed.
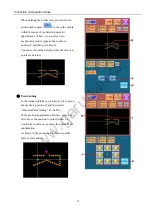
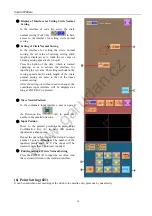
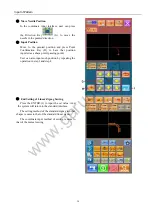
③
Move Needle Position
In the coordinate input interface, user can press
the Direction Key
(D) to move the
needle in the pointed direction.
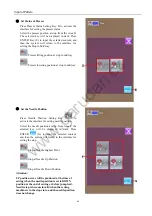
④
Input Position
Move to the pointed position and press Point
Confirmation Key (E) to have that position
inputted as a shape point.
Repeat the operation in step 3 and step 4 to input
another 2 points.
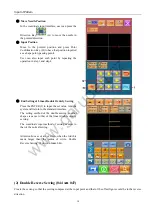
Attention:
The number of the
inputted points shall be 2! The input will be
denied if more than 3 points are inputted.
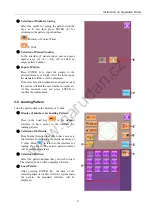
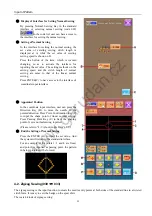
⑤
End the Setting of Arc Normal Sewing
Press the ENTER (F) to input the set value. And
the system will return to the standard interface.
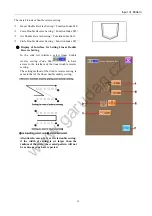
(5) Circle Normal Sewing (026)
After the user fixes two points, the arc connecting that point and the needle position will inputted in the set sewing
stitch length. The sewing direction is determined by the input order of the pointed spots.
www.garudan.cz
Содержание GPS/F-1006 Series
Страница 2: ...w w w g a r u d a n c z...
Страница 4: ...w w w g a r u d a n c z...