background image

EN- 

GHS 10/10i Installation Instructions

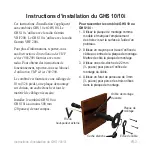
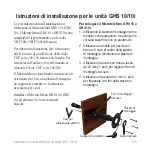
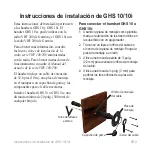
5.  Use the three 3.5 × 20 mm, panhead 

mounting screws to attach the 

mounting plate.

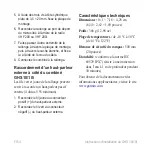
6.  Connect the extension cable to the 

microphone relocation port on the 

rear of the VHF 200 or VHF 200i 

radio.

7.  Mount the other end of the extension 

cable through the mounting plate and 

weather cap, securing with the cable 

nut.

8.  Connect the handset to the extension 

cable.

Connecting an external 

speaker next to the  

GHS 10/10i handset

The green and yellow wires on the 

extension cable can be used to connect 

an external passive speaker (4 ohm, 5 W 

minimum).

1.  Connect the yellow wire to the 

positive (+) connection on the 

external speaker.

2.  Connect the green wire to the 

negative (-) connection on the 

external speaker.

Specifications

Dimensions:

 6.34 × 2.82 × 1.69 in. 

(16.1 × 7.16 × 4.28 cm)

Weight:

 12.98 oz. (368 g)

Temperature Range:

 from 14ºF to 

122ºF (from -10ºC to 50ºC)

Compass-safe Distance:

 20 in. 

(500 mm)

Waterproof:

 IEC 60529 IPX7 

(Immersion in 1 meter of water for 

30 minutes)

Please visit 

www.garmin.com


for additional documentation and 

information.

Содержание GHS 10i

Страница 1: ...GHS10 10i handset installation instructions instructions d installation istruzioni di installazione installationsanweisungen instrucciones de instalaci n...

Страница 2: ...m extension cable a bulkhead mounting plate a weather cap and the necessary cable hardware Install the GHS 10 or GHS 10i handset at least 20 in 500 mm from any compass To connect the GHS 10 or GHS 10i...

Страница 3: ...next to the GHS 10 10i handset The green and yellow wires on the extension cable can be used to connect an external passive speaker 4 ohm 5 W minimum 1 Connect the yellow wire to the positive connecti...

Страница 4: ...he tanche et tout le mat riel de c blage n cessaire Installez le combin GHS 10 ou GHS 10i au moins 500 mm 20 pouces de tout compas Pour raccorder le combin GHS 10 ou GHS 10i 1 Utilisez la plaque de mo...

Страница 5: ...10i Les fils vert et jaune de la rallonge peuvent servir raccorder un haut parleur passif externe 4 ohms 5 W minimum 1 Raccordez le fil jaune au connecteur positif du haut parleur externe 2 Raccordez...

Страница 6: ...e la minuteria necessaria per i cavi Installare il Microtelefono GHS 10 o GHS 10i ad almeno 50 cm da eventuali bussole Per collegare il Microtelefono GHS 10 o GHS 10i 1 Utilizzando la piastra di monta...

Страница 7: ...altoparlante esterno accanto al Microtelefono GHS 10 10i I cavi verde e giallo sul cavo di estensione possono essere utilizzati per collegare un altoparlante esterno 4 ohm 5 W minimo 1 Collegare il ca...

Страница 8: ...hott eine Schutzkappe und die notwendigen Kabel enthalten Das Handset GHS 10 bzw GHS 10i muss in einem Abstand von mindestens 50 cm 20 Zoll von Kompassen installiert werden So schlie en Sie das Handse...

Страница 9: ...s externen Lautsprechers neben dem Handset GHS 10 10i Die gr ne und gelbe Leitung des Ver l ngerungskabels k nnen zum Anschluss eines externen Passivlautsprechers 4 Ohm mind 5 W verwendet werden 1 Sch...

Страница 10: ...uch n de goma y los componentes para el cable necesarios Instale el handset GHS 10 o GHS 10i a una distancia m nima de 20 pulg 500 mm de cualquier br jula Para conectar el handset GHS 10 o GHS 10i 1 U...

Страница 11: ...tavoz externo junto al handset GHS 10 10i Se pueden utilizar los hilos verde y amarillo del cable de extensi n para conectar un altavoz externo pasivo 4 ohmios 5 W m nimo 1 Conecte el hilo amarillo a...

Страница 12: ...151st Street Olathe Kansas 66062 USA Garmin Europe Ltd Liberty House Hounsdown Business Park Southampton Hampshire SO40 9RB UK Garmin Corporation No 68 Jangshu 2nd Road Shijr Taipei County Taiwan www...

Отзывы: