


Getting Started
WARNING
See the
Important Safety and Product Information
guide in the
product box for product warnings and other important
information.
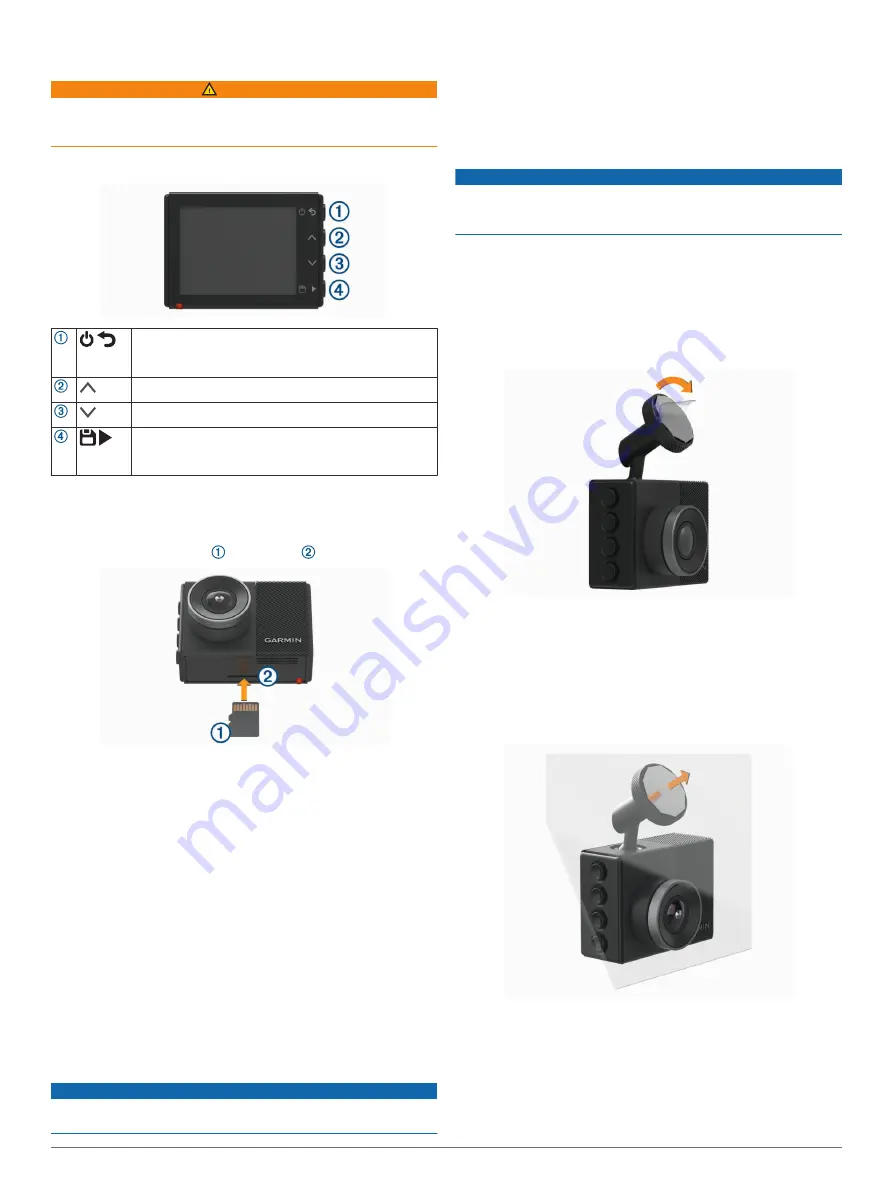
Device Overview
Press to turn the device on.
Hold for 3 seconds to turn the device off.
Select to return to the previous page.
Select to scroll through menus or pages.
Select to scroll through menus or pages.
From the viewfinder, select to save a photo.
Hold to save a video clip.
Select to choose an option in a menu.
Installing a Memory Card
To record video, you must install a compatible memory card
(
).
1
Insert the memory card into the slot .
2
Press it in until it clicks.
Formatting the Memory Card
The camera requires a memory card formatted using the FAT32
file system. You can use the camera to format your card using
this file system.
You should format your memory card at least one time every 6
months to help extend the useful life of the memory card. You
must also format a brand new memory card if it is not formatted
using the FAT32 file system.
NOTE:
Formatting the memory card deletes all videos, photos,
and data on the card.
1
Connect the camera to power.
2
Select
Settings
>
Camera
>
Format Card
.
3
Keep the camera connected to power until the formatting is
complete.
When formatting is complete, the camera displays a message
and begins recording.
Removing the Memory Card
NOTICE
Removing the memory card while the device is turned on can
result in a loss of data or damage to the device.
1
Turn off the device.
2
Press the card in until it clicks.
3
Release the card.
The card ejects from the slot.
Installing the Device on Your Windshield
NOTICE
The adhesive mount is intended for a long-term installation and
can be difficult to remove. You should carefully consider the
mounting location before you install the mount.
Before you can install the adhesive mount onto your windshield,
the ambient temperature must be from 21° to 38°C (from 70° to
100°F).
1
Clean the windshield using water or alcohol, and a lint-free
cloth.
The windshield must be free of dust, wax, oils, or coatings.
2
Remove the protective film from the mount adhesive.
3
Position the mount over the mounting location.
TIP:
The adhesive is extremely sticky. Avoid touching the
adhesive to the windshield until the mount is properly
positioned and aligned.
4
Press the mount firmly onto the windshield, and maintain
pressure for 30 seconds.
This helps to ensure the mount adhesive has proper contact
with the windshield.
Connecting the Device to Vehicle Power
1
Plug the power cable into the USB port on the device.
Getting Started
1
Содержание DASH CAM 46
Страница 1: ...GARMINDASHCAM 46 56 66W Owner sManual ...
Страница 4: ......
Страница 14: ...support garmin com TRA REGISTERED No ER69454 19 DEALER No 0015955 08 March 2019 190 02544 00_0A ...


