


Installation
G&D DVIMUX2-DL-PS/2 ·
4
Connecting the console devices
Keyb.:
Plug the connection cable of the PS/2 keyboard in this socket.
Mouse:
Plug the connection cable of the PS/2 mouse in this socket.
Speaker:
Connect the speakers to this interface for output of audio signals at the
active computer.
Monitor 1:
Plug the monitor’s DVI-I cable to this interface.
Connecting the computers
ADVICE:
Connect the cables of the console and the computers preferably block by
block and from the bottom up. By doing so, you will avoid already connected
cables blocking your view of the interfaces.
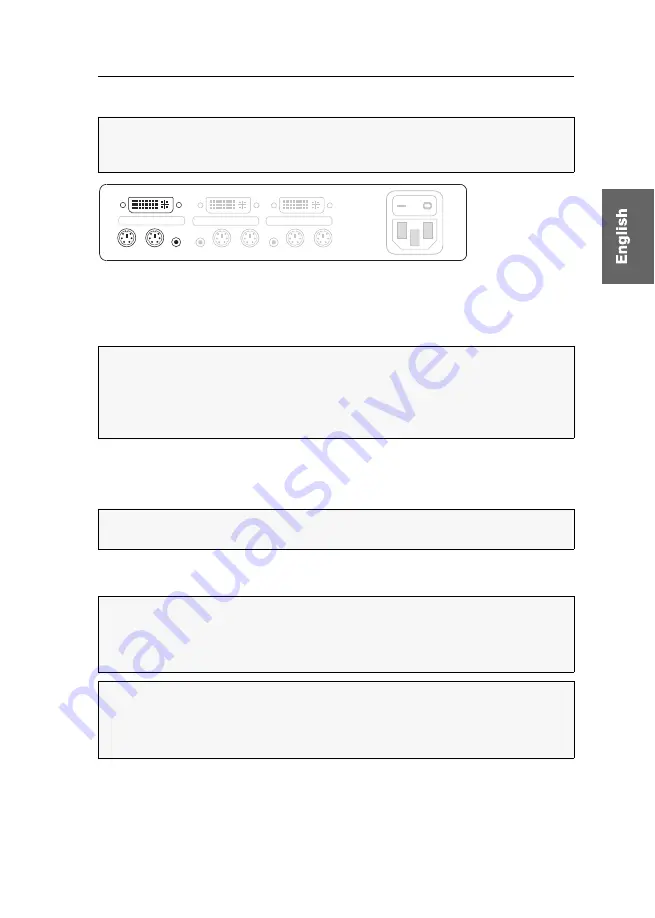
Figure 2: Interfaces to connect the console devices
NOTE:
You can also connect a USB keyboard and/or a USB mouse to the
USB K/M
interfaces on the front panel of the device.
The PS/2 interfaces (on the back panel of the KVM switch) as well as the USB
interfaces on the front panel of the device can be used for connecting both console
keyboard and console mouse.
NOTE:
If you purchased the multi-channel variant of the KVM switch, connect the
additional monitors to the
Monitor 2
interface.
IMPORTANT:
KVM cable sets are required to connect the computers to the KVM
switch. All available KVM cable sets are listed on page 31.
Assign the cable sets to the different computers and have them available for instal-
lation.
NOTE:
To connect the (maximum two) computers to the KVM switch, the inter-
faces as shown below are available for each computer.
The label (e.g.
CPU 1
) assigns the interface to a specific computer and to the corre-
spondent button on the front panel.
Power
CPU 1
DVI-I CPU 1
Keyb.
Mouse
Line In
Keyb.
Mouse
Line In
CPU 2
DVI-I CPU 2
Monitor 1
Keyb.
Mouse Speaker
CON
Содержание DVIMUX2-DL-PS/2
Страница 39: ...NOTIZEN...
Страница 75: ...NOTES...
Страница 76: ...NOTES...
Страница 77: ...NOTES...
Страница 78: ...NOTES...
Страница 79: ...NOTES...


