background image


WC ORION III ENGLISH CDN 1230 REV01.DOCX 

ORION III 

GENERAL


MAINTENANCE ..................................................... 45


SERVICE


AND


REPAIR ........................................................... 45


CLEANING


YOUR


CHAIR ........................................................ 45


11


WARRANTY ........................................................................47


LIFETIME ................................................................................. 47


FOR


TWO


(2)


YEARS .............................................................. 47


FOR


ONE


(1)


YEAR ................................................................. 47


FOR


(90)


DAYS ........................................................................ 47


LIMITATIONS ........................................................................... 47


WARRANTY


PROCEDURES ................................................... 47


Содержание Orion III

Страница 1: ...OWNERS MANUAL...

Страница 2: ...entire manual before using this wheelchair Thank you for choosing Future Mobility Healthcare Inc If you have any questions please do not hesitate to write or call us at the address and telephone numbe...

Страница 3: ...ARNINGS 13 ANTI TIP WHEELS 13 ARMRESTS 13 BACK CANES 13 FASTENERS 13 FOOTRESTS 13 POSITIONING BELTS 14 QUICK RELEASE AXLES 14 REAR WHEEL AXLES 14 REAR WHEEL LOCKS 15 8 WHEELCHAIR SET UP AND ADJUSTMENT...

Страница 4: ...H CDN 1230 REV01 DOCX 4 ORION III GENERAL MAINTENANCE 45 SERVICE AND REPAIR 45 CLEANING YOUR CHAIR 45 11 WARRANTY 47 LIFETIME 47 FOR TWO 2 YEARS 47 FOR ONE 1 YEAR 47 FOR 90 DAYS 47 LIMITATIONS 47 WARR...

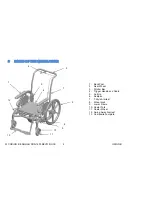
Страница 5: ...S OF THE WHEELCHAIR 1 2 3 4 5 6 7 8 9 10 11 12 13 1 Back Post 2 Rear Wheel 3 Stroller Bar 4 Trigger Handle and Cable 5 Anti tip 6 Seatpan 7 T Style Armrest 8 Wheel Lock 9 Lower Frame 10 Caster Fork 11...

Страница 6: ...depend on such things as 1 The level of your disability strength balance and coordination 2 The places and terrain that you are likely to use your chair 3 The need for options for your safety and comf...

Страница 7: ...thers TO REDUCE THE RISK WARNING 1 BEFORE riding you should be trained in the safe use of this chair by your health care advisor 2 Practice bending reaching and transfers until you know the limit of y...

Страница 8: ...center of gravity and stability How your chair is set up the options you select and the changes you make may affect the risk of a fall or tip over 1 The Most Important Adjustments Are a The position...

Страница 9: ...f You Must Reach Or Lean a Do not lock the rear wheels This creates a tip point and makes a fall or tip over more likely b Do not put pressure on the footrests c Move your chair as close as you can to...

Страница 10: ...u know how to do a safe transfer on your own 2 Lock the rear wheels before you transfer This keeps the rear wheels from rolling 3 Make sure to keep pneumatic tires properly inflated Low tire pressure...

Страница 11: ...back until you are off the curb or stair and standing on the lower level 4 Pull the chair toward you until the rear wheels reach the edge of the curb or step Then allow the rear wheels to slowly roll...

Страница 12: ...and rolls it to the edge of the top step 4 A second attendant stands on the third step from the top and grasps the hanger receiver or frontmost part of the seat rail He or she lowers the chair one ste...

Страница 13: ...ace UNLESS a You have an attendant or b You have to climb or descend a curb or overcome an obstacle and can safely do so without them At these times make sure anti tip tubes are up out of the way ARMR...

Страница 14: ...and flat between the belt and the rider 4 A pelvic wedge or a similar device can help keep the rider from sliding down in the seat Consult with the rider s doctor nurse or therapist to find out if the...

Страница 15: ...r wheel locks are NOT designed to slow or stop a moving wheelchair Use them only to keep the rear wheels from rolling when your chair is at a complete stop 1 NEVER use rear wheel locks to try to slow...

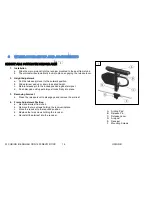
Страница 16: ...e armrest pad up or down to desired height c Return release pin to the locked position against armpost d Push arm pad until upper armpost locks firmly into place 3 Removing Armrest a Press the release...

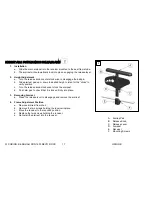
Страница 17: ...esired height Listen for the clicks to verify position c Turn the release knob clock wise to lock the armpost d Push arm pad to check that it is locked firmly into place 3 Removing Armrest a Press the...

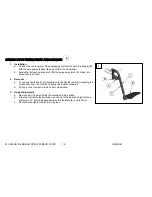
Страница 18: ...p the armrest back it remains attached to the rear pivot mount c To reattach move the armrest down into place d Press down until the release lever C locks into the receiver D 2 Height Adjustment a Pul...

Страница 19: ...clicks into place onto the U bolt 2 Removal a To remove the footrest pull outward onto the handle latch A releasing the mechanism from the U bolt and swing the footrest outwards b Pull up on the foot...

Страница 20: ...clicks into place onto the hanger 2 Removal a To remove the footrest push inward onto the handle latch A releasing the mechanism from the hanger and swing the footrest outwards b Pull up on the footr...

Страница 21: ...to place onto the hanger block 2 Removal a To remove the footrest pull up onto the handle latch A releasing the mechanism from the hanger and swing the footrest outwards or inwards b Pull up on the fo...

Страница 22: ...he mechanism from the hanger and swing the elevating legrest outwards or inwards b Pull up on legrest to remove from wheelchair 3 Height Adjustment a Remove bolt D which holds the extension tube in pl...

Страница 23: ...and washer d Insert caster stem spacer E into caster housing C Size will depend on required STF See Chart e Insert caster stem and fork F G into caster spacer E and place washer on stem f Replace nut...

Страница 24: ...as you slide axle C into axle sleeve D d Release button to lock axle in sleeve Adjust axle if it does not lock e Repeat steps on other side 3 To Remove Wheel a Depress quick release button A fully b...

Страница 25: ...WC ORION III ENGLISH CDN 1230 REV01 DOCX 25 ORION III FRONT SEAT TO FLOOR SET UP CHART...

Страница 26: ...WC ORION III ENGLISH CDN 1230 REV01 DOCX 26 ORION III...

Страница 27: ...t desired height using pre set holes in rear axle mounting bracket B c Replace and tighten lock nut d Adjust set screw D to remove any play from bracket Important Note The adjustment on each side of t...

Страница 28: ...y equal Important Note The adjustment should be done by an authorized dealer only Note Use a torque setting of 120 in lbs when tightening the lock nuts 2 Weight Distribution Weight distribution betwee...

Страница 29: ...s may have to be raised or lowered to achieve proper ground clearance of 1 1 2 to 2 a Loosen and remove lock nuts from bolts D b Insert anti tip onto anti tip mounting tube C in desired location using...

Страница 30: ...the 90 degrees position d Replace and tighten the angle adjustment bolt B e Tighten rear bolt A f Repeat on other side of chair Important Note The adjustment on each side of the chair should be exact...

Страница 31: ...isengages the stroller handle and allows it to rotate freely Releasing the push buttons positively locks the adjustable stroller handle in the desired position 4 Recline Backrest Adjustment a Depress...

Страница 32: ...b Tilt the chair B to the desired angle and release the trigger handle c A locking collar can be used on the gas cylinder rod to limit the tilt angle if required 2 Attendant Foot Release Tilt Functio...

Страница 33: ...hex barrel spacer C to lengthen or shorten cable end ball c The slack from the cable end should be removed when the tilt release lever D is fully out This will be when the trigger handle is released...

Страница 34: ...handle C forward for the Push to Lock or pull the handle rearward for the Pull to lock version until the mechanism locks in place 2 Berner Wheel Lock Function and Adjustment a To adjust loosen the scr...

Страница 35: ...he wheel locks place toe of shoe under the foot pedal C and pull up until the brake shoe disengages from the tire When deactivated the foot pedal will be in the up position f To adjust the cable turn...

Страница 36: ...re set holes in both the side frame cross tube and center tube See Lower Crossbar Set Up Chart c Replace and tighten screws d Repeat procedure for other side of lower frame Check overall width to conf...

Страница 37: ...Width Adjustment Both Front and Rear a To adjust loosen all screws A on both sides of the H Links frame B cross tubes b Slide the H Link frame to the desired width using the pre set holes in both the...

Страница 38: ...WC ORION III ENGLISH CDN 1230 REV01 DOCX 38 ORION III...

Страница 39: ...WC ORION III ENGLISH CDN 1230 REV01 DOCX 39 ORION III...

Страница 40: ...ding the footrest hanger B to the seat frame side tube A b Slide the footrest hanger B to the desired location using the pre set holes to achieve the required seat depth c The hangers used come in two...

Страница 41: ...ible the rider should transfer to the Original Equipment Manufacturer vehicle seat and use the vehicle restraint b If the wheelchair is used for transport it must be used in a forward facing seating p...

Страница 42: ...might be causing your problem You may need to look farther to find the best solution for a specific problem NOTE To keep track of your progress make only ONE change at a time Chair Veers Right Left Wh...

Страница 43: ...for loose or missing hardware Inspect for bent frame or cross tubes X X X X WHEEL LOCKS Do not interfere with tires when rolling Pivot points free of wear and looseness Wheel locks easy to engage Whe...

Страница 44: ...ough edges or peeling X X FRONT CASTERS FORKS Inspect caster fork assembly for proper tension by spinning caster caster should come to a gradual stop Adjust bearing system if wheel wobbles or binds to...

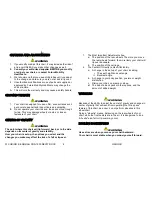
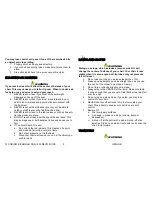
Страница 45: ...ervice Representative for the serial number that is affixed to the wheelchair 5 If any of the following conditions are observed the wheelchair must be serviced at Future Mobility a Any part of the fra...

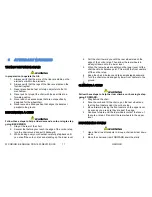
Страница 46: ...et cloth b Wipe off or blow away any dust or dirt on axles or moving parts WARNING Do not use abrasive powders or scouring pads on painted surfaces Do not ever submerge chair in water Do not use clean...

Страница 47: ...thcare Inc guarantees the wheelchair components to be free of defects in material and workmanship for one year FOR 90 DAYS Cushion and Back Upholstery 1 Future Mobility Healthcare Inc guarantees the w...

Страница 48: ...to FMHI 5 DO NOT return products to FMHI without our prior consent The defective unit or parts must be returned for warranty inspection within thirty 30 days of the return authorization date FMHI will...

Страница 49: ...WC ORION III ENGLISH CDN 1230 REV01 DOCX 49 ORION III...

Страница 50: ...WC ORION III ENGLISH CDN 1230 REV01 DOCX 50 ORION III...

Страница 51: ...WC ORION III ENGLISH CDN 1230 REV01 DOCX 51 ORION III...

Страница 52: ......

Отзывы: