Other changes and additions
2SHUDWLRQFKDQJHLQWKH
"
Acceleration
"
UDQJHLQVWUXFWLRQPDQXDOSDJHZLWKLQ(3$VHWWLQJUDQJH
$GGHGSROOQXPEHUVHWWLQJDQGJHDUUDWLRVHWWLQJRQ7HOHPHWU\/LQNVHWWLQJVFUHHQRIQRQ)XWDEDVHQVRU
&DVWOH7/
$GGHGVXSSRUWWRFKDQJH65PRGHRI%/669
The transmitter’s power switch turns on the PWR side and outputs radio waves. Wireless setting are not be used
on the DISP side. Turn on the battery switch of the receiver and confirm that the servos can operate.
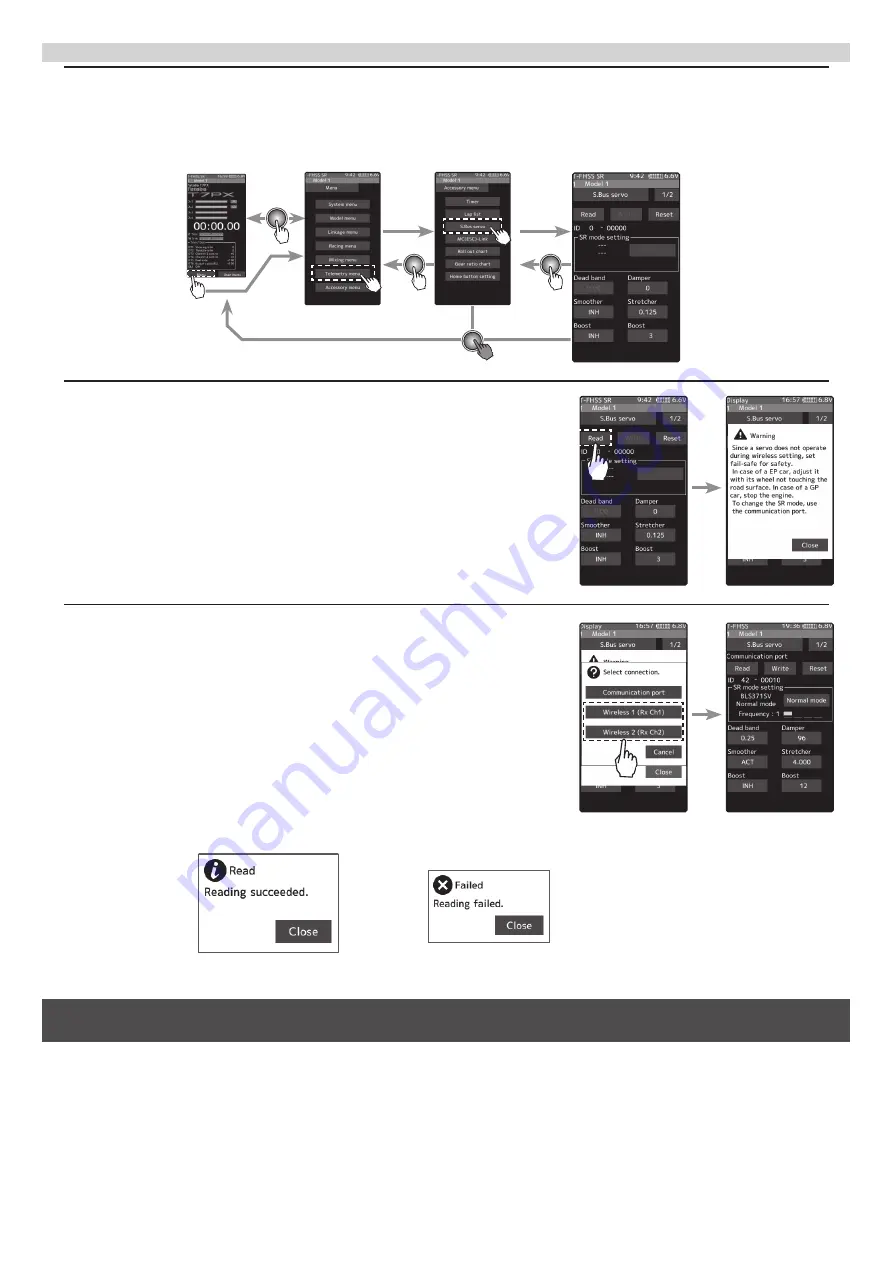
The S.BUS servo screen is displayed in the following way.
How to use wireless settings
Home screen
Menu screen
Accessory menu screen
S.Bus servo
1
Tap the [Read] button. The notes on wireless setting are displayed. Tap
the [Close] button.
Once this screen is displayed, it will not be displayed again until you turn
the power back on.
2
Touch the channel in which the servo to be set is connected and read the
setting data from the servo.
- Communication port
:T7PX communication port (conventional wired setting).
- Wireless 1 (Rx Ch1)
:Receiver channel 1
- Wireless 2 (Rx Ch2)
:Receiver channel 2
-"Reading succeeded" is displayed on the screen and the servo’s ID cord and currently set
contents are read.
- If "Failed" is displayed on the screen, communication with the servo is not being performed
normally.
Check the T7PX and servo connection to servo and repeat
[Read]
. (Check receiver power
supply etc.)


