background image

43

EN

In

tr

od
uct

ion

Con

n

ec
ti

on
s

P

lay
b

a

ck

Ed
it

in

g

O

th

e

rs

Fu
nct

ion
 S
e

tu

p

Rec

o

rd

in

g

V

CR Fun

ct

ions

Basi

c Se

tu
p /
 

TV
Vi

ew

Op
eration

4

Press [

K

\

L

] to select the desired track / file or 

folder, then press [ENTER

\

OK].

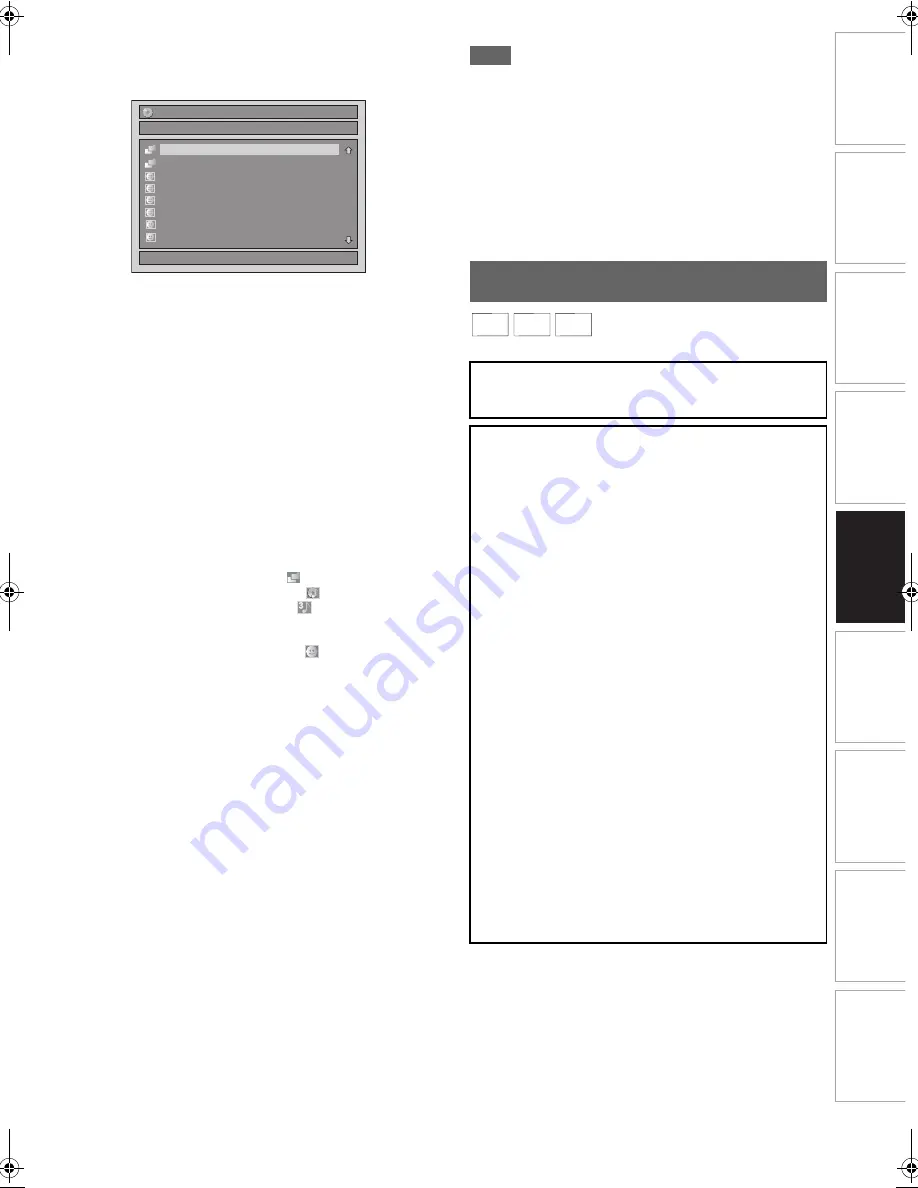
e.g.) Photo (JPEG) files

If a track / file is selected:

Playback will start.

If a folder is selected:

The files in the folder will appear.
Press 

[

K

\

L

]

 to select the file or folder you want, then 

press 

[ENTER

\

OK]

.

• You can also call up the file type selection screen by 

following the steps below;
In stop mode, press 

[SETUP]

. Select “Title List” using 

[

K

\

L

]

, then press 

[ENTER

\

OK]

. Select the media type 

using 

[

K

\

L

]

, then press 

[ENTER

\

OK]

.

• To exit the File List, press 

[TOP MENU]

 or press 

[STOP

C

]

.

• To resume the File List, press 

[TOP MENU]

.

• Press 

[PLAY

B

]

[ENTER

\

OK]

 or 

[

1

]

 to move to any 

lower folders.

• Press 

[

0

]

 to move back to the folder above.

Note for audio CD tracks and MP3 / JPEG files:

• Folders are shown with the 

 icon.

• Audio CD tracks are shown by 

 .

• MP3 files are shown with the 

 icon.

Playback will start from the selected track and continue 
with each one after.

• JPEG files are shown with the 

 icon.

• The unit can recognise up to 255 folders and up to 99 

tracks / 999 files.

• Letters of a file / folder name overflowing the given 

space will be displayed as “...”.

• Unplayable folders and tracks / files may be displayed 

depending on the recording conditions.

• For MP3 file recorded in Variable Bit Rate (VBR), the 

unit may not display the actual elapsed time.

• If there are no files in the folder, “No Files” is displayed.
• High resolution or large-size JPEG files take a few 

moments to be displayed.

• It is not possible to play back progressive JPEGs (JPEG 

files saved in progressive format) on this unit.

• It is not possible to play back JPEG files of 12 MB or 

more.

It is recommended that files to be played back in this unit 
are recorded under the following specifications:

[MP3]

[JPEG] Size of picture

Note

• Files with extensions other than “.mp3 (MP3)” or “.jpg /

.jpeg (JPEG)” will not be listed in the File List.

• Some folders or tracks listed in the File List may be unplayable 

due to their recording status.

• The File List displays only up to 8 folders and file names.

Notes on JPEG:

After file is displayed for 5 seconds or 10 seconds (set in the 
“Slide Show” on page 52), the display moves to the next file.
During JPEG playback, press 

[

1

]

 or 

[

0

]

 to rotate a picture 90 

degrees clockwise or counterclockwise respectively. (Not 
available when the display menu appears.)

You can play back the contents in a USB device.

• Sampling frequency

: 44.1 kHz or 48 kHz

• Constant Bit Rate

: 112 kbps to 320 kbps

• Upper limit

: 6,300 x 5,100 dots

• Lower limit

: 32 x 32 dots

• Capacity limit

: less than 12 MB

1/ 2

A

B

File List

DISC NAME

JPEG file1

JPEG file2

JPEG file3

JPEG file4

JPEG file5

JPEG file6

Playing Back a USB Device with MP3 / 
JPEG / DivX

®

 Files

Note for DivX

®

• DivX

®

 files recorded in USB device are not guaranteed to 

play back.

Note for USB device

• The unit cannot play back a USB device at the following 

condition.
- During the operation of the disc tray.
- During the disc loading, DVD recording, DVD/CD 

playback, editing or dubbing.

- While “Title List” or “File List” of disc is displayed.
- While “Setup”, “Timer Programming” or “EPG” menu is 

displayed.

• Do not disconnect the USB device while the indicator on 

the device is flickering.

USB device requirements:

• USB version 2.0 (Full Speed).
• USB devices formatted with the FAT16 and FAT32 file 

systems are supported.

• Up to 8 characters (excluding the extension) are displayed 

as a file and folder names. 9 or more characters cannot 
be displayed.

• Files with extensions other than “.mp3 (MP3)”, “.jpg 

(JPEG)” or “.avi (DivX

®

)” will not be listed in the File List.

• The maximum supply current from the USB port is up to 

500 mA.

Compatible device:

• USB flash memory (max. 32 GB)

Incompatible device:

• USB  hub
• USB device with inner hub
• PC
• Cameras
• Devices that need to install drivers

(e.g. some MP3 players)

• Bus-powered HDD

MP3

MP3

MP3

JPEG

JPEG

JPEG DivX

DivX

®

DivX

®

E9TF0ED_EN.book  Page 43  Wednesday, March 17, 2010  1:32 PM

Содержание WD6D-D4413DB

Страница 1: ...hers Function Setup Recording VCR Functions Basic Setup TV View Operation For Customer Use Carefully read the Model No and Serial No located at the back of the unit and enter the information below Ret...

Страница 2: ...s a Power Saving Mode ECO for standby 10 Do not place any combustible objects on the device candles etc 11 Before moving the unit be sure to remove any discs and unplug the mains cable from the AC out...

Страница 3: ...patibility with this 480p or 576p product please contact our customer service centre A NOTE ABOUT RECYCLING This product s packaging materials are recyclable and can be reused Please dispose of any ma...

Страница 4: ...lem If a streaky or snowy picture appears during playback the video heads in the unit may need to be cleaned 1 Please visit your local Audio Video store and purchase a good quality VHS Video Head Clea...

Страница 5: ...device E Page 43 Chasing playback during recording and simultaneous playback and recording E Page 49 Playing back MP3 JPEG DivX Kodak Picture CD files E Pages 42 46 Quick search E Pages 71 72 Adding o...

Страница 6: ...Recording OTR 32 Timer Recording 33 Timer Recording EPG 36 Satellite Link 36 Settings for External Equipment 37 Information on DV Dubbing 38 DVC to DVD Dubbing 39 Dubbing Mode 40 Setting a Disc to Pr...

Страница 7: ...ailable to DVD RW discs in VR mode Available to DVD R discs in video mode Available to audio CDs Available to CD RW R discs and USB device with MP3 files Available to CD RW R discs and USB device with...

Страница 8: ...ry Title menu will be created Playable only on VR mode compatible unit Finalisation recommended Playable on most DVD players Finalisation necessary Title menu will be created Available Features Record...

Страница 9: ...Super audio CD Only the sound on the CD layer can be heard The sound on the high density super audio CD layer cannot be heard This unit uses the PAL system However it is also possible to play back DV...

Страница 10: ...19 REW E button 2 VCR 20 STOP EJECT C A button VCR 21 STANDBY ON Q button 3 1 Mains cable 2 HDMI OUT jack 3 DIGITAL AUDIO OUT COAXIAL jack 4 AUDIO OUT L R jacks 5 COMPONENT VIDEO OUT jacks 6 AV2 DECO...

Страница 11: ...button DVD 23 C button 24 CLEAR button 25 GUIDE button 26 SUBTITLE button 27 MENU LIST button DVD 28 ENTER OK button 29 RETURN BACK button 30 FWD D button 31 STOP C button 32 SKIP G button DVD 33 DVD...

Страница 12: ...sensor on the unit Use within the operating range and angle as shown The maximum operable range as follows Remote control operation may become unreliable if the remote control sensor of the unit is be...

Страница 13: ...8 Indicates the component in use DVD USB device Note For some descriptions on this manual only one disc type is indicated as an example Press DISPLAY repeatedly while the display menu is displayed to...

Страница 14: ...information 1 Audio language 2 Channel number 3 Channel name 4 Current time and day 5 Next programme information 6 Current programme information The window will automatically exit after 4 seconds or...

Страница 15: ...E Page 58 Audio CD 1 Random Play E Page 51 2 Programme Play E Page 51 CD RW R with MP3 JPEG Kodak Picture CD files 3 Music MP3 files E Page 51 4 Photo JPEG files E Pages 51 52 5 Slide Show JPEG Kodak...

Страница 16: ...ideo resolution 1080i is selected Appears when HDMI video resolution 1080p is selected DB DTV DVD VCR 4 3 2 1 Appears when the channel is in digital mode Title track number Chapter number F Appears wh...

Страница 17: ...ut setting should be set to Component Progressive or Component Interlace Refer to B Video Out Default SCART RGB on page 67 Component connection provides the better quality picture Connect the COMPONEN...

Страница 18: ...ible that some devices with an HDMI input may not operate properly with this unit When using an HDCP incompatible display device the image will not be viewed properly Among the devices that support HD...

Страница 19: ...bilities of your receiver the receiver will produce a strong distorted sound or no sound at all Connecting multi channel Dolby Digital decoder allows you to enjoy the Multi channel Dolby Digital surro...

Страница 20: ...llow to A Clock Setting on page 67 Note After Initial Setting if you need to unplug the mains cable make sure to turn off the power first and leave it in standby mode for at least 1 minute before atte...

Страница 21: ...UP Select General Setting using K L then press ENTER OK 2 Select Channel using K L then press ENTER OK 3 Select ANALOG Channel Setup using K L then press ENTER OK 4 Select Auto Tuning using K L then p...

Страница 22: ...channels using PROG G H 1 Follow steps 1 to 4 in Manual Tuning ANALOG on pages 21 22 2 Select Position using K L then press 1 3 Select the position number using the Number buttons or K L then press 0...

Страница 23: ...ing using K L then press ENTER OK 2 Select Channel using K L then press ENTER OK 3 Select Country using K L then press ENTER OK 4 Select your desired country using K L then press ENTER OK Digital chan...

Страница 24: ...te group list Skip Channels Adult Lock Delete Channels 4 Channel information 5 Operation Guide 5 Press RETURN BACK to exit You can sort each DVB channel into 8 different favourite group lists Group 1...

Страница 25: ...to delete using K L then press BLUE will appear Press BLUE to cancel will disappear 3 Press RETURN BACK to exit The channel has been deleted from the Edit Channels menu You can change the order of th...

Страница 26: ...ws weather forecast and subtitles 1 Press TEXT to display Teletext screen Teletext for the TV channel will be displayed 2 Use RED GREEN YELLOW BLUE to follow the instructions on screen 3 Press TEXT to...

Страница 27: ...ENTER OK Select the channel and TV programme using K L 0 1 Press ENTER OK or BLUE to go to Timer Programming menu after you select the TV programme using K L 0 1 Refer to Timer Recording EPG on page 3...

Страница 28: ...edia CPRM When recording a TV broadcast or an external input you can display copy control information on the screen CPRM is a scrambling copy protection system for the protection of copy once broadcas...

Страница 29: ...mode DVD 99 titles per each Playlist and Original 999 chapters per each Playlist and Original Video mode DVD 99 titles per disc 99 chapters per title Making Discs Playable in Other DVD Players Finali...

Страница 30: ...ically every 10 minutes by default during recording Using the Auto Chapter menu you can set this function off or change the time period 1 In stop mode press SETUP Select General Setting using K L then...

Страница 31: ...ecording Audio on page 31 for more detail You can select either Main or Sub audio to record a bilingual broadcast in video mode This setting is only for recording analogue channel 1 In stop mode press...

Страница 32: ...If the clock is not set the date and time of title names will be 01 01 10 and 00 00 You cannot change the recording speed in the REC or REC pause mode Even if the broadcasting you are recording is in...

Страница 33: ...n analogue channel is selected VPS PDC will be displayed instead of STTL Select VPS PDC to ON or OFF using K L Refer to VPS Video Programme System PDC Programme Delivery Control on page 34 When DVB ch...

Страница 34: ...ay If the starting time of the VPS PDC timer recording is between 4 00 and 23 59 on a given day the VPS PDC function will operate from 0 00 on the given day to 4 00 on the next day This means that if...

Страница 35: ...to priority if the timer programmes overlap If the starting time is same The timer programming set first PROG 1 has priority When the starting time and the ending time for each programmes are differen...

Страница 36: ...eparation of the external tuner The external tuner should be equipped with some kind of timer function Using timer function of the tuner set it to be turned on when it comes to the time you want to st...

Страница 37: ...message appears on the screen and recording will be paused Recording will be resumed when a PAL or SECAM signal is detected Before recording from external equipment see page 19 for connection instruct...

Страница 38: ...1 Connect your DVC to the DV IN jack on the front panel using a DV cable Use the DV cable that has 4 pin input jack and is compliance with the IEEE 1394 standards 2 Press INPUT SELECT repeatedly to se...

Страница 39: ...her DV device such as cable satellite box or D VHS recorder cannot be recognised If no video signal is detected from the DVC during DVC to DVD dubbing the recording will be paused and I will flash on...

Страница 40: ...NO If you set External Input Audio to Stereo the sound is recorded in Stereo video mode and VR mode While in video mode if you set External Input Audio to Bilingual the audio set in Bilingual Recordin...

Страница 41: ...inalising will start To cancel finalising DVD RW disc only At step 4 press STOP C Select Yes using K L then press ENTER OK Finalising is cancelled and the unit switches to stop mode If appears when ST...

Страница 42: ...o start playback by pressing PLAY B instead of ENTER OK at steps 7 and 8 Some discs may start playback automatically 1 Follow steps 1 to 5 in Playing Back a DVD RW DVD R Disc on page 42 2 Press PLAY B...

Страница 43: ...icture Note Files with extensions other than mp3 MP3 or jpg jpeg JPEG will not be listed in the File List Some folders or tracks listed in the File List may be unplayable due to their recording status...

Страница 44: ...It may take some time until all menu items are displayed on the menu screen 2 Press K L 0 1 to select a desired track to be played back then press PLAY B or ENTER OK An image will be played back from...

Страница 45: ...e you get the new file from the DivX VOD services Refer to DivX VOD on page 45 Some DivX VOD files are restricted with the limited playable times you cannot play them back beyond the limit If your Div...

Страница 46: ...ature is not available may appear on the TV screen The displayed disc menu which will vary among discs and may be same with the Title menu 2 Select an item using K L 0 1 then press ENTER OK Repeat thi...

Страница 47: ...start point will move another 30 seconds forward and playback resume automatically You can press CM SKIP up to 6 times 180 seconds 1 During playback press PAUSE F Playback will pause with the sound mu...

Страница 48: ...ntly selected the zoom area is not displayed You cannot slide the zoomed picture on some JPEG files You can assign a specific point on a disc to return later 1 During playback press DISPLAY to bring u...

Страница 49: ...recording time for the OTR Wait for a moment will be displayed on the screen if you press PLAY B before 1 minute of recording This function is available only when you are recording on a DVD RW disc i...

Страница 50: ...already shown skip to step 2 2 Select the icon using 0 1 then press ENTER OK for the track number is highlighted 3 Enter the desired track number to search for using K L or the Number buttons then pr...

Страница 51: ...and JPEG files Chapter Track repeat will be cancelled whenever a Chapter Track is skipped forward or backward For some DivX files A B Repeat playback may not function You can use this function to pla...

Страница 52: ...ress SUBTITLE during playback and follow from step 3 2 Select the icon using 0 1 to display the selection menu 3 Select the desired subtitle language using K L then press ENTER OK Subtitles are displa...

Страница 53: ...en the unit is turned off Some DVD videos feature scenes shot from two or more angles The disc case is usually marked with an angle icon if the disc has multi angle scenes 1 During playback press DISP...

Страница 54: ...e name 6 Title information which displays recorded time length of the title date month year recorded CH and the recording speed 7 Submenu Submenus for the selected menu are displayed here 8 Title name...

Страница 55: ...ies and may subject you to civil and criminal liability Note A Playlist is not available for DVD R or video mode DVD RW discs It is not possible to edit a disc recorded in another video system other t...

Страница 56: ...Press 0 1 to move the cursor to the left or right You can enter up to 30 letters Unrecognisable characters will be replaced with asterisks If you delete them adjoining characters may change to asteris...

Страница 57: ...f you select OFF at step 3 all the chapter marks are erased 5 Press RETURN BACK repeatedly to exit Writing onto the disc starts It may take awhile to write the data on a disc Note You cannot select th...

Страница 58: ...ect Yes using K L then press ENTER OK The title is added to Playlist 4 Press RETURN BACK to exit Writing onto the disc starts It may take awhile to write the data on a disc Note To delete a title from...

Страница 59: ...n is indicated in red You can check the preview by pressing ENTER OK Before and after 5 seconds of the deleted point will be playback for preview 4 Select Delete using K L then press ENTER OK 5 Select...

Страница 60: ...signals DTS OFF Set whether DTS signal is output or not MP3 Surround Stream Set the type of MP3 signal to output Disc Menu Language E Page 65 Bulgarian Czech French German Hungarian Italian Polish Rom...

Страница 61: ...udio E Page 31 Sub Set the audio type for recording External Input Audio E Page 31 Bilingual Set the external input audio type for recording Video Colour System E Page 37 PAL SECAM Set the video colou...

Страница 62: ...ownload the DivX VOD files from the Internet DivX Subtitle E Pages 44 68 English Czech Dutch French German Hungarian Italian Polish Romanian Russian1 Russian2 Slovak Spanish Swedish Set the language f...

Страница 63: ...tting is activated 6 When you finish the setting press SETUP to exit To return to the previous screen Press RETURN BACK Playback Display Video Recording Clock Channel DivX HDMI DVB Setting Reset All G...

Страница 64: ...ly If you forget your password or you want to clear all settings in Parental Lock enter 4 7 3 7 using the Number buttons at the option window Your password is cleared and parental levels are set to OF...

Страница 65: ...ifier decoder is NOT compatible with 96 kHz PCM select 48kHz Sound recorded at 96 kHz is down sampled to 48 kHz 96kHz If your amplifier decoder is compatible with 96 kHz PCM select 96kHz Sound is samp...

Страница 66: ...Box so that black bars appear on the top and bottom of the TV screen when playing back a wide screen picture Select 4 3 Pan Scan for a full height picture with both sides trimmed when playing back wi...

Страница 67: ...ent Progressive or Component Interlace connect to the corresponding jack on the TV If the setting is changed for example to SCART RGB while the COMPONENT VIDEO OUT jacks are used to connect to the TV...

Страница 68: ...Setup A General Setting A DivX Provides DivX VOD registration code and deactivation code Refer to page 45 for more details Set the DivX subtitle Setup A General Setting A HDMI Make sure that the HDMI...

Страница 69: ...g using K L then press ENTER OK Select OFF to disable Maturity Lock Once Maturity Lock has been set Pincode will be required in order to view the programme that exceeds the age restriction In order to...

Страница 70: ...Number buttons or PROG G H on the remote control There is a tape with a record tab in the unit 1 Insert a recordable videotape 2 Select the recording speed using REC SPEED The desired recording speed...

Страница 71: ...channel then press PROG G H repeatedly to select DV AV3 2 Select the recording speed using REC SPEED See page 70 3 Stop or pause the DVC where you want to start dubbing 4 Play back the DVC 5 Press REC...

Страница 72: ...lly press SYSTEM Each time you press SYSTEM the colour system will change as follows Note If the playback picture on the TV screen is black and white change the video colour system manually When you c...

Страница 73: ...curely In case of power failure Check the breaker and Clock setting When the unit is in standby mode front panel display is off because Power Saving mode is applied to this product When you forget the...

Страница 74: ...DVD Recording is impossible This unit cannot record programmes that contain copy protection signal This is not a malfunction The space of the recording media may be used up Try deleting unnecessary t...

Страница 75: ...d the performance of those discs are not guaranteed on this unit The disc may be dirty or flawed Clean the disc Check if all the connections are made correctly Check Parental Lock setting See page 64...

Страница 76: ...problem use other type of compatible USB device Region Error Please eject the disc Playback is not authorized in your region Playback is not authorised in the region of the DVD video that you inserte...

Страница 77: ...rk from an Original list See page 56 Recording Error You cannot record on this disc as Control Information is full This disc has no space to write Control Information when recording or deleting conten...

Страница 78: ...Kirghiz 5771 Kirundi 6460 Korean 5761 Kurdish 5767 Laothian 5861 Latin 5847 Latvian Lettish 5868 Lingala 5860 Language Code Lithuanian 5866 Macedonian 5957 Malagasy 5953 Malay 5965 Malayalam 5958 Malt...

Страница 79: ...format Sampling frequency Compression format 13 5 MHz MPEG Audio recording format Sampling frequency Compression format 48 kHz Dolby Digital Tuner Analogue channels L SECAM L BG PAL B G F1 E69 E2 E69...

Страница 80: ...ormity This product complies with the requirement of the related directives is in compliance with the related regulations We FUNAI ELECTRIC EUROPE Sp z o o ul In ynierska 1 67 100 Nowa S l Poland decl...

Отзывы: