background image

STOP

PLAY

REC

STAND-BY ON

HDD & DVD-R / DVD-RW RECORDING

DVD

HDD

OPEN/
CLOSE

B

e

fo

re

 Yo
u St

ar

t

C

o

n

n

e

c

tio

n

s

 In

itia

l Se

tu

ps

 Re
co
rd

in

g

 Pl
ay

b

ac

k

Ed
it

in

g

 Ot
her Setups

Others

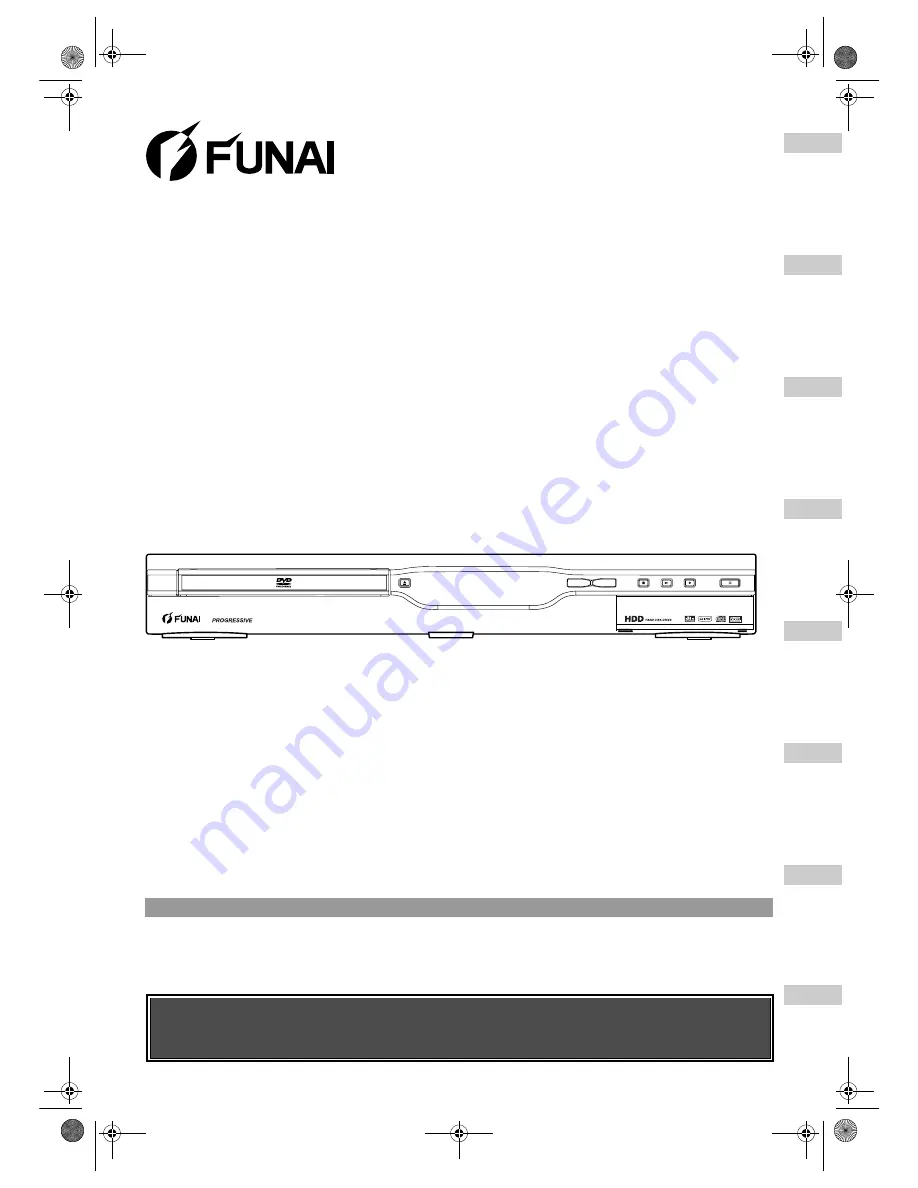
Owner’s Manual

DVD Recorder with HDD

HD-B2735

HD-B2785

Before using this unit you need to complete connections.
Refer to “Connections” on pages 15-17.

Accessories Supplied

• Remote control with two R6 (AA) batteries

• RF cable

• Owner’s Manual

• Quick Setup Guide

E2B21BD_E2B28BD_EN.book  Page 1  Monday, August 21, 2006  5:05 PM

Содержание HD-B2735

Страница 1: ...iting Other Setups Others Owner s Manual DVD Recorder with HDD HD B2735 HD B2785 Before using this unit you need to complete connections Refer to Connections on pages 15 17 Accessories Supplied Remote...

Страница 2: ...iquid on the unit If liquid is spilled and enters the unit consult qualified service personnel 7 Do not stand the unit vertically Use the unit in a horizontal flat position only 8 This product is in S...

Страница 3: ...g If the plug has to be changed because it is not suitable for your socket or becomes damaged it should be cut off and an appropriate plug fitted following the wiring instructions below The plug remov...

Страница 4: ...tion do not subject it to vibration or strong impact or pull out the power plug And if a power failure occurs the content of the recording replaying programme may be lost HDD rotates at high speed whe...

Страница 5: ...tellite Link 36 Information on dubbing 37 Setting for external connection AV3 40 Dubbing from the external devices 41 Finalising a disc 41 Setting disc protection 43 Playback 44 Information on playbac...

Страница 6: ...o DVD if the disc runs out of the space or if there is no recordable disc in the unit it automatically changes the recording media to the HDD Dubbing With this unit you can enjoy bi directional dubbin...

Страница 7: ...mode is a new format for recording on DVD RW R discs that was approved by the DVD Forum in 2000 Adoption of this format is optional for manufactures of DVD playback devices and there are DVD Video pl...

Страница 8: ...Shows information and messages Refer to Front Panel Display Guide on page 14 10 S VIDEO input jack AV3 Connect the S Video output of an external device here using a commercially available S Video cabl...

Страница 9: ...se a commercially available S Video cable 8 COMPONENT VIDEO OUTPUT jacks Connect to an optional component video cable through the component video input jacks of a TV 9 DIGITAL AUDIO OUTPUT OPTICAL COA...

Страница 10: ...ODE button Press to select the Rec Mode 15 REPEAT button Press to play back the chapter title group disc and track repeatedly 16 MODE SELECT button Press to display AV Mode Select Menu 17 SEARCH butto...

Страница 11: ...dvance one frame at a time 34 HDD button Press to activate the remote control in HDD mode See page 12 Press to activate the HDD 35 DVD button Press to activate the remote control in DVD mode See page...

Страница 12: ...unit Replace the batteries when the operating range of the remote control reduces HDD DVD modes switching Because this unit is a combination of a HDD and a DVD recorder you must first select which co...

Страница 13: ...ons of the unit 1 Disc Management To set up the disc to manage 2 Editing To edit a recorded disc or HDD 3 Dubbing To dub a content of the HDD to DVD or vice versa 4 Timer Programme To programme a time...

Страница 14: ...ars when an Audio CD or a disc with MP3 JPEG DivX files is on the disc tray R Appears when a DVD R disc is loaded on the disc tray RW Appears when a DVD RW disc is loaded on the disc tray 6 Displays t...

Страница 15: ...Video Out setting to Component Progressive in the setup menu see page 75 Next set your TV to the progressive scan mode If your TV is not compatible with progressive scan set Video Out setting to Compo...

Страница 16: ...gital output does not match the capabilities of your receiver the receiver will produce a strong distorted sound or no sound at all Note for a TV with no S Video input jack or Scart jack This unit has...

Страница 17: ...nnot be recorded using an MD or DAT deck as a digital sound If not connected to a Dolby Digital decoder set Dolby Digital to PCM in Digital Audio Setting see page 76 Playing back a DVD using incorrect...

Страница 18: ...available channels in your area with the following procedures 1 Press SETUP in stop mode Setup Menu will appear 2 Select Initial Setting using Cursor then press ENTER 3 Select Channel Setting using C...

Страница 19: ...using SKIP F or SKIP B 6 Press Cursor to start searching for the available channel Search direction can be switched by pressing Cursor If you already know the channel number you can directly enter the...

Страница 20: ...select channels 1 to 99 About an external input You can select the external input mode AV1 AV2 or AV3 using INPUT SELECT or PROG You cannot change the channel when either HDD or DVD is in any recordi...

Страница 21: ...Select Clock Setting using Cursor then press ENTER 4 Select Auto Clock Setting using Cursor then press ENTER 10 04 06 Mon 19 34 Move Pos Channel Decoder Skip Station P02 45 P03 63 P04 80 P05 88 P06 9...

Страница 22: ...time by receiving PDC broadcasts whenever the unit is in standby mode The unit will correct the current time automatically at 8 00 if the unit is in standby mode From 23 00 to 1 00 the Auto Clock func...

Страница 23: ...hen press ENTER The selected setting will be checked and activated The default setting is 4 3 Letter Box 5 Press SETUP to exit Mode Audio output Display on the TV screen Main Main audio from both spea...

Страница 24: ...e aspect ratio of the image will be distorted and parts of the image will be cropped 7 This setting is for 4 3 TV If you have 16 9 TV and select this setting black bars will appear on the top and bott...

Страница 25: ...Video Recording mode is a basic recording format for DVD RW discs You can record and edit material repeatedly It is impossible to record additional materials on a disc formatted in VR mode and alread...

Страница 26: ...pplication software used to create the disc even if it is recorded in a compatible format Check with the software publisher for more detailed information Discs recorded in Video mode on this unit cann...

Страница 27: ...de discs the finalisation is recommended About HDD HDD is a special device which has high recording density and is suited for long time recording or high speed cueing but by contrast has many factors...

Страница 28: ...Cursor then press ENTER The default setting is VR Mode 5 Select Yes using Cursor then press ENTER Formatting will start Example VR Format The screen returns to normal after formatting is completed Thi...

Страница 29: ...splay DVD Disc Control 10 04 06 Mon 19 34 Disc Management DVD Format HDD Initialise DVD Disc Control 10 04 06 Mon 19 34 Disc Management DVD Format HDD Initialise All Erase Part Erase DVD Disc Control...

Страница 30: ...ing onto a VR mode disc both Main and Sub will be recorded regardless of your setting here And when you play back you can choose either audio format or a combination of both as your playback audio If...

Страница 31: ...to digital sound without compressing audio data When the recording mode is set at other than XP the unit records Dolby Digital audio automatically even if you selected LPCM With HDD or VR mode DVD RW...

Страница 32: ...ohibited in this unit One touch Timer Recording OTR This is a simple way to start a timer recording You can start recording right away by just one touch of a button and each press of the button sets t...

Страница 33: ...le disc if you are recording to a DVD Use only the HDD or CPRM compatible VR mode DVD RW discs for recording copy once programmes See page 27 1 Press TIMER PROG Timer Programme List will appear You ca...

Страница 34: ...s or if you do not reply in 1 minute To stop recording in progress press STOP S Confirmation message will appear Select Yes using Cursor Relay Recording When you Timer Record to DVD the unit automatic...

Страница 35: ...g stays in effect unless you cancel it To cancel an incorrect timer setting refer to Editing the Timer Programming information on page 34 Hints for Timer Recording The priority of overlapped settings...

Страница 36: ...ff when it comes to the time you want to finish recording Refer to the tuner s manual on how to set the timer Make sure to turn off the external tuner when you finish setting Preparation of this unit...

Страница 37: ...VD RW discs performing the Fast Dubbing from VR mode DVD RW discs to the HDD performing the Fast Dubbing from the HDD to Video mode DVD RW R discs Fast Dubbing This unit is compatible with the bi dire...

Страница 38: ...NTER Completion message will appear and the dubbing will stop 3 Press ENTER to remove the message Note The Rec Mode will be set to Auto for the One Touch Dubbing If you stop the dubbing halfway Playin...

Страница 39: ...ist 1 Select All Erase using Cursor then press ENTER 2 Select Yes using Cursor then press ENTER 9 After registering all the programmes you want select Start using Cursor then press ENTER 10 Select a d...

Страница 40: ...Menu will appear 2 Select Initial Setting using Cursor then press ENTER 3 Select Select Video using Cursor then press ENTER 4 Select the video input type you use Video In or S Video In using Cursor th...

Страница 41: ...hen it is connected to AV2 NTSC dubbing is prohibited in this unit Finalising a disc In order to play back discs recorded in this unit on other player you must finalise the discs Although finalisation...

Страница 42: ...ace runs out Your setting is activated The default setting is Off 6 Press SETUP to exit Note Auto Finalise is not available while the Setup Menu is displayed HDD Initialise DVD Format 10 04 06 Mon 19...

Страница 43: ...Protect is available only for VR mode DVDs DVD RW DVD RW VR Setup Menu 10 04 06 Mon 19 34 Disc Management Editing Editing Dubbing Dubbing Timer Programme Timer Programme Title List Title List Initial...

Страница 44: ...r colour systems such as NTSC Region codes This unit has been designed to play back DVDs for Region Two 2 It is only possible to play back DVDs in this unit that are labelled for Region 2 or for ALL r...

Страница 45: ...the same time select the appropriate device by pressing HDD or DVD before you press PAUSE p or STOP S to pause or stop the operation Playback from the Title List Menu Not available for the DVD Videos...

Страница 46: ...nger available Follow the steps below to play back a disc using the DVD Menu Press DVD first 1 Insert a disc DVD Menu may appear automatically Otherwise press TOP MENU to call up the DVD Menu 2 Select...

Страница 47: ...digital sound using an MD or DAT deck Files with extensions other than mp3 MP3 will not be listed in the File List Some folders or files listed in the File List may be unplayable due to their recordin...

Страница 48: ...s are restricted with the limited playable times you cannot play them back beyond the limit If your DivX VOD file has such limit confirmation window will appear Use Cursor to select Yes if you want to...

Страница 49: ...itle created by the user can be displayed during DivX playback 1 After the DivX file is selected the Subtitle List will appear 2 Select the desired setting using Cursor then press ENTER DivX with the...

Страница 50: ...or one DivX VOD file You must first download the file from the internet and play it back on this unit before you are able to get another code You must follow this step every time you purchase or rent...

Страница 51: ...n certain discs 3 Press DISC MENU to exit the disc menu Depending on discs pressing Disc Menu may not exit the disc menu Note Menus vary among discs Refer to the information accompanying the disc for...

Страница 52: ...u Cancelling and Recalling the PBC function Insert a Video CD 1 Press SETUP in stop mode Setup Menu will appear 2 Select Playback using Cursor then press ENTER 3 Select CD Playback Mode using Cursor t...

Страница 53: ...e beginning of the track last played Press STOP S twice at step 1 if you do not want to set a resume point In this case next time you press PLAY P the playback will start from the beginning of the dis...

Страница 54: ...muted To return to normal playback press PLAY P Note For some DivX files Slow forward may not function Only slow forward is available when playing back Video CDs and discs with DivX files Time shift...

Страница 55: ...the playback by pressing HDD or DVD button during HDD DVD recording And then follow the normal playback procedure Only with regard to the HDD you can playback a title in the same device HDD To do so p...

Страница 56: ...e available x1 0 x1 2 x1 5 and x2 0 The zoom area is displayed 4 While the picture is enlarged press Cursor to move the zoomed image up down left or right The gray box with an inner orange box that sh...

Страница 57: ...rk while PBC function is on Programme playback You can programme the disc to play back in your desired order 1 Press SETUP in stop mode Setup Menu will appear 2 Select Playback using Cursor then press...

Страница 58: ...buttons 1 Press SKIP F to skip to the next title or chapter track during playback To go back to the previous title or chapter track press SKIP B twice in quick successions Using the SEARCH button By...

Страница 59: ...yback press AUDIO repeatedly to select one of the available languages Audio display appears at the left top of the TV screen and the new audio will be heard The display will disappear after about 5 se...

Страница 60: ...elect Off Type 1 or Type 2 using Cursor then press ENTER Off No effect Type 1 Natural effect Type 2 Emphasised effect Note Select Virtual Surround to Off if the sound is distorted The setting will be...

Страница 61: ...34 Editing PlaylistEditing PlaylistEditing Original Playlist HDD Playlist New HDD Playlist New HDD PL Scene Delete HDD PL Scene Delete HDD PL Title Combine HDD PL Title Combine HDD PL Title Divide DVD...

Страница 62: ...ned These marks work as chapter marks when you search for a chapter but cannot be deleted like chapter marks Also when a title with chapter marks are dubbed from DVD to the HDD those marks become edit...

Страница 63: ...e HDD HDD HDD Playlist DVD RW DVD RW DVD RW VR Playlist Setup Menu 10 04 06 Mon 19 34 Disc Management Editing Editing Dubbing Dubbing Timer Programme Timer Programme Title List Title List Initial Sett...

Страница 64: ...le Name 4 12 04 06 Wed P01 12 22 1 04 40 XP 10 04 06 Mon P01 12 22 1 04 40 XP New New HDD Remain 72h00m SP 001 016 HDD PL New Title Name Recording Date P01 11 19 0 00 06 SP 12 04 06 Wed P01 11 22 0 14...

Страница 65: ...D R DVD R HDD HDD Remain 72h00m SP Page 1 4 Remain 76 13 SP 001 016 Title Name Recording Date P01 11 19 0 00 06 SP 12 04 06 Wed P01 11 22 0 14 13 XP 11 04 06 Tue P02 09 19 0 22 40 SP 12 04 06 Wed P01...

Страница 66: ...DD Remain 72h00m SP Page 1 4 Remain 76 13 SP 002 016 Title Name Recording Date P01 11 19 0 00 06 SP 12 04 06 Wed P01 11 22 0 14 13 XP 11 04 06 Tue P02 09 19 0 22 40 SP 12 04 06 Wed P01 12 22 1 04 40 X...

Страница 67: ...PAUSE p to find the end point easily 10 04 06 Mon 19 34 Editing PlaylistEditing PlaylistEditing Original Playlist HDD PL Scene Delete HDD PL Title Combine HDD PL Title Combine HDD PL Title Divide DVD...

Страница 68: ...tter will be highlighted HDD PL Scene Delete 1 1 1 04 40 P01 10 04 06 Mon 12 22 T C 12 22 1 04 40 XP End 0 35 00 Start 0 31 00 Duration after editing 1 04 36 total time after deleting chapter mark sea...

Страница 69: ...ect Undo Protect and press ENTER The protect icon will disappear 4 Press RETURN R or SETUP twice to exit To protect the VR mode DVD RW disc itself refer to Setting disc protection on page 43 HDD HDD R...

Страница 70: ...PL Scene Delete DVD PL Title Combine DVD PL Title Divide HDD PL New HDD Remain 72h00m SP 001 016 HDD PL Title Combine Playlist Creation Date 1 04 40 P01 11 19 0 00 06 SP 12 04 06 Wed P01 11 22 0 14 1...

Страница 71: ...ill appear 2 Select Editing using Cursor then press ENTER 3 Select Playlist using Cursor then press ENTER 4 Select HDD PL Title Divide or DVD PL Title Divide using Cursor then press ENTER Example Play...

Страница 72: ...de the titles if the total number of chapters has already reached 999 HDD Remain 72h00m SP 001 016 HDD PL Title Divide Playlist Creation Date P01 11 19 0 00 06 SP 12 04 06 Wed P01 11 22 0 14 13 XP 11...

Страница 73: ...nterlace Sets the video output signal to be fixed accordingly to your TV set Digital Audio Setting Down Sampling Page 76 96kHz Set whether the sound recorded at 96 kHz is down sampled to 48 kHz or not...

Страница 74: ...80 Initialise Yes Return the initial settings to the factory default Recording Auto Chapter HDD Page 29 5 minutes 10 minutes 30 minutes 60 minutes Off Insert chapter marks every set time interval Noi...

Страница 75: ...and make sure the connection indicated by each jack Y PB PR properly Component Interlace If your TV has component jacks select Component Interlace and make sure the connection indicated by each jack Y...

Страница 76: ...tputs Dolby Digital signals If your amplifier decoder is compatible with Dolby Digital set to Bit Stream PCM Converts the Dolby Digital into PCM 2 channel If your amplifier decoder is NOT compatible w...

Страница 77: ...only with analogue audio connection Playback 1 Press SETUP in stop mode Setup Menu will appear 2 Select Playback using Cursor then press ENTER 3 Select a desired item using Cursor then press ENTER 4 R...

Страница 78: ...nu Language Default English Set the Disc Menu language Follow steps 1 to 2 on page 77 Select Language using Cursor then press ENTER Language Menu will appear Select Disc Menu Language using Cursor the...

Страница 79: ...ng the password After that the numbers will change to When the password has been set already the password will be displayed as for your security If the password you have entered is wrong the error mes...

Страница 80: ...he PAL system cannot be viewed on an NTSC system TV With discs recorded using the NTSC system an NTSC signal is output for viewing on an NTSC or Multi system TV With discs recorded using the NTSC syst...

Страница 81: ...to DVD Video Mode Follow steps 1 to 2 on the left Select Fast Dubbing Audio Video Mode using Cursor then press ENTER Option window will appear Select the desired setting using Cursor then press ENTER...

Страница 82: ...ff Does not show the operating display 3 Background Colour Default On Set the background colour When there is no signal for the picture signal input the screen changes to blue background Follow steps...

Страница 83: ...a CPRM compatible disc Could not perform the dubbing There may be insufficient space in the HDD because the Fast Dubbing from DVD to HDD and the HDD recording are proceeding simultaneously Check the d...

Страница 84: ...wable number of Edit Marks or chapters has been exceeded You are trying to dub when total chapter or Edit Mark number in the DVD is already at its limit Delete unnecessary chapters in the DVD See page...

Страница 85: ...aged Try Channel Setting by following the steps on pages 18 to 21 Only specific channels do not appear The channels may be set to be skipped See page 19 The external input channels such as AV1 AV2 or...

Страница 86: ...istorted This is not a malfunction Check if the cables are damaged Keep the equipment which may cause electrical disturbances such as a cellular phone away There is no sound or no subtitle Turn on all...

Страница 87: ...unit Dubbing cannot be executed Video mode discs made on other recorder cannot be dubbed using this unit When the number of the titles or the chapters exceeds the maximum recordable number the dubbin...

Страница 88: ...rean 5761 Kurdish 5767 Laothian 5861 Latin 5847 Latvian Lettish 5868 Lingala 5860 Language Code Lithuanian 5866 Macedonian 5957 Malagasy 5953 Malay 5965 Malayalam 5958 Maltese 5966 Maori 5955 Marathi...

Страница 89: ...on CD RW R discs from a computer and play back the files on this unit MP3 MPEG Audio Layer 3 MP3 is a method of compressing files You can copy MP3 files on CD RW R discs from a computer and play back...

Страница 90: ...ency Compression format 48 kHz Dolby Digital Tuner Receivable channels E2 E69 Input Output Front Panel AV3 Video input Input level One RCA connector 1 Vp p 75 S Video input Input level One Mini DIN 4...

Страница 91: ...91 EN E2B21BD_E2B28BD_EN book Page 91 Monday August 21 2006 5 05 PM...

Страница 92: ...HD B2735 HD B2785 Trade Name Funai is in compliance with following Regulations EN55013 2001 A1 2003 EN55020 2002 A1 2003 EN61000 3 2 2000 EN61000 3 3 1995 A1 2001 EN60065 2002 EN60825 1 Edition 1 2 20...

Отзывы: