8
1
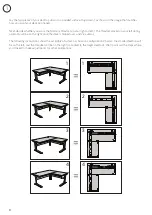
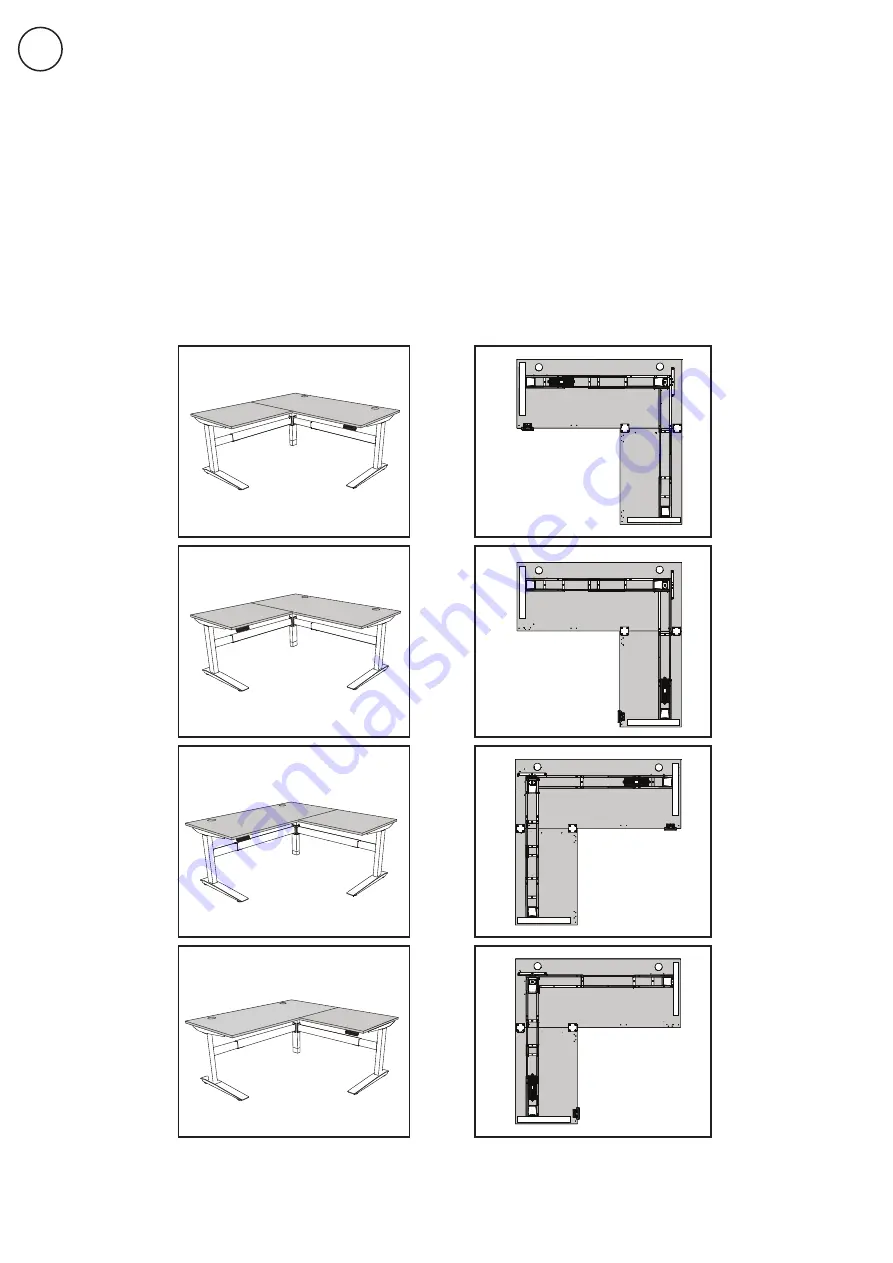
Lay the two pieces of your desktop down on a padded surface (tops down) as shown in the image that matches
how you want your desk positioned.
Next, decide whether you want the Memory Handset on your right or left. (The Handset placed on your left during
assembly will be on the right once the desk is flipped over, and vice versa.)
The following instructions show the assembly of a desk as shown in configuration 2 below: the smaller desktop will
be on the left, and the Handset will be on the right (mounted to the larger desktop). We’ll point out the steps where
you’ll need to make adjustments for other orientations.
=
1
1
=
3
3
=
4
4
=
2
2
Содержание Jarvis
Страница 2: ...Thank you for choosing a Jarvis desk from Fully ...
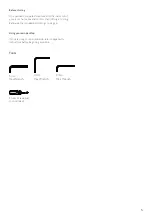
Страница 7: ...7 Not to scale Large Desktop Small Desktop AD AE Desktop Screw x16 Extra AF Desktop boxes 2 ...
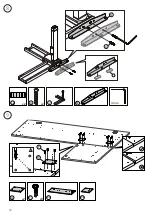
Страница 9: ...9 J W C J x4 W C x1 3 2 W I C x4 W C x1 I 4 mm 4 mm ...
Страница 10: ...10 4 A V 2 A x2 V 2 4 mm B V 3 B x2 V 3 5 4 mm ...
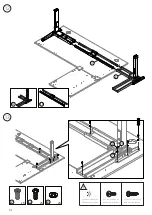
Страница 11: ...11 6 K P W AB x2 W P K x2 AB 4 mm x2 U 6 L 7 U L 6 4 mm ...
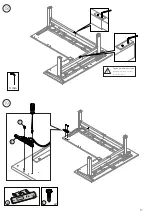
Страница 12: ...12 x2 U 8 x2 AB U N AB 7 N 4 mm 9 Q x2 x8 T AE Q T 1 4 3 2 AD ...
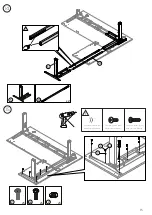
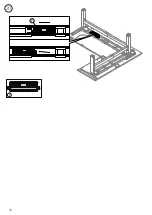
Страница 17: ...17 19 18 3 mm T E E x2 T Tighten pre installed screws Skipping this step will result in stability issues ...
Страница 18: ...18 20 F F ...
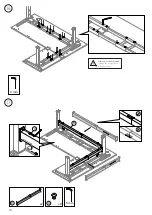
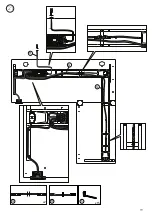
Страница 19: ...19 21 G G H G x2 H x15 S ...
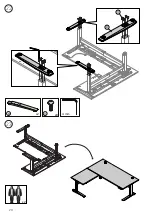
Страница 20: ...20 22 23 V D V x8 4 mm x2 D x2 ...
Страница 25: ...25 ...
Страница 26: ...version 40000492V C Everything you need to find your work flow ...

