16
L i f e B o o k A 6 0 0 0 S e r i e s N o t e b o o k - S e c t i o n T w o
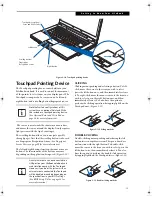
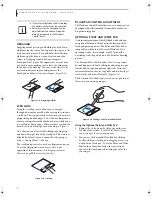
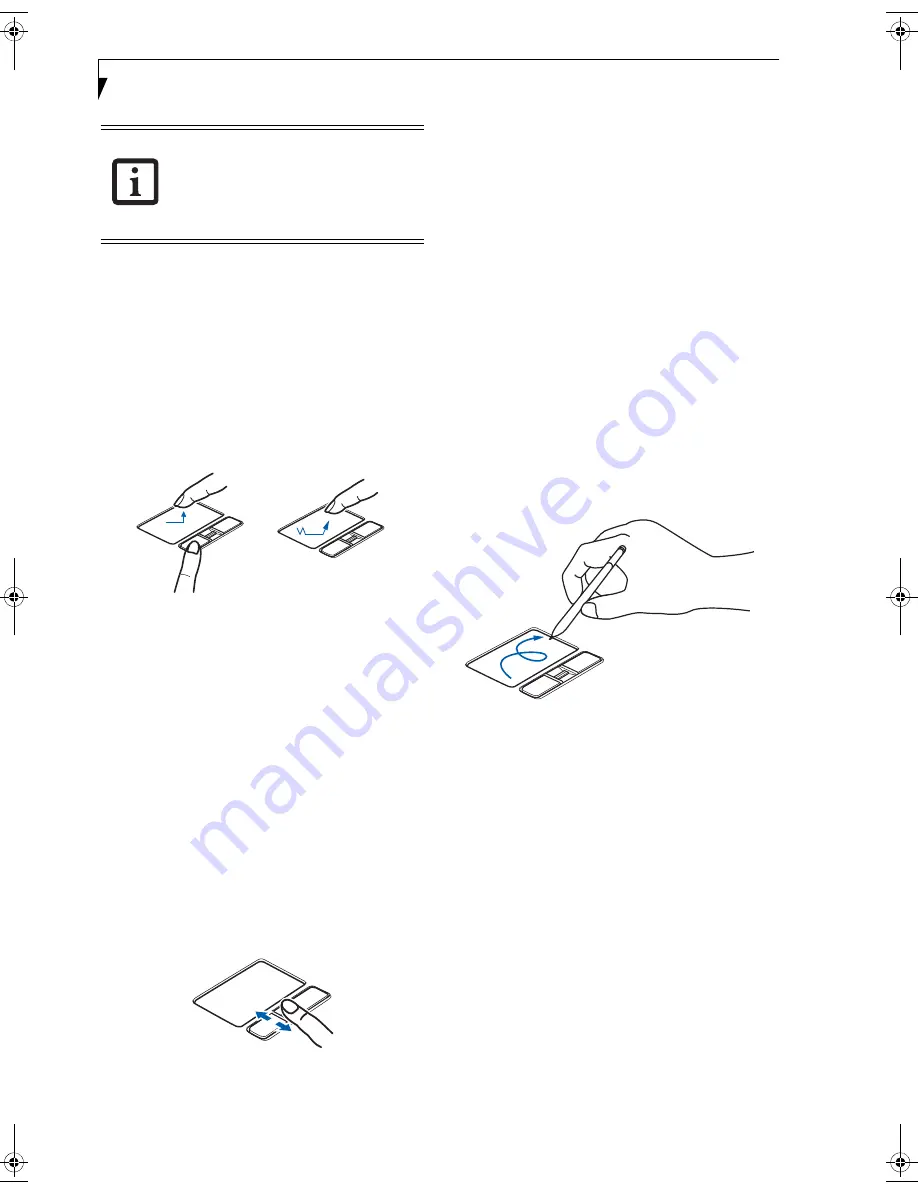
DRAGGING
Dragging means pressing and holding the left button,
while moving the cursor. To drag, move the cursor to the
item you wish to move. Press and hold the left button
while moving the item to its new location and then
release it. Dragging can also be done using the
Touchpad. First, tap the Touchpad twice over the item
you wish to move making sure to leave your finger on
the pad after the final tap. Next, move the object to its
new location by moving your finger across the
Touchpad, and then release your finger.
(Figure 2-13)
Figure 2-13 Dragging methods
SCROLLING
Using the scrolling sensor allows you to navigate
through a document quickly without using the window’s
scroll bars. This is particularly useful when you are navi-
gating through online pages. To use the scrolling sensor,
move your finger forward or backward across the button
to scroll up or down a page. When you have reached the
desired section of the page, raise your finger.
(Figure )
Note that you can also scroll by sliding your finger up
and down the right side of the touchpad. This feature is
disabled by default, but you can enable it by going to
Start -> Control Panel -> Mouse.
The scrolling sensor is also used as a fingerprint sensor.
To use the fingerprint sensor device, refer to the
appendix of this document.
(See Fingerprint Sensor
Device on page 99 for more information)
Figure 2-14 Scrolling
TOUCHPAD CONTROL ADJUSTMENT
The Windows Control Panel allows you to customize your
Touchpad with selections made from within the Mouse
Properties dialog box.
OPTIONAL POINT AND WRITE PAD
Certain configurations of this LifeBook notebook have
an optional Point and Write Pad in the location of the
touchpad pointing device. The Point and Write Pad is
compatible with the latest Microsoft Windows Vista
operating system. For example, use MS Journal for
notetaking with the pad, and use MS Paint for drawing
pictures.
The Point and Write Pad enriches the user’s experience
by enabling powerful note-taking, handwriting recogni-
tion, and fast navigation options under the Vista envi-
ronment that allow the user to quickly and intuitively get
results faster and more efficiently.
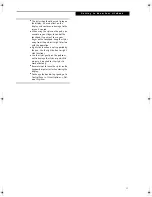
(Figure 2-15)
The Point and Write Pad stylus is used on the pad just as
if it were a pen writing on paper.
Figure 2-15 Writing on the Point and Write Pad
Using the Optional Point and Write Pad
1. Remove the stylus from the stylus slot on the rear
left side of the system.
(See Left-Side Panel Compo-
nents on page 7 for more information)
.
2. You can use the Point and Write Pad for clicking,
double-clicking, scrolling, and dragging, just as you
would with a touch pad. To use the Point and Write
Pad for these functions, follow the instructions
above for the touchpad, substituting the stylus for
your finger.
■
If the interval between clicks is too long,
the double-click will not be executed.
■
Parameters for the Touchpad can be
adjusted from the Mouse Properties
dialog box located in the Windows
Control Panel.
fennec2.book Page 16 Thursday, December 21, 2006 12:43 PM
Содержание LifeBook A6020
Страница 1: ...Fujitsu LifeBook A6020 Notebook User s Guide ...
Страница 2: ......
Страница 8: ...L i f e B o o k A 6 0 0 0 S e r i e s N o t e b o o k ...
Страница 9: ...1 Preface ...
Страница 10: ...L i f e B o o k A 6 0 0 0 S e r i e s N o t e b o o k ...
Страница 12: ...2 L i f e B o o k A 6 0 0 0 S e r i e s N o t e b o o k ...
Страница 13: ...3 2 Getting to Know Your LifeBook Notebook ...
Страница 14: ...4 L i f e B o o k A 6 0 0 0 S e r i e s N o t e b o o k S e c t i o n T w o ...
Страница 31: ...21 3 Getting Started ...
Страница 32: ...22 L i f e B o o k A 6 0 0 0 S e r i e s N o t e b o o k S e c t i o n T h r e e ...
Страница 39: ...29 4 User Installable Features ...
Страница 40: ...30 L i f e B o o k A 6 0 0 0 S e r i e s N o t e b o o k S e c t i o n F o u r ...
Страница 54: ...44 L i f e B o o k A 6 0 0 0 S e r i e s N o t e b o o k S e c t i o n F o u r ...
Страница 55: ...45 5 Troubleshooting ...
Страница 56: ...46 L i f e B o o k A 6 0 0 0 S e r i e s N o t e b o o k S e c t i o n F i v e ...
Страница 70: ...60 L i f e B o o k A 6 0 0 0 S e r i e s N o t e b o o k S e c t i o n F i v e ...
Страница 71: ...61 6 Care and Maintenance ...
Страница 72: ...62 L i f e B o o k A 6 0 0 0 S e r i e s N o t e b o o k S e c t i o n S i x ...
Страница 76: ...66 L i f e B o o k A 6 0 0 0 S e r i e s N o t e b o o k S e c t i o n S i x ...
Страница 77: ...67 7 System Specifications ...
Страница 78: ...68 L i f e B o o k A 6 0 0 0 S e r i e s N o t e b o o k S e c t i o n S e v e n ...
Страница 83: ...73 8 Glossary ...
Страница 84: ...74 L i f e B o o k A 6 0 0 0 S e r i e s N o t e b o o k S e c t i o n E i g h t ...
Страница 92: ...82 L i f e B o o k A 6 0 0 0 S e r i e s N o t e b o o k S e c t i o n E i g h t ...
Страница 93: ...83 Appendix A Integrated Wireless LAN User s Guide ...
Страница 94: ...84 L i f e B o o k A 6 0 0 0 S e r i e s N o t e b o o k A p p e n d i x ...
Страница 105: ...95 Appendix B Using the Fingerprint Sensor ...
Страница 106: ...96 L i f e B o o k A 6 0 0 0 S e r i e s N o t e b o o k ...
Страница 114: ...104 L i f e B o o k A 6 0 0 0 S e r i e s N o t e b o o k ...
Страница 118: ...108 L i f e B o o k A 6 0 0 0 S e r i e s N o t e b o o k I n d e x ...
Страница 119: ......
Страница 120: ......


