


49
U s e r I n s t a l l a b l e F e a t u r e s
Device Ports
Your LifeBook comes equipped with multiple ports to
which you can connect an external device including:
disk drives, keyboards, modems, printers, etc.
MODEM (RJ-11) TELEPHONE JACK
The modem (RJ-11) telephone jack is used for an
internal modem. To connect the telephone cable follow
these easy steps: (See Figure 2-4 on page 11 for location)
1. Align the connector with the port opening.
2. Push the connector into the port until it is seated.
3. Plug the other end of the telephone cable into a
telephone outlet.
PARALLEL PORT
The parallel port, or LPT port, allows you to connect
parallel devices, such as a printer to your LifeBook. In
order to connect a parallel interface device follow these
easy steps: (See Figure 2-6 on page 13 for location)
1. Align the connector with the port opening.
2. Push the connector into the port until it is seated.
3. Tighten the two hold-down screws, located on
each end of the connector.
SERIAL PORT
The serial port, or COMM port, allows you to connect
serial devices, such as printers or scanners. In order
to connect a serial interface device follow these easy
steps: (See Figure 2-6 on page 13 for location)
1. Align the connector with the port opening.
2. Push the connector into the port until it is seated.
3. Tighten the two hold-down screws, located on each
end of the connector.
PS/2 PORT
The PS/2 port allows you to connect an external
keyboard, and/or numeric keypad and mouse. In order
to connect a PS/2 interface device follow these easy
steps: (See Figure 2-6 on page 13 for location)
1. Align the connector with the port opening.
2. Push the connector into the port until it is seated.
UNIVERSAL SERIAL BUS PORT
The Universal Serial Bus port (USB) allows you to
connect USB devices such as external game pads,
pointing devices, keyboards and/or speakers. In order
to connect a USB device follow these easy steps: (See
Figure 2-6 on page 13 for location)
1. Align the connector with the port opening.
2. Push the connector into the port until it is seated.
INFRARED PORT
The Infrared IrDA 1.1 (4Mbps) port allows for wireless
data transfer between your LifeBook and other
IrDA-compatible devices, such as another computer or a
printer, without the use of a cable. (See Figure 2-4 on
page 11 for location)
It is important to keep in mind that while carrying out
this form of communication, both devices must be
placed so their infrared ports are directly facing each
other without obstruction. The devices must also be
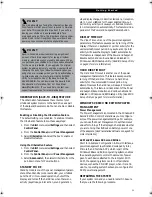
W A R N I N G
Do not connect the internal modem to a Digital PBX as
it may cause serious damage to the modem or your
LifeBook. It should be noted that some hotels use the
Digital PBX systems, please be sure to find out BEFORE
you connect your modem. Consult your PBX manufac-
turer’s documentation for more information.
C A U T I O N
The internal modem is designed to the ITU-T V.90
standard. Its maximum speed of 53000bps is the high-
est allowed by the FCC, and its actual connection rate
depends on the line conditions. The maximum speed is
33600bps at upload.
C A U T I O N
The internal modem on all Fujitsu LifeBooks is not qual-
ified for use with telephone systems outside the United
States and Canada and may not operate in other coun-
tries.
P O I N T
A mouse, keyboard, or keypad may be installed and
automatically recognized by your LifeBook without
restarting or changing setups.
P O I N T
The use of two PS/2 devices simultaneously from the
port requires a PS/2 splitter.
C A U T I O N
Due to the ongoing changes in USB technology
and standards, not all USB devices and/or drivers
are guaranteed to work.
A_Series.book Page 49 Monday, June 26, 2000 2:28 PM
Содержание LifeBook A-4170
Страница 8: ...L i f e B o o k A S e r i e s ...
Страница 9: ...1 1 Preface ...
Страница 10: ...2 L i f e B o o k A S e r i e s S e c t i o n 1 ...
Страница 12: ...4 L i f e B o o k A S e r i e s S e c t i o n 1 ...
Страница 13: ...5 2 Getting to Know Your LifeBook ...
Страница 14: ...6 L i f e B o o k A S e r i e s S e c t i o n 2 ...
Страница 34: ...26 L i f e B o o k A S e r i e s S e c t i o n 2 ...
Страница 35: ...27 3 Getting Started ...
Страница 36: ...28 L i f e B o o k A S e r i e s S e c t i o n 3 ...
Страница 45: ...37 4 User Installable Features ...
Страница 46: ...38 L i f e B o o k A S e r i e s S e c t i o n 4 ...
Страница 59: ...51 5 Troubleshooting ...
Страница 60: ...52 L i f e B o o k A S e r i e s S e c t i o n 5 ...
Страница 74: ...66 L i f e B o o k A S e r i e s S e c t i o n 5 ...
Страница 75: ...67 6 Care and Maintenance ...
Страница 76: ...68 L i f e B o o k A S e r i e s S e c t i o n 6 ...
Страница 80: ...72 L i f e B o o k A S e r i e s S e c t i o n 6 ...
Страница 81: ...73 7 Specifications ...
Страница 82: ...74 L i f e B o o k A S e r i e s S e c t i o n 7 ...
Страница 85: ...77 8 Glossary ...
Страница 86: ...78 L i f e B o o k A S e r i e s S e c t i o n 8 ...
Страница 92: ...84 L i f e B o o k A S e r i e s ...
Страница 96: ...88 L i f e B o o k A S e r i e s ...


