background image

Fujitsu LifeBook

®

E8210 Notebook

User’s Guide

E8210.book  Page 1  Friday, March 10, 2006  4:33 PM

Содержание E8210 - LifeBook - Core 2 Duo 1.66 GHz

Страница 1: ...Fujitsu LifeBook E8210 Notebook User s Guide E8210 book Page 1 Friday March 10 2006 4 33 PM ...

Страница 2: ...E8210 book Page 2 Friday March 10 2006 4 33 PM ...

Страница 3: ...hnology that is protected by method claims of certain U S patents and other intellectual property rights owned by Macrovision Corporation and other rights users Use of this copyright protection technology must be authorized by Macrovision Corporation and is intended for home and other limited viewing uses only unless authorized by Macrovision Corporation Reverse engineering or disassembly is prohi...

Страница 4: ...gas leak in the vicinity of the leak Use only the power cord and batteries indicated in this manual Do not dispose of batteries in a fire They may explode Check with local codes for possible special disposal instructions To reduce the risk of fire use only No 26 AWG or larger UL Listed or CSA Certified Telecommunication Line Cord SAVE THESE INSTRUCTIONS For Authorized Repair Technicians Only Syste...

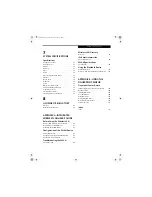
Страница 5: ... 13 CapsLock Indicator 13 ScrLk Indicator 13 Security Indicator 13 Keyboard Using the Keyboard 14 Numeric Keypad 14 Windows Keys 14 Cursor Keys 14 Function Keys 15 Touchpad Pointing Device Clicking 16 Double Clicking 16 Dragging 17 Touchpad Control Adjustment 17 Scrolling 17 Optional Quick Point Feature 17 Volume Control Controlling the Volume 18 Flexible Bay Devices Removing and Installing Modula...

Страница 6: ...Cards 40 Removing A Memory Stick SD Card 40 PC Cards ExpressCards Installing PC Cards 41 Removing PC Cards 41 Installing ExpressCards 42 Removing ExpressCards 42 Smart Card Reader 42 Memory Upgrade Module Installing Removing Memory Modules 43 Checking the Memory Capacity 44 Device Ports Modem RJ 11 Telephone Jack 45 Internal LAN RJ 45 Jack 45 Parallel Port 45 Serial Port 46 Port Replicator Connect...

Страница 7: ... WLAN Device 91 Activating the WLAN Device 91 Configuration of the WLAN Device Flow of Operations 92 Configuration Using Intel PROSet Utility 92 Connection to the network 93 Troubleshooting the WLAN Troubleshooting 96 Wireless LAN Glossary Glossary 97 IP address information About IP Addresses 99 WLAN Specifications Specifications 100 Using the Bluetooth Device What is Bluetooth 101 Where to Find I...

Страница 8: ...L i f e B o o k E 8 0 0 0 N o t e b o o k E8210 book Page 8 Friday March 10 2006 4 33 PM ...

Страница 9: ...1 Preface E8210 book Page 1 Friday March 10 2006 4 33 PM ...

Страница 10: ...L i f e B o o k E 8 0 0 0 N o t e b o o k E8210 book Page 2 Friday March 10 2006 4 33 PM ...

Страница 11: ...hould have the following information ready so that the customer support representative can provide you with the fastest possible solution Product name Product configuration number Product serial number Purchase date Conditions under which the problem occurred Any error messages that have occurred Type of device connected if any Fujitsu Online You can go directly to the online Fujitsu Product catal...

Страница 12: ...2 L i f e B o o k E 8 0 0 0 N o t e b o o k E8210 book Page 2 Friday March 10 2006 4 33 PM ...

Страница 13: ...3 2 Getting to Know Your LifeBook Notebook E8210 book Page 3 Friday March 10 2006 4 33 PM ...

Страница 14: ...4 L i f e B o o k E 8 0 0 0 N o t e b o o k E8210 book Page 4 Friday March 10 2006 4 33 PM ...

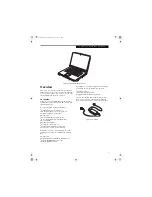
Страница 15: ...lephone cable Driver and Application Restore DAR Disc Recovery DVD Getting Started Guide User s Guide this document International Limited Warranty Brochure Microsoft associated product materials Depending on your system configuration one of the following devices will be pre installed in the Flexible Bay Weight Saver Modular Dual Layer Multi Format DVD Writer Modular DVD CD RW combo drive Modular D...

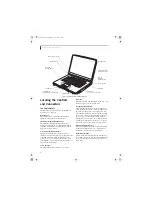
Страница 16: ...more information Touchpad Pointing Device The Touchpad pointing device is a mouse like cursor control with five buttons two right mouse like buttons two left mouse like buttons and a scroll button The upper left and right buttons are for use with the Quick Point cursor control See Touchpad Pointing Device on page 16 for more information Depending upon the configuration of your system the scroll bu...

Страница 17: ...rDA Standard Revision 1 1 Display Panel Latch The display panel latch locks and releases the display panel Microphone Jack The microphone jack allows you to connect an external mono microphone See Microphone Jack on page 47 for more information Air Vents The air vents are used to cool the system to prevent overheating Depending upon your system configuration the head phone jack may serve different...

Страница 18: ... 48 for more infor mation PC Card Slot The PC Card Slots allow you to install a Type I or Type II PC Card See PC Cards ExpressCards on page 41 for more information Smart Card Slot A dedicated Smart Card slot is provided on your note book Smart Cards are the same size and shape as credit cards but they contain an integrated microprocessor chip See Smart Card Reader on page 42 for more infor mation ...

Страница 19: ... See Modem RJ 11 Telephone Jack on page 45 for more information Flexible Bay Release Latch The Flexible Bay release latch releases the Flexible Bay device S Video Out Port The S Video output is used to transmit a higher resolu tion video signal to a compatible TV or VCR See S Video Out Port on page 47 for more information Anti Theft Lock Slot Modem Jack Flexible Bay Flexible Bay Release Latch S Vi...

Страница 20: ... Ports on page 46 for more information Gigabit LAN RJ 45 Jack The internal LAN RJ 45 jack is used for an internal Gigabit 10Base T 100Base Tx 1000Base T Ethernet LAN connection See Internal LAN RJ 45 Jack on page 45 for more information Anti theft Lock Slot The anti theft lock slot allows you to attach an optional physical lock down device Serial Port The serial port allows you to connect serial R...

Страница 21: ...ry See Lithium ion Battery on page 35 for more information Main Unit and Configuration Label The configuration label shows the model number and other information about your notebook In addition the configuration portion of the label has the serial number and manufacturer information that you will need to give your support representative It identifies the exact version of various components of your...

Страница 22: ...m the AC adapter Auto Airline adapter or battery s This icon has two different states that can tell you what power source your notebook is using On This means that either of the adapters are currently in use Off Power is only coming from the batteries and you do not have an adapter connected BATTERY LEVEL INDICATORS The two Battery Level indicators state whether or not the primary Lithium ion batt...

Страница 23: ... if your software tries to access a PC Card even if there is no card installed See PC Cards ExpressCards on page 41 for more information NUMLK INDICATOR The NumLk indicator states that the integral keyboard is set in ten key numeric keypad mode CAPSLOCK INDICATOR The CapsLock indicator states that your keyboard is set to type in all capital letters SCRLK INDICATOR The ScrLk indicator states that y...

Страница 24: ...nctions as both standard character keys and numeric keypad keys NumLk can be activated by pressing the NumLk keys Turning off the NumLk feature is done the same way Once this feature is activated you can enter numerals 0 through 9 perform addition subtraction multiplication or division and enter decimal points using the keys designated as ten key function keys The keys in the numeric keypad are ma...

Страница 25: ...al Setting is selected in the BIOS See BIOS Setup Utility on page 29 Fn F6 Pressing F6 repeatedly while holding Fn will lower the brightness of your display Fn F7 Pressing F7 repeatedly while holding Fn will increase the brightness of the display Fn F8 Pressing F8 repeatedly while holding Fn will decrease the volume of your LifeBook notebook Fn F9 Pressing F9 repeatedly while holding Fn will incre...

Страница 26: ...on once and then immediately release it You also have the option to perform the clicking operation by tapping lightly on the Touchpad once Figure 2 13 Figure 2 13 Clicking DOUBLE CLICKING Double clicking means pushing and releasing the left button twice in rapid succession This procedure does not function with the right button To double click move the cursor to the item you wish to select press th...

Страница 27: ... through on line pages To use the Scrolling button press the crescent shape at the top or bottom of the button to scroll up or down a page When you have reached the desired section of the page release the button Figure 2 16 Figure 2 16 Scrolling OPTIONAL QUICK POINT FEATURE The optional Quick Point device consists of a cursor control button at the lower center of the keyboard It is roughly the sam...

Страница 28: ...rolled by many volume controls that are set within individual applications Certain external audio devices you might connect to your system may have hardware volume controls Each source discussed above puts an upper limit on the volume level that must then be followed by the other sources We recommend that you experiment with the various volume controls to discover the optimal sound level Any softw...

Страница 29: ...asy steps Figure 2 18 1 Close any open files 2 Shut down your LifeBook notebook 3 Pull out the Flexible Bay release latch This will push your device out slightly allowing you to remove it 4 Slide your device out until it is clear of the bay This will require light force Figure 2 18 Removing Installing a device in the Flexible Bay 5 Slide the device you are installing into your notebook until it cl...

Страница 30: ...ual LifeBook notebooks in a group environment should not use a common password A password consists of one to five button strokes plus the Enter button A valid stroke consists of pushing one or up to four buttons simultaneously The following are valid button strokes Pushing 4 by itself Pushing 2 and 3 at the same time Pushing 1 2 and 4 at the same time Pushing 1 2 3 and 4 at the same time The follo...

Страница 31: ... the Power Suspend Resume button Low Battery Operations If your LifeBook notebook has low battery pushing the Power Suspend Resume button only turns on the Secu rity Indicator Your notebook does not unlock the Secu rity Indicator turns off after one minute To resume normal operation first attach a power supply to the notebook Then you may unlock the notebook UNINSTALLING THE SECURITY PANEL APPLICA...

Страница 32: ...u under Settings Control Panel Other Control Panel Settings Application Panel They include two Application Panel Setup tabs E mail Setup and Internet Setup Configuring your LifeBook Application Panel When you start Windows the LifeBook Application Panel is automatically activated An icon resembling a finger pressing a button will appear on the system tray the indented portion of the status bar whe...

Страница 33: ...ctivating and Activating the LifeBook Application Panel To deactivate the LifeBook Application Panel follow these easy steps 1 Click on Start 2 Click on Programs 3 Click on LifeBook Application Panel 4 Click on Deactivate Panel To reactivate follow the same procedure except for step 4 Click on Activate Panel instead If your system has dedicated one of the application launcher buttons to be an Inte...

Страница 34: ...24 L i f e B o o k E 8 0 0 0 N o t e b o o k E8210 book Page 24 Friday March 10 2006 4 33 PM ...

Страница 35: ...25 3 Getting Started E8210 book Page 25 Friday March 10 2006 4 33 PM ...

Страница 36: ...26 L i f e B o o k E 8 0 0 0 N o t e b o o k E8210 book Page 26 Friday March 10 2006 4 33 PM ...

Страница 37: ...Optional Auto Airline Adapter 1 Plug the DC output cable into the DC power jack on your notebook 2 Plug the Auto Airline adapter into the cigarette lighter of an automobile with the ignition key in the On or Accessories position OR 3 Plug the Auto Airline adapter into the DC power jack on an airplane seat Switching from AC Adapter Power or the Auto Airline Adapter to Battery Power 1 Be sure that y...

Страница 38: ...he power management utility Using the Keyboard Adjusting the brightness using the keyboard changes the setting only temporarily Fn F6 Pressing repeatedly will lower the brightness of your display Fn F7 Pressing repeatedly will increase the brightness of the display CLOSING THE DISPLAY PANEL 1 Holding the edge of your display panel pull it forward until it is flush with the body of your Life Book n...

Страница 39: ... Test POST When the boot sequence is completed without a failure and without a request for the BIOS Setup Utility the system displays the operating system s opening screen The boot sequence is executed when You turn on the power to your LifeBook notebook You restart your notebook from the Windows Shut Down dialog box The software initiates a system restart Example When you install a new applicatio...

Страница 40: ...n important change becomes available for your notebook Several additional windows will appear prompting you to enter a name and description for your computer an Administrator password and a domain name Read the instructions on the screens carefully and fill in the infor mation as directed You will then be automatically connected to the Internet if you have an appropriate connection avail able If a...

Страница 41: ...esume button when your system is turned on Selecting Standby from the Windows Shut Down menu Timing out from lack of activity Allowing the battery to reach the Dead Battery Warning condition Your notebook s system memory typically stores the file on which you are working open application informa tion and any other data required to support operations in progress When you resume operation from Suspe...

Страница 42: ...r Options to set the timeout values for turning off the display and hard disks whether you are running the notebook on battery power or one of the adapters RESTARTING THE SYSTEM If your system is on and you need to restart it be sure that you use the following procedure 1 Click the Start button and then click Shut Down 2 Select the Restart option from within the Windows Shut Down dialog box 3 Clic...

Страница 43: ...33 4 User Installable Features E8210 book Page 33 Friday March 10 2006 4 33 PM ...

Страница 44: ...34 L i f e B o o k E 8 0 0 0 N o t e b o o k E8210 book Page 34 Friday March 10 2006 4 33 PM ...

Страница 45: ...otifica tion message will appear If you do not respond to the low battery message the batteries will continue to discharge until they are too low to operate When this happens your notebook will go into Suspend mode There is no guarantee that your data will be saved once the notebook reaches this point Do not leave a faulty battery in your LifeBook notebook It may damage your AC adapter optional Au...

Страница 46: ...wapping Cold swapping Batteries To cold swap batteries in your battery bay follow these easy steps Figure 4 1 1 Have a charged battery ready to install 2 Shut down your notebook and disconnect the AC adapter 3 Orient the notebook with the battery closest to you Figure 4 1 4 While pushing the battery bay release latch away from the battery pack Figure 4 1 slide the battery bay lift latch to the lef...

Страница 47: ...er Multi Format DVD Writer and media player software you can play DVD movies and music CDs on your LifeBook notebook The media player includes controls which allow you to take full advantage of the features of a DVD movie as well as standard features such as fast forward fast reverse pause etc With this drive you can also burn onto recordable DVD R RW DVD R RW or CD R RW discs DVD CD RW Combo mode...

Страница 48: ...e About DVD Player Performance dialog box and the movie will begin Opening the Media Player Control Panel With most DVD ROMs you have the option of altering how the movie should play and what you wish to view You can do this by using the media player control panel and the mouse 1 Right click on the movie screen to open a dropdown menu for options 2 Select View then Player for all the controls avai...

Страница 49: ...vie to view it in its entirety To Watch a Movie on Battery Power 1 Have an additional full charged battery or your AC adapter ready for use 2 Start watching your DVD movie 3 When the low battery warning occurs immediately stop the movie and exit the media player 4 Power down your LifeBook notebook and replace the discharged battery with an additional fully charged battery If you do not have an add...

Страница 50: ...o install an Memory Stick or SD Card follow these steps 1 See your specific card manual for instructions on the installation of your card Some cards may require that your notebook is off while installing them 2 Make sure there is no card currently in the slot If there is see Removing a Memory Stick SD Card 3 Insert your card into the slot with the product label facing up 4 Push the card firmly int...

Страница 51: ...s may require your note book to be in Suspend Mode or Off during removal 2 Unlock the card from the slot by pressing the eject button associated with the slot in which the card is located When pressed the button will pop out 3 Firmly press the button again until it is flush with the notebook This will eject the card slightly out of the slot allowing you to remove the card Eject Buttons PC Card Slo...

Страница 52: ...the card slightly out of the slot allowing you to remove the card SMART CARD READER A dedicated Smart Card Reader is provided on your notebook Figure 4 8 Smart Cards are the same size and shape as credit cards but they contain an integrated microprocessor chip The chip can hold a variety of information and provides you with many possible options such as allowing you to make secure purchases pay fo...

Страница 53: ... a Second Memory Module 8 Replace the cover and reinstall the screws REMOVING A MEMORY UPGRADE MODULE 1 Perform steps 1 through 4 of Installing a Memory Upgrade Module 2 Pull the clips sideways away from each side of the memory upgrade module at the same time 3 While holding the clips out remove the module from the slot by lifting it up and pulling towards the rear of your notebook Figure 4 11 Do ...

Страница 54: ...Panel then double clicking the System icon Select the General tab and check the amount of memory under Computer There may be a variation between the actual memory size and what is displayed This is possible if your system is configured with an integrated Intel Graphics Media Accelerator 950 which dynamically allocates system memory to accelerate graphics performance If the total memory displayed i...

Страница 55: ...ble follow these easy steps 1 Align the connector with the port opening 2 Push the connector into the port until it is seated Figure 4 13 3 Plug the other end of the cable into a LAN outlet Figure 4 13 Connecting the LAN PARALLEL PORT The parallel port or LPT port located on the system and on the optional Port Replicator allows you to connect parallel devices such as a printer to your notebook In ...

Страница 56: ...nd other IrDA compatible devices such as another computer or a printer without the use of a cable The infrared port is located adjacent to the wireless LAN switch See Figure 2 4 on page 7 for location It is important to keep in mind that while carrying out this form of communication both devices must be placed so their infrared ports are directly facing each other without obstruction The devices m...

Страница 57: ...u to connect an external monitor or LCD projector In order to connect an external video device follow these easy steps See Figure 2 5 on page 8 for location 1 Align the connector with the port opening 2 Push the connector into the port until it is seated 3 Tighten the two hold down screws located on each end of the connector Depending upon your system configuration the headphone jack may serve dif...

Страница 58: ...48 L i f e B o o k E 8 0 0 0 N o t e b o o k E8210 book Page 48 Friday March 10 2006 4 33 PM ...

Страница 59: ...49 5 Troubleshooting E8210 book Page 49 Friday March 10 2006 4 33 PM ...

Страница 60: ...50 L i f e B o o k E 8 0 0 0 N o t e b o o k E8210 book Page 50 Friday March 10 2006 4 33 PM ...

Страница 61: ...ing information 8 If you have tried the solutions suggested in the Trou bleshooting Table without success contact your support representative Toll free 1 800 8Fujitsu 1 800 838 5487 E mail 8fujitsu us fujitsu com Web site http www computers us fujitsu com support Before you place the call you should have the following information ready so that the customer support represen tative can provide you w...

Страница 62: ...e incorrect Set the BIOS setup utility to the default values within the Multimedia Device Configuration menu See BIOS Setup Utility on page 29 for more information Software driver is not configured correctly The Audio Driver may be installed or reinstalled by using the Drivers and Applications CD that came with your Fujitsu LifeBook Refer to your application and operating system documentation for ...

Страница 63: ...adapter is not plugged in Provide power to the Port Replicator Notebook is not properly seated in the Port Repli cator Remove and re dock your LifeBook notebook Floppy Disk Drive Problems You cannot access your optional external floppy disk You tried to write to a write protected floppy disk Eject the disk and set it to write enable Disk is not loaded correctly Eject floppy disk check orientation ...

Страница 64: ...ated by whichever modem applica tion is in use See your application software documentation for addi tional information Parallel Serial and USB Device Problems You have installed a parallel port device a serial port device or a USB device Your LifeBook notebook does not recognize the device or the device does not seem to work properly The device is not properly installed Remove and re install the d...

Страница 65: ...s Indicator Panel to determine the presence and condition of the batteries See Status Indicator Panel on page 12 for more information Install a charged battery or a Power adapter The primary battery is installed but is faulty Use the Status Indicator panel to verify the presence and condition of the batteries See Status Indicator Panel on page 12 for more information If a battery is indicating a s...

Страница 66: ... charged one or install a power adapter No batteries are installed Install a charged battery The batteries are improp erly installed Verify that the batteries are properly connected by re installing them Your installed batteries are faulty Verify the condition of the batteries using the Status Indicator panel and replace or remove any batteries that are shorted See Status Indicator Panel on page 1...

Страница 67: ... problem See the Power On Self Test POST messages to deter mine the meaning and severity of the problem Not all messages are errors some are simply status indicators See Power On Self Test Messages on page 60 for more information Your notebook appears to change setup parameters when you start it BIOS setup changes were not saved when you made them and exited the setup utility returning it to earli...

Страница 68: ...very short intervals and you failed to notice the display come on and go off again Press any button on the keyboard or move the mouse to restore operation If that fails push the Power Suspend Resume button The display may be shut off by Standby Mode Auto Suspend or Video Timeout Something is pushing on the Closed Cover switch Check the Closed Cover switch See figure 2 3 on page 6 for location Your...

Страница 69: ...nitor is not properly installed Reinstall your device See External Video Port on page 47 for more information Your operating system is not setup with the correct software driver for that device Check your device and operating system documentation and activate the proper driver You have connected an external monitor and it does not come on Your external monitor is not compatible with your LifeBook ...

Страница 70: ...you restart the system there may be a serious fault which might cause you to lose data if you continue Contact your support representative Incorrect Drive A type run SETUP Type of floppy drive A not correctly identified in Setup This means that the floppy disk drive type identified in your setup utility does not agree with the type detected by the Power On Self Test Run the setup utility to correc...

Страница 71: ...tion program that changes data stored in BIOS memory Run Setup and reconfigure the system System RAM Failed at offset nnnn System memory failed at offset nnnn of in the 64k block at which the error was detected This means that there is a fault in your built in memory If you continue to operate you risk corrupting your data Contact your support representative for repairs nnnn System RAM Passed Wher...

Страница 72: ...rify change the boot up priority rather than booting up from the hard drive or an external floppy disk drive perform one of the following procedures Changing priority from BIOS Setup utility 1 Start your system and press the F2 key when the Fujitsu logo appears You will enter the BIOS Setup Utility 2 Using the arrow keys go to the Boot menu 3 Arrow down to the Boot Device Priority submenu Press En...

Страница 73: ...ALLY DOWNLOADING DRIVER UPDATES Your system has a convenient tool called the Fujitsu Driver Update FDU utility With FDU you can choose to automatically or manually go to the Fujitsu site to check for new updates for your system The FDU icon should appear in the system tray at the bottom right of your screen roll the cursor over the icons to find the correct one If the FDU icon does not appear in t...

Страница 74: ...64 L i f e B o o k E 8 0 0 0 N o t e b o o k E8210 book Page 64 Friday March 10 2006 4 33 PM ...

Страница 75: ...65 6 Care and Maintenance E8210 book Page 65 Friday March 10 2006 4 33 PM ...

Страница 76: ...66 L i f e B o o k E 8 0 0 0 N o t e b o o k E8210 book Page 66 Friday March 10 2006 4 33 PM ...

Страница 77: ...r position your notebook such that the optical drive is supporting the weight of the notebook Do not drop your notebook Do not touch the screen with any sharp objects Cleaning your LifeBook notebook Always disconnect the power plug Pull the plug not the cord Clean your LifeBook notebook with a damp lint free cloth Do not use abrasives or solvents Use a soft cloth to remove dust from the screen Nev...

Страница 78: ... lose batteries in a pocket or purse where they may mix with coins keys or other metal objects Doing so may cause an explosion or fire Do not drop puncture disassemble mutilate or incin erate the battery Recharge batteries only as described in this manual and only in ventilated areas Do not leave batteries in hot locations for more than a day or two Intense heat can shorten battery life Do not lea...

Страница 79: ...inner edge and wiping to the outer edge Caring for your Optical Drive Your optical drive is durable but you must treat it with care Please pay attention to the following points The drive rotates the compact disc at a very high speed Do not carry it around or subject it to shock or vibration with the power on Avoid using or storing the drive where it will be exposed to extreme temperatures Avoid us...

Страница 80: ...70 L i f e B o o k E 8 0 0 0 N o t e b o o k E8210 book Page 70 Friday March 10 2006 4 33 PM ...

Страница 81: ...71 7 System Specifications E8210 book Page 71 Friday March 10 2006 4 33 PM ...

Страница 82: ...72 L i f e B o o k E 8 0 0 0 N o t e b o o k E8210 book Page 72 Friday March 10 2006 4 33 PM ...

Страница 83: ...hics Up to 128 MB shared video memory using Dynamic Video Memory Technology DVMT or ATI Mobility Radeon X1400 with 128 MB of dedi cated video memory AUDIO Realtek codec ALC262 with 2 channel High Definition HD audio Headphones Depending upon your system configuration you have one of the following Stereo headphone SPDIF jack 3 5 mm 1 Vrms or less minimum impedance 32 Ohms or Stereo headphone line o...

Страница 84: ...ecifications Dedicated Smart Card slot requires third party appli cation Wireless LAN antenna with pre installed on off switch Optional Bluetooth module with antenna On the Optional Port Replicator One 6 pin mini DIN PS 2 compatible connectors for external keyboard or mouse One 25 pin D SUB connector for parallel input output devices Bi directional output only or ECP One 15 pin D SUB connector for...

Страница 85: ...tebook in order to maximize battery life LifeBook Security Application Panel Software Your LifeBook notebook is pre installed with software utilities that let you operate and configure your LifeBook Security Application Panel The Security Panel portion allows for password protec tion while the system is off or in Suspend mode The Security Panel utilities are found under the Start menu under Progra...

Страница 86: ...76 L i f e B o o k E 8 0 0 0 N o t e b o o k E8210 book Page 76 Friday March 10 2006 4 33 PM ...

Страница 87: ...77 8 Glossary E8210 book Page 77 Friday March 10 2006 4 33 PM ...

Страница 88: ...78 L i f e B o o k E 8 0 0 0 N o t e b o o k E8210 book Page 78 Friday March 10 2006 4 33 PM ...

Страница 89: ... Used to describe data transfer rates Boot To start up a computer and load its operating system from disk ROM or other storage media into RAM Bus An electrical circuit which passes data between the CPU and the sub assemblies inside your LifeBook notebook Byte 8 bits of parallel binary information Cache Memory A block of memory built into the micro processor which is much faster to access than your...

Страница 90: ...association between the IP address and the name assigned to the computer If you do not know the IP address but if you know the computer name you can still communicate to that computer DOS Disk Operating System MS DOS is a Microsoft Disk Operating System Driver A computer program which converts application and operating system commands to external devices into the exact form required by a specific ...

Страница 91: ... 000 hosts on each of 16 000 networks Class C supports 254 hosts on each of 2 million networks The number of unassigned Internet addresses is running out so a new classless scheme called CIDR is gradually replacing the system based on classes A B and C and is tied to adoption of IPv6 credit webopedia com IR An abbreviation for infrared IrDA Infrared Data Association An organization which produces ...

Страница 92: ...e and made to appear to the operating system as if it were a separate disk and addressed by the operating system accordingly PCI Peripheral Component Interconnect Self configuring PC local bus Designed by Intel PCI has gained wide acceptance as a standard bus design PCMCIA PCMCIA is a trademark of the Personal Computer Memory Card International Association The Personal Computer Memory Card Interna...

Страница 93: ... to occur SMART makes a status report available so that the LifeBook notebook can prompt the user to back up the data on the drive Natu rally not all failures are predictable SMART predict ability is limited to those attributes which the drive can self monitor In those cases where SMART can give advance warning a considerable amount of precious data can be saved SRAM Static random access memory A ...

Страница 94: ...t has passed the interoperability test supplied by the WECA Wireless Ethernet Compatibility Alliance which guar antees the interoperability of wireless IEEE 802 11 LAN products For more information on the Wi Fi standard go to the WECA Web site at www wirelessethernet com WLAN Wireless Local Area Network A wireless interconnection of computers and peripherals within a single limited geographic loca...

Страница 95: ...EN of this equipment is 0 1B as shown on the label The REN is used to deter mine the number of devices that may be connected to a telephone line Excessive RENs on a telephone may result in the devices not ringing in response to an incoming call In most but not all areas the sum of RENs should not exceed five 5 0 To be certain of the number of devices that may be connected to a line as determined b...

Страница 96: ...ro d enregistrement Le sigle IC placé devant le numéro d enregistrement signifie que l enregistrement s est effectué conformément à une déclaration de conformité et indique que les spécifications techniques d Industrie Canada ont été respectées Il n implique pas qu Industrie Canada a approuvé le matériel Avant de connecter cet équipement à une ligne télépho nique l utilisateur doit vérifier s il e...

Страница 97: ...87 Appendix A Integrated Wireless LAN User s Guide Optional device E8210 book Page 87 Friday March 10 2006 4 33 PM ...

Страница 98: ...88 L i f e B o o k E 8 0 0 0 N o t e b o o k E8210 book Page 88 Friday March 10 2006 4 33 PM ...

Страница 99: ...he following two conditions 1 This device may not cause interference and 2 This device must accept any interference including interference that may cause undesired operation of this device FCC Interference Statement This equipment has been tested and found to comply with the limits for a Class B digital device pursuant to Part 15 of the FCC Rules These limits are designed to provide reasonable pro...

Страница 100: ...3 0 WIRELESS LAN MODES USING THIS DEVICE Ad Hoc Mode See Figure 5 1 Ad Hoc Mode refers to a wireless network architecture where wireless network connec tivity between multiple computers is established without a central wireless network device typically known as Access Point s Connectivity is accomplished using only client devices in a peer to peer fashion That is why Ad Hoc networks are also known...

Страница 101: ... The WLAN device can be deactivated quickly and effi ciently by toggling the Wireless On Off Switch to the Off position Figure 5 3 The Wireless On Off switch has no effect on non Wire less LAN models Figure A 3 Wireless LAN On Off Switch Deactivation using Intel PROSet for Wireless Utility The WLAN device can also be deactivated in Windows using the Intel PROSet for Wireless utility The proce dure...

Страница 102: ...k the Start button first and then All Pro grams 3 Click the icon Intel PROSet Wireless to execute the Intel PROSet for Wireless utility 4 Click the Add button The General Settings dialog displays 5 Enter a profile name in the Profile Name field 6 Enter the network SSID in the Network Name SSID field 7 Click Infrastructure or Ad Hoc for the operating mode 8 Click Advanced 9 The Mandatory Access Poi...

Страница 103: ...nd then enter data for IP address and Subnet mask See page 99 for IP address setting For access point infrastructure connection If your network uses DHCP select Obtain an IP address automatically and Obtain DNS server address automatically If your network uses static IP addresses consult with your network adminis trator for the correct IP address settings 8 Click the OK button Processing will retu...

Страница 104: ...crosoft Networks will be added to the list 10 Click the Close button Setting the file sharing function The procedure for setting the file sharing function follows with the work folder in drive C as an example 1 Click the Start button then My Computer 2 Double click Local disk C 3 Right click the work folder or whichever folder you want to share and then click Sharing and Security in the menu displ...

Страница 105: ...ROSet for Wireless window opens 3 Contained within the General tab and the Details section accessed by pressing the Details button you will find the current operating status of the radio When the radio is turned off or the com puter is not yet connected some of the conditions will not be displayed Profile Name The current configuration profile is displayed Network Name SSID Displays the Network Na...

Страница 106: ...emoving any obstacles for better sight To check the wave condition refer to the following page Confirming the status of the radio waves on page 95 The WLAN device has been deactivated or disabled Check if the wireless switch is turned ON Also verify Disable Radio is not checked in Network setting window The computer to be connected is turned off Check if the computer to be connected is turned ON R...

Страница 107: ...ecimal digits 0 through 9 and A through F or as six hexadecimal numbers separated by periods or colons e g 0080002012ef 0 80 0 2 20 ef which identify uniquely a computer that has an Ethernet interface MTU Maximum Transmission Unit The maximum size of data which can be transmitted at one time in networks including the Internet In an envi ronment whose maximum size of data is too large to correctly ...

Страница 108: ... the BSS unless it can provide the unique SSID Because the SSID is broadcast in plain text it does not supply any security to the network Subnet mask TCP IP network is controlled by being divided into multiple smaller networks subnets IP address consists of the subnet address and the address of each computer Subnet mask defines how many bits of IP address comprise the subnet address The same value...

Страница 109: ...ressed with four values in the range between 1 and 255 Set the each computer as follows The value in paren theses is a subnet mask Example Computer A 192 168 100 2 255 255 255 0 Computer B 192 168 100 3 255 255 255 0 Computer C 192 168 100 4 255 255 255 0 Computer X 192 168 100 254 255 255 255 0 IP addressing is much more complicated than can be briefly explained in this document You are advised t...

Страница 110: ... be connected may be decreased Item Specification Type of network The Intel PRO Wireless 3945ABG WM3945ABG Network Connections WLAN device conforms to IEEE 802 11a and 802 11b g Wi Fi based Transfer rate Automatic switching 54 Mbps maximum data rate Active frequency 802 11b g 2400 2473 MHz 802 11a 4900 5850 MHz Typical operating distances 802 11a 40 ft 12 m 54 Mbps 300 ft 91 m 6 Mbps 802 11b 100 f...

Страница 111: ...teria due to its low power The transmitters in this device must not be co located or operated in conjunction with any other antenna or transmitter Canadian Notice To prevent radio interference to the licensed service this device is intended to be operated indoors and away from windows to provide maximum shielding Equipment or its transmit antenna that is installed outdoors is subject to licensing ...

Страница 112: ...102 L i f e B o o k E S e r i e s N o t e b o o k A p p e n d i x A E8210 book Page 102 Friday March 10 2006 4 33 PM ...

Страница 113: ...103 Appendix B Using the Fingerprint Sensor Optional device E8210 book Page 103 Friday March 10 2006 4 33 PM ...

Страница 114: ...104 L i f e B o o k E 8 0 0 0 N o t e b o o k A p p e n d i x B E8210 book Page 104 Friday March 10 2006 4 33 PM ...

Страница 115: ...hether OmniPass has already been installed by checking to see if the following are present The presence of the gold key shaped OmniPass icon in the system tray at the bottom right of the screen The presence of the Softex program group in the Programs group of the Start menu System Requirements The OmniPass application requires space on your hard drive it also requires specific Operating Systems OS...

Страница 116: ...computer and enrolls an OmniPass user with username John_01 and password freq14 He then goes to his webmail site to log onto his account He inputs his webmail credentials as usual username John_02 and password lifebook but instead of clicking Submit he directs OmniPass to Remember Password Now whenever he returns to that site OmniPass will prompt him to supply access credentials John enters his Om...

Страница 117: ...ractice capturing your fingerprint When you are comfortable with how your fingerprint is captured proceed to enroll a finger 3 Once OmniPass has successfully acquired the finger print the Verify Fingerprint screen will automati cally appear To verify your enrolled fingerprint place your fingertip on the sensor and hold it there as if you were having a fingerprint captured Successful fingerprint ve...

Страница 118: ...iPass authentication settings Settings for this Pass word Site can always be changed in Vault Management Logging in to a Remembered Site Whether or not OmniPass prompts you to authenticate when you return to a remembered site is determined by Settings for this Password Site and can be changed in Vault Management The following cases are applicable to using OmniPass to login to Windows remembered we...

Страница 119: ...an choose the identity with which you are logging in if you login using master password Choosing User Identity during Login To choose your identity during login type your user name in the User Name field Press Tab and see that the Domain field self populates Click the Password field to bring the cursor to it and you will see the pull down menu in the Identity field Select the identity you wish to ...

Страница 120: ...n now successfully import the OmniPass user data to the new system If you export an OmniPass only user you can import that user to any computer running OmniPass pro vided that a user with that name is not already enrolled in OmniPass If you attempt to import a user profile who has the same name as a user already enrolled in OmniPass the OmniPass import function will fail OMNIPASS CONTROL CENTER Th...

Страница 121: ...d Windows users to OmniPass If you experience difficulties adding a Windows user to OmniPass you may need to adjust your local secu rity settings You can do this by going to Start Control Panel Administrative Tools and Local Security Settings Expand Local Policies expand Security Options and double click Network Access Sharing and Security Model for Local Accounts The correct setting should be Cla...

Страница 122: ...112 L i f e B o o k E 8 0 0 0 N o t e b o o k A p p e n d i x B E8210 book Page 112 Friday March 10 2006 4 33 PM ...

Страница 123: ... Guide 1 Cursor 16 Cursor Keys 14 D DC Output Cable 27 DC Power Jack 27 Device Ports 45 74 DIMM 43 Disk care 68 Display Panel 6 28 adjusting 28 brightness 28 closing 28 latch 6 opening 28 problems 57 58 Display Timeout 32 Docking Port 46 Dolby Headphone 39 Double Clicking 16 Dragging 17 Drivers and Application Restore CD 62 DVD drive access indicator 13 problems 52 53 tray release 38 61 E Emergenc...

Страница 124: ... numeric keypad 14 problems 53 windows keys 14 L LAN RJ 45 Jack 10 LifeBook Security Application Panel buttons 22 configuring 22 deactivating 23 deactivating and activating 23 launching applications 22 operating 21 passwords 20 uninstalling 21 LifeBook Security Application Panel 6 M Media Player care 69 Control Panel 38 39 loading 37 removing 38 Software 37 38 using 39 Memory capacity 44 compartme...

Страница 125: ...tware 62 RJ 11 45 RJ 45 45 S ScrLk 13 SD Card installing 40 removing 40 SDRAM 11 43 Secure Digital Card removing 40 Security Indicator 13 Security Panel 20 Serial Port 46 problems 54 Specifications 73 Audio 73 Chipset 73 Dimensions and Weight 75 Environmental Requirements 75 Keyboard 74 Memory 73 Microprocessor 73 Power 74 Video 73 Status Indicator Panel 6 12 Stereo Speakers 6 Suspend Mode 31 T To...

Страница 126: ...116 L i f e B o o k E 8 0 0 0 N o t e b o o k E8210 book Page 116 Friday March 10 2006 4 33 PM ...

Страница 127: ...E8210 book Page 117 Friday March 10 2006 4 33 PM ...

Страница 128: ...E8210 book Page 118 Friday March 10 2006 4 33 PM ...

Отзывы: