background image

h

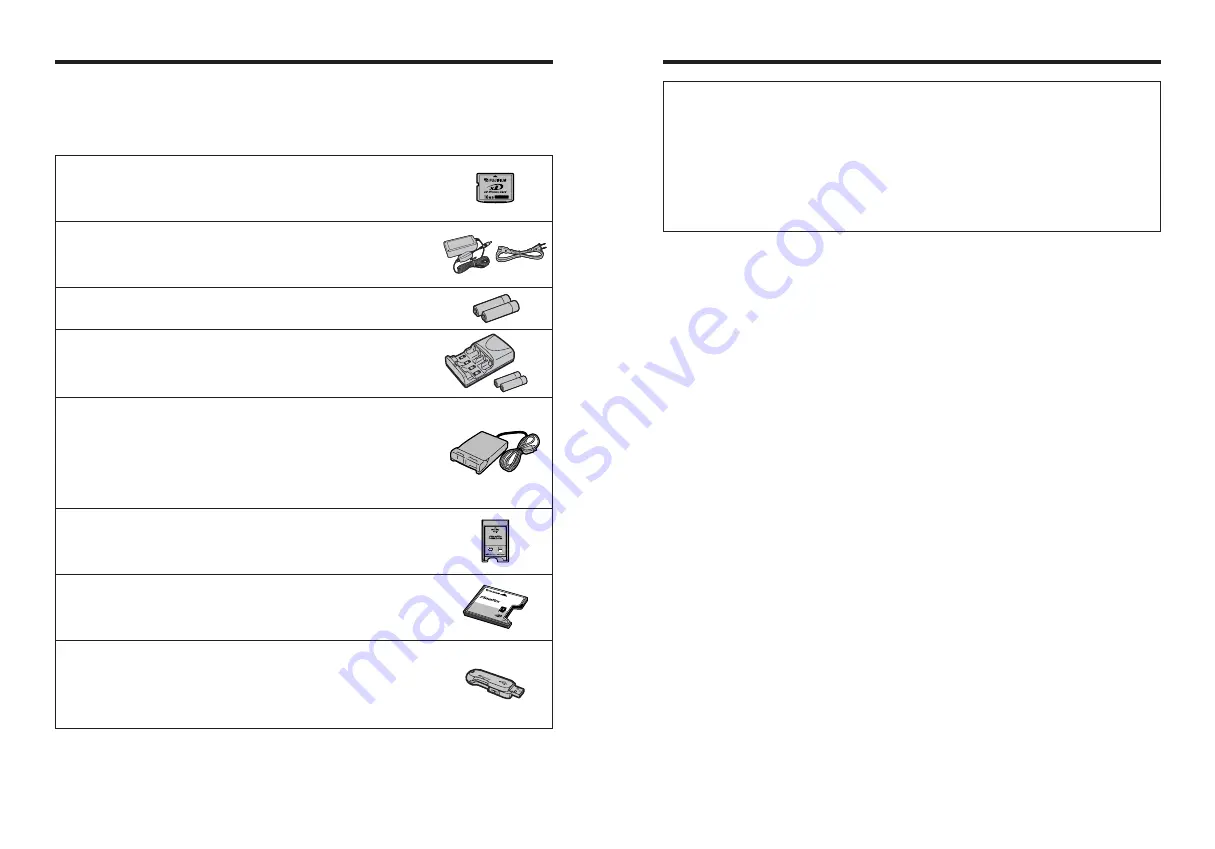
Image Memory Card Reader DPC-R1

The DPC-R1 provides a quick and easy way to transfer images back and forth
between your PC and an image memory card (

xD-Picture Card

and SmartMedia).

The DPC-R1 uses the USB interface for high-speed file transfer.

h

Compatible with Windows 98/98 SE, Windows Me, Windows 2000 Professional,
Windows XP or iMac, Mac OS 8.6 to 9.2.2, Mac OS X (10.1.2 to 10.2.2) and
models that support USB as standard.

h

Compatible with 

xD-Picture Card

of 16 MB to 512 MB, and SmartMedia of 3.3 V, 4

MB to 128 MB.

h

PC Card Adapter DPC-AD

The PC Card Adapter allows the 

xD-Picture Card

and SmartMedia to be used as a

PC Card Standard ATA-compliant (PCMCIA 2.1) PC card (Type 

II

).

h

Compatible with 

xD-Picture Card

of 16 MB to 512 MB, and SmartMedia of 3.3 V, 2

MB to 128 MB.

h

CompactFlash™ Card Adapter DPC-CF

Loading an 

xD-Picture Card

into this adapter allows you to use the card as a

CompactFlash card (Type 

I

).

h

Windows 95/98/98 SE/Me/2000 Professional/XP

h

Mac OS 8.6 to 9.2/X (10.1.2 to 10.1.5)

COM

PACT

FLAS

H

DPC

-CF

TM

for

xD-P

icture

 Card

CAR

D AD

APTE

R

h

xD-Picture Card™ USB Drive DPC-UD1

This is a compact card reader for 

xD-Picture Card

s. Simply plug the drive into the

USB port to read and write data to an 

xD-Picture Card

. (No driver installation is

required except on Windows 98/98 SE.)

h

Compatible with 

xD-Picture Card

of 16 MB to 512 MB

h

Windows 98/98 SE/Me/2000 Professional/XP

h

Mac OS 9.0 to 9.2/X (10.0.4 to 10.2.6)

122

123

Accessories Guide

h

Hyper-Utility Software HS-V2 Ver.3.0

h

Offers PC-based functions such as browsing, two-image comparison, image sorting and organizing using a
marker function, and image analysis using histogram and highlight warning displays for images shot on a
digital camera.

h

Allows you to specify the output image size and the processing parameters (tone curve, white balance,
sharpness, color and dynamic range) for CCD-RAW files and also allows you to convert them to ordinary
image files (16-bit/8-bit TIFF or Exif JPEG).

h

Allows images shot on a FinePix S3 Pro to be downloaded directly to a PC without using a recording media
by connecting the camera to the PC’s IEEE 1394 interface (Photography function).

h

Provides a range of other functions for using photographed images in various ways, including printing,
contact-sheet file creation and slide shows.

h

Refer to the product package for detailed information on specifications and system requirements.

e

Accessories (sold separately) can make taking pictures with the FinePix S3 Pro even easier. For
information on how to attach and use accessories, refer to the instructions provided with the
accessory used.
Visit the FUJIFILM web site for the latest information on camera accessories.
http://home.fujifilm.com/products/digital/index.html
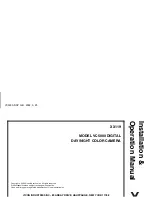
h

xD-Picture Card

These are separately available 

xD-Picture Card

s. 

Use the following 

xD-Picture Card

:

DPC-16 (16 MB)/DPC-32 (32 MB)/DPC-64 (64 MB)/DPC-128 (128 MB)/
DPC-256 (256 MB)/DPC-512 (512 MB)

h

AC Power Adapter AC-5VX

Use the AC-5VX when taking pictures or play back images for long periods or when
the FinePix S3 Pro is connected to a personal computer.

The shape of the AC power adapter, the plug and socket outlet depend on the
country.

h

Fujifilm Rechargeable Battery 2HR-3UF

The 2HR-3UF includes 2 pieces of high-capacity AA-size Nickel-Metal Hydride (Ni-
MH) batteries.

h

Fujifilm Battery Charger with Battery BK-NH2
(With Euro type or UK type plug)

The BK-NH2 includes the quick battery charger BCH-NH2 and 2 Ni-MH batteries.
The BCH-NH2 can charge 2 Ni-MH batteries in approximately 120 minutes.
Up to 4 Ni-MH batteries can be charged simultaneously.

Содержание Finepix S3 Pro UVIR

Страница 1: ...eady Basic Photography Advanced Photography Settings Advanced Features Playback Connection This manual will show you how to use your FUJIFILM DIGITAL CAMERA FinePix S3 Pro correctly Please follow the instructions carefully OWNER S MANUAL ...

Страница 2: ...designed to provide reasonable protection against harmful interference in a residential installation This equipment generates uses and can radiate radio frequency energy and if not installed and used in accordance with the instructions may cause harmful interference to radio communications However there is no guarantee that interference will not occur in a particular installation If this equipment...

Страница 3: ...H AE LOCK 41 DEPTH OF FIELD CHECK BUTTON 42 CCD PLANE INDICATOR 42 VIEWING THE IMAGES w PLAYBACK 43 Single frame playback 43 Selecting images 43 Playback zoom 44 PLAYBACK MODE 5 1 2 3 4 5 6 CONTINUOUS SHOOTING 50 9 SELF TIMER PHOTOGRAPHY 51 p MULTIPLE EXPOSURE 52 METERING SYSTEMS 54 l Matrix 10 segment metering 54 k Center weighted metering 54 j Spot metering 54 ISO SENSITIVITY 55 P AUTO MULTI PRO...

Страница 4: ...d the Windows logo are trademarks or registered trademarks of Microsoft Corporation in the United States and or other countries Windows is an abbreviated term referring to the Microsoft Windows Operating System The Designed for Microsoft Windows XP logo refers to the camera and the driver only h Other company or product names are trademarks or registered trademarks of the respective companies Expl...

Страница 5: ... holder 1 Fitted on the camera body h CD ROM Software for FinePix AX 1 h Owner s Manual this manual 1 h Software Quick Start Guide 1 Accessories included AF assist illuminator P 38 Self timer lamp P 51 Red eye reduction lamp P 69 Accessory shoe P 75 Accessory shoe cover Power switch P 26 Sub command dial P 33 Depth of field check button P 42 Shutter button for vertical shooting P 36 Strap mount P ...

Страница 6: ...al P 62 Remote release socket cap Tripod mount Slot cover unlock button Main command dial P 33 Access lamp P 116 4 direction button lock switch MENU OK button BACK button xD Picture Card slot CF Microdrive eject button CF Microdrive slot Slot cover 4 direction button AE L AF L button Metering system selector dial PLAY button P 43 FUNC button P 76 84 F1 button F2 button F3 button F4 button LCD moni...

Страница 7: ...e Flash exposure compensation P 73 Custom Setting P 110 Battery level warning P 25 Exposure compensation P 63 Flash synchro mode P 68 Bracketing bar graphs P 64 Auto Exposure Bracketing P 64 Focus area P 47 Flexible Program P 56 ISO200 01 01 2004 12 00AM Quality AF area mode Function lock Sharpness Tone Color Recording icon when recording Color space when AdobeRGB is set Media Press the FUNC butto...

Страница 8: ...Grid Lines The grid lines can be displayed by using Custom Setting Menu 2 P 111 These grids assist you in composing the frame in taking landscape pictures or in shifting tilting PC Nikkor lenses Due to characteristics of the LCD used in the Vari Brite Focus Area display system a thin line outside the selected focus area may also be displayed or the entire viewfinder may be illuminated in red under...

Страница 9: ...the camera s bayonet mount so that the mounting indexes on lens and camera body are aligned then twist lens counterclockwise until it locks into place Always change the lens in an area free of dirt and dust When attaching the lens take care not to press the lens release button When the lens is not attached or when a non CPU Nikkor lens is attached and the power switch is turned on blinks in the to...

Страница 10: ...mpatible with AF S and AF I Nikkor except AF S 17 35 mm f 2 8D IF ED AF S 28 70 mm f 2 8D IF ED AF S 12 24mm f 4G AF S DX ED 17 55mm f 2 8G AF S DX ED 18 70mm f 3 5 4 5G AF S ED 24 85mm f 3 5 4 5G and AF S VR ED 24 120mm f 3 5 5 6G 7 With maximum effective aperture of f 5 6 or faster 8 With maximum aperture of f 5 6 or faster 9 Some lenses accessories cannot be attached P 20 10 With exposure mode ...

Страница 11: ... batteries function P 107 The socket outlet shall be installed near the equipment and shall be easily accessible The shape of the plug and socket outlet depends on the country of use Plug in and cord attached types are provided depending on the intended country of use CHARGING THE BATTERIES Set exposure mode to M Manual with a non CPU lens When other modes are selected shutter cannot be released T...

Страница 12: ...which AA size Ni MH rechargeable batteries can be used may be shorter You are advised to check the detailed information provided on P 129 and then charge the batteries before using the camera within 1 week Outer casing Set the Power switch to OFF to turn the camera off 1 1Lift out the battery holder release catch 2Turn the battery holder release catch counterclockwise to unlock the battery holder ...

Страница 13: ...to the slot Push the CF Microdrive firmly all the way into the CF Microdrive slot Compatibility is listed on Fujifilm website http home fujifilm com products digital xD Picture Card CF Microdrive 3 Close the slot cover How to replace the xD Picture Card Push the xD Picture Card into the slot and then slowly remove your finger The lock is released and the xD Picture Card is pushed out How to replac...

Страница 14: ...ate and time settings will be retained for roughly 6 months even when the camera has no power batteries removed and AC power adapter disconnected 0 1 0 2 2004 9 23 2004 9 23 10 00 AM 00 AM YYYY MM DD YYYY MM DD DATE TIME DATE TIME SET SET CANCEL CANCEL 0 1 0 2 To turn the camera on set the Power switch to ON To turn the camera off set the Power switch to OFF 1 9 23 2004 9 23 2004 10 00 AM 00 AM MM...

Страница 15: ...rsighted Nikon also provides 9 types of diopter adjustment lens ranging from 5 m 1 to 3 m 1 DIOPTER ADJUSTMENT LCD ILLUMINATOR Since the diopter adjustment knob is located next to the viewfinder be careful not to poke yourself in the eye with your finger or fingernail while sliding the knob CSM 14 The illuminator can be set to come on when any button is pressed P 112 Pressing the shutter button do...

Страница 16: ...r speed xAccessory shoe Mount an external flash here xDepth of field check button This button allows you to check the depth of field xShutter button Press this button down halfway to restore the camera to Photography mode Press down fully to take a picture xSub command dial Changes the aperture and other settings xDiopter adjustment knob Makes the image in the viewfinder easier to see Set this kno...

Страница 17: ...m an action in the menu screen x4 direction button lock switch Release this switch to use the 4 direction button xBACK button Press this button to cancel an action in the menu screen x Access lamp Lights during media access x4 direction button Use this button to select menu options or the focus area Photography Menu SET UP Playback xPlayback Menu and SET UP Operations LCD monitor OFF Shutter butto...

Страница 18: ...e the focus area either move the focus area or take the picture using the AF Lock function P 40 1 Set the focus mode selector switch to S Single AF Servo 2 1Press the FUNC button to display the AF setting on the rear display panel 2Press the F1 button to select 7 Single area AF Make sure to turn the focus mode selector switch until it clicks into position 3 1Unlock the 4 direction button 2Press d ...

Страница 19: ...e actual number of available shots increases for media with a higher capacity See P 78 79 for information on changing the number of recorded pixels Quality compression ratio setting The factory default settings set at shipment are 6M and N Quality NORMAL The shutter button for vertical shooting makes taking pictures in this mode as convenient as normal shooting Shooting with the camera held on end...

Страница 20: ...performed due to vignetting with following lenses at shooting distance within 1m 3 3 ft i AF Micro 200 mm f 4 IF ED i AF 24 120 mm f 3 5 5 6 IF i AF S 17 35 mm f 2 8 IF ED i AF S 28 70 mm f 2 8 IF ED i AF 18 35 mm f 3 5 4 5 ED i AF Micro 70 180 mm f 4 5 5 6 ED i AF 20 35 mm f 2 8 IF i AF 24 85 mm f 2 8 4 i AF 24 85mm f 2 8 4D i AF S DX ED 12 24mm f 4G i AF S DX 18 70mm f 3 5 4 5G i AF S ED 24 85mm...

Страница 21: ...ges the aperture h Rotating the metering system selector to another setting does not change the metering system during Auto Exposure Lock operation Release the AE lock CSM 5 Auto Exposure Lock can be set to be activated by pressing the shutter button down halfway P 111 CSM 9 The operation performed when the AE L AF L button is pressed can be modified P 111 Operation AF AE lock default setting AE l...

Страница 22: ...D CHECK BUTTON CCD PLANE INDICATOR DEPTH OF FIELD CHECK BUTTON CCD PLANE INDICATOR Still images viewable on the FinePix S3 Pro This camera will display still images recorded on the FinePix S3 Pro or still images excluding some uncompressed images recorded on any FUJIFILM digital camera that supports xD Picture Cards or CF Microdrives Clear playback or playback zooming may not be possible for still...

Страница 23: ...F S or AF C Selecting the AF area mode P 47 Select the number of focus areas used for focusing Single 1 Dynamic 5 Single MF Dynamic Closest subject priority setting ON The camera focuses using the focus area containing the closest subject OFF The camera focuses using the specified focus area Selecting the focus area P 48 Manual Select the focus area to be used for focusing Automatic This option is...

Страница 24: ...play panel are shown below Focus area Single area AF Dynamic AF Closest subject Priority AF OFF Dynamic AF Closest subject Priority AF ON Top display panel viewfinder display Then specify the focus area End of settings SELECTING THE FOCUS MODE FOCUS SETTINGS AF C AF S MF Use the focus mode selector switch to select the focus mode Focus modes AF S S Single AF servo AF C C Continuous AF servo MF M M...

Страница 25: ... lens until the image can be seen clearly in the matt surface of the viewfinder screen h When using a lens with the A M select function set the switch ring to M to focus manually If M A autofocus with manual priority is available with your lens Manual focus is possible either with the switch ring set to M or M A See the instruction manual of your lens for details This allows you to check the focus...

Страница 26: ...vailable shots is low the number of available shots may temporarily change to 0 9 SELF TIMER PHOTOGRAPHY RELEASE MODES You can use the self timer when you want to be in the photograph Use a tripod or place the camera on a stable surface before using the self timer 1 Hold down the release mode switch unlock button and set the release mode switch to 9 self timer 2 1Position the focus area over the s...

Страница 27: ...ess the F2 button to move on to the next shot h A preview image is always displayed regardless of the PREVIEW setting selected in SET UP h If you change the release mode before multiple exposure shooting is completed no images are recorded 0 2 4 When you take the next multiple exposure shot a preview appears showing the overlaid images h To record the image Press the F1 or MENU OK button h To take...

Страница 28: ...o ensure even more accurate metering l Matrix 10 segment metering Center weighted metering determines the exposure value based primarily on a 12 mm circle in the center of the viewfinder k Center weighted metering Spot metering determines the exposure value by concentrating metering on the equivalent of a 4 mm diameter area in the viewfinder approx 2 of the entire frame The metering area moves to ...

Страница 29: ...ed To cancel the Flexible Program turn the Main command dial until the Flexible Program icon W disappears change the exposure mode turn the Power switch to OFF use the built in flash P 70 or perform a Two Button Reset P 109 P AUTO MULTI PROGRAM EXPOSURE MODES Program chart The program chart shows exposure control in Auto Multi Program mode ISO 100 h Limits apply to the upper and lower EV values de...

Страница 30: ...t take pictures When this occurs you can take pictures by setting the exposure mode to M and using the aperture ring on the lens to set the aperture Note that you cannot use the camera s exposure meter If you select the P S or A exposure mode when you are not using a Nikkor lens with a built in CPU appears on the top display panel and in the viewfinder and you cannot take pictures When this occurs...

Страница 31: ...m settings must be modified P 111 While watching the electronic analog exposure display in the viewfinder use the Main command dial to set the shutter speed 1 4000 sec to 30 sec or and the Sub command dial to set the aperture setting minimum aperture to maximum aperture h When the exposure compensation P 63 is set only the electronic analog exposure display changes selected shutter speed and apert...

Страница 32: ...he background is brighter than your main subject or to the side when the background is darker h See P 73 for information on using flash exposure compensation to adjust the amount of light emitted by the flash Compose picture focus and shoot h To cancel exposure compensation set the compensation amount to 0 0 or perform a Two Button Reset P 109 Turning the camera off does not cancel exposure compen...

Страница 33: ...a shot is taken h When three shots are to be taken is shown before shooting begins appears after the first shot appears after the second shot and the bar graph disappears when shooting is completed h If you hold the shutter button down when the Continuous shooting release mode is selected shooting automatically stops when the specified number of shots has been taken Note that shots are taken one f...

Страница 34: ...hro modes Front Synchro Normal Synchro Slow Synchro Rear Synchro Red Eye Reduction and Red Eye Reduction with Slow Synchro are available with FinePix S3 Pro camera D 3D Multi Sensor Balanced Fill Flash can be performed with a combination of the FinePix S3 Pro camera and D or G type Nikkor lens Performs balanced BL metering that uses multi pattern photometering information to provide a balance betw...

Страница 35: ...tomatically set to Slow Synchro 1 180 to 30 sec automatically set by the camera 1 2 1 180 to 30 sec 1 180 to 30 sec and V Red eye Reduction 1 180 to 1 60 sec automatically set by the camera 1 180 to 30 sec 1 180 to 30 sec and B Red eye Reduction Slow Synchro 1 180 to 30 sec automatically set by the camera 2 1 When a Nikon SB 26 SB 25 or SB 24 flash unit is used the synchro selector on the external...

Страница 36: ...kkor are attached 1 Center weighted metering Matrix metering Set the metering system selector dial to Matrix metering or Center weighted metering 2 1Press the flash pop up button to pop up the flash 2Hold down the v button 3Turn the Main command dial to select the synchro mode 3 Set exposure mode and confirm shutter speed and aperture Shutter speeds faster than the synchronized speed 1 180 sec can...

Страница 37: ...prevent vignetting remove the lens hood when using the flash h The built in flash cannot be used at shooting distance less than 0 6 m 2 0 ft h Zoom lenses with a macro feature cannot be used in the macro range h Vignetting occurs at the edges of the frame resulting in underexposure with the following zoom lenses which have limitations in usable focal length or shooting distance Notes on using the ...

Страница 38: ...t fires h Even when the optional flash with the AF assist illuminator is attached AF assist illuminator does not emit light unless the conditions for AF assist illumination are met h With SK 6 and SB 24 are attached AF assist illuminators of the camera body and the flash do not emit light h When the exposure mode is P Multi Programmed Auto the widest aperture that can be automatically set by the c...

Страница 39: ...is setting for shots taken under Daylight fluorescent lamps Fluorescent 2 Select this setting for shots taken under Warm White fluorescent lamps Fluorescent 3 Select this setting for shots taken under Cool White fluorescent lamps Incandescent Select this setting for shots when the light source is incandescent bulbs or lights Custom 1 This setting uses the white balance setting specified by the pho...

Страница 40: ...AW P 140 No image processing is performed on the camera Select this setting when you want to process the image on a PC Display Name Description 1M Sets the image size to 1440 960 pixels approx 1 38 megapixels You can record the largest number of images in this mode 3M Sets the image size to 2304 1536 pixels approx 3 54 megapixels 6M Sets the image size to 3024 2016 pixels approx 6 10 megapixels 12...

Страница 41: ...1 Takes the picture with the dynamic range set to 230 regardless of the scene being shot WIDE 2 Takes the picture with the dynamic range set to 400 regardless of the scene being shot Display Name Description STD STANDARD This setting sets the contrast for photographed images to the standard level HARD This setting provides a higher level of contrast than the STD setting ORG ORIGINAL This setting s...

Страница 42: ...ful for situations where you want to focus accurately on a more or less stationary subject Dynamic AF or or Useful for shots where it is difficult to accurately keep the subject in a given focus area such as when you are tracking a moving subject P 47 FUNCTION LOCK This feature allows you to lock the function menu settings so that they cannot be changed to prevent accidental improper use h Factory...

Страница 43: ...isplay erase protect and switch between multi frame and single frame playback 1 2 3 100 0001 0 1 0 2 1 Unlock the 4 direction button 1 and press d or c 2 to select the frame for which the histogram is to be displayed 2 The histogram display changes each time you press the F1 button Histograms can be displayed for both playback images and preview images Image histogram for brightness shown Image hi...

Страница 44: ...utton 1 100 0001 Press the F3 button to display the protection screen The following operations can be used in the protection screen To select the frame d or c To protect the frame L F1 button To unprotect the frame F4 button To return to the previous frame BACK button 2 100 0001 Protect last frame back next frame unprotect 3 When you have finished the procedure lock the 4 direction button to preve...

Страница 45: ...L FRAMES 0 2 0 1 3 MULTI FRAME PLAYBACK PLAYBACK FUNCTION MENU Unlock the 4 direction button 1 100 0001 Multi frame playback Single frame playback Press the F4 button 2 Press d c a or b to move the cursor the orange frame and select a frame Press a or b several times to move to the next or previous page 3 100 0001 You can view the selected image enlarged by pressing the F4 button again 4 When you ...

Страница 46: ...ave finished the procedure lock the 4 direction button to prevent accidental improper use 4 1 0 1 0 2 1Press the PLAY button to select Playback mode 2Unlock the 4 direction button SET ALL SET ALL PROTECT PROTECT RESET ALL RESET ALL 2 1Press the MENU OK button to display the menu on the screen 2Press d or c to select i PROTECT 3 1Press a or b to select SET ALL or RESET ALL 2Press MENU OK button to ...

Страница 47: ... i PROTECTING IMAGES SET ALL RESET ALL PLAYBACK MENU u HOW TO SPECIFY PRINT OPTIONS DPOF PLAYBACK MENU DPOF stands for Digital Print Order Format and refers to a format that is used for recording printing specifications for images shot using a digital camera on media such as an xD Picture Card and CF Microdrive The recorded specifications include information on which frames are to be printed This ...

Страница 48: ...nted in some cases 5 Always press the MENU OK button after the settings are completed Pressing the BACK button cancels those settings Total number of prints TOTAL 11SHEETS TOTAL 11SHEETS DPOF DPOF 4 1Press d or c to display the frame file for which you want to specify DPOF settings 2Press a or b to set a value up to 99 as the number of copies of the frame file to be printed For frames files that y...

Страница 49: ... When you have finished the procedure lock the 4 direction button to prevent accidental improper use 4 When you have finished the procedure lock the 4 direction button to prevent accidental improper use 4 1Press the PLAY button to select Playback mode 2Unlock the 4 direction button 3Press the MENU OK button to display the menu screen 1 0 1 0 2 0 3 Press d or c to select PLAYBACK 1Press a or b to s...

Страница 50: ...PANNING PANNING SET SET CANCEL CANCEL Zoom bar ZOOM ZOOM SET SET CANCEL CANCEL Saved image size varies depending on the zoom scale Up to 1M can be saved 0 1 0 2 0 1 0 2 1Press the PLAY button to select Playback mode 2Unlock the 4 direction button 3Press the MENU OK button to display the menu screen 1 0 1 0 2 0 3 5 Check the saved image size and press the MENU OK button The trimmed image is added a...

Страница 51: ...revent accidental use When you have finished using the menu lock the 4 direction button to prevent accidental use USING THE SET UP SCREEN Press d or c to move to options 1 to 5 After you have changed the settings press the MENU OK button to confirm the changes 1Press a or b to select a menu option 2Press d or c to change the setting Press c for CUSTOM WB FORMAT DATE TIME DISCHARGE RESET or LIVE IM...

Страница 52: ... PREVIEW The photographed image is displayed and then automatically recorded Pressing the F2 button Erase while the image is displayed deletes the recorded image Pressing F1 End checking MENU OK BACK or the shutter button clears the display ready for the next shot Procedure when PREVIEW is set End checking Erase Histograms Standard chart Preview zoom Unlock the 4 direction button and press a or b ...

Страница 53: ...roughly double so the number of continuous shots available roughly half STANDARD The dynamic range is 100 as on the previous digital camera FinePix S2 Pro but the continuous shooting speed and the number of continuous shots available are increased for easier shooting After taking the picture check the color tones white balance in the image i Select PREVIEW as the photographed image display option ...

Страница 54: ...rom 100 to 101 The maximum number is 999 9999 The displayed frame number may differ for images photographed on other cameras When q appears see P 134 FRAME NO A A B B CONT RENEW Formatted media used for both A and B 100 0009 Frame number Directory number File number The Discharging rechargeable batteries function can only be used with Ni MH batteries Use the Discharging rechargeable batteries func...

Страница 55: ...press the BACK button To view the live image use the optional AC adapter AC 5VX Continued use of live image display can cause the CCD to overheat resulting in coarseness or noise such as white spotting in images photographed subsequently If this occurs turn the camera off and wait for it to cool down If you display consecutive live images the initial brightness setting is retained for the second a...

Страница 56: ...us area in the viewfinder 0 NORMAL default 1 ENABLES ROTATION FOCUS AREA SELECTION Selecting cyclic focus area selection allows you to select the opposite focus area without changing which part of the 4 direction button you have to press 0 DISABLED default 1 ACTIVATED AE LOCK Set this parameter to 1 to apply the AE lock when the shutter button is pressed half way 0 DISABLED default 1 ACTIVATED LON...

Страница 57: ...led video cable into the camera s VIDEO OUT video output socket 1 VIDEO OUT socket If there is a power outlet available connect the AC Power Adapter AC 5VX Plug the other end of the cable into the video input socket on the TV Then turn the camera and TV on and take pictures or play back images as you would normally 2 To video input socket Refer to the instructions provided with your TV for more in...

Страница 58: ...n the files on the media may be damaged If inserting an xD Picture Card and a CF Microdrive into the camera at the same time images will be recorded onto the media selected as the MEDIA P 102 1Turn your PC on 2Connect the camera to the PC using the USB cable mini B or IEEE 1394 cable 3Turn the camera on Always use the cable provided with your camera If you use other cable your camera may not work ...

Страница 59: ...or If the menu does not appear check whether the USB mode setting is Depending on the printer some functions are disabled The camera cannot be used to specify printer settings such as the paper size and print quality Please connect the AC Power Adapter AC 5VX sold separately to your camera Use a media that was formatted on the camera Set the Power switch to ON 3 0 1 0 3 3 0 2 CONNECTING TO A COMPU...

Страница 60: ...P 2 1 3 4 5 DATE TIME SET DATE TIME SET USB MODE USB MODE 1394 MODE 1394 MODE BEEP LOW BEEP LOW SET SET CANCEL CANCEL 1Set the Power switch to ON 2Select in USB MODE in the SET UP menu P 101 3Set the Power switch to OFF to turn the camera off Do not connect to a PC when the USB mode setting is set to See P 137 if you connect to PC by mistake 1 0 1 0 3 3 0 2 PRINT WITH DATE is not available when th...

Страница 61: ...screen 2Turn the camera off Unplug the USB cable mini B DC IN 5V socket USB socket mini B CANCEL CANCEL 100 0001 100 0001 YES YES FRAME FRAME TOTAL 00001 TOTAL 00001 SHEETS SHEETS 01 01 CANCEL CANCEL PRINTING PRINTING 1 1 1 19SHEETS SHEETS CANCEL CANCEL YES YES TOTAL 19SHEETS TOTAL 19SHEETS PRINT OK PRINT OK System Expansion Options eBy using the FinePix S3 Pro together with other optional FUJIFIL...

Страница 62: ...mages shot on a digital camera h Allows you to specify the output image size and the processing parameters tone curve white balance sharpness color and dynamic range for CCD RAW files and also allows you to convert them to ordinary image files 16 bit 8 bit TIFF or Exif JPEG h Allows images shot on a FinePix S3 Pro to be downloaded directly to a PC without using a recording media by connecting the ...

Страница 63: ...ied out by an authorized FUJIFILM service facility to CCDs that were scratched or damaged during cleaning by the customer will be charged to the customer Note that such repairs will probably involve replacing the CCD and will be expensive Take the following precautions to ensure that no dirt or dust gets onto the CCD i Before a FUJIFILM digital camera is shipped from the factory it is carefully ch...

Страница 64: ...hutter closes at the same time Ensure that your fingers are not caught inside the camera Starting CCD cleaning Take great care to avoid scratching or damaging the CCD during cleaning as you will be responsible for the possibly high cost of repairs or replacement by an authorized FUJIFILM dealer Use a blower that does not have a brush attached Using a blower brush to clean soiling from the CCD can ...

Страница 65: ...e shots to be taken with the camera However care must be taken with the way Ni MH batteries are used if their original performance is to be maintained h Ni MH batteries left unused in storage for long periods can become deactivated Also repeatedly charging Ni MH batteries that are only partially discharged can cause them to suffer from the memory effect Ni MH batteries that are deactivated or affe...

Страница 66: ...ve cover Using Compact Flash Contact the CompactFlash card manufacturer for information on the CompactFlash functions operation details and system requirements Card types approved for use with the FinePix S3 Pro are listed on the FUJIFILM website http home fujifilm com products digital h The CompactFlash card may be hot immediately after being used in the camera and should be handled with care h D...

Страница 67: ...ower off and replace batteries with new ones Attach CPU lens except IX Nikkor With a non CPU lens set the exposure mode to M and set the aperture with lens aperture ring Non CPU lens is attached or lens is not attached blinking blinking Focus manually Autofocus is not possible blinking i In P mode use ND filter If the warning indication remains after performing above remedies in S or A mode use ND...

Страница 68: ... back file was not recorded correctly i The media contact area is soiled i Camera fault i Images cannot be played back i Wipe the contact area on the media with a soft dry cloth It may be necessary to format the media If the message still appears replace the media i Contact your FUJIFILM dealer The frame number has reached 999 9999 1 Insert a formatted media into the camera 2 Set RENEW as the FRAM...

Страница 69: ...ra and wipe the battery terminals with a clean dry cloth before reloading the batteries i Wipe the battery terminals with a clean dry cloth before charging i Due to their nature the batteries may not be fully charged Charge and use the batteries several times to restore them to normal operation i Load new fully charged batteries i Use the rechargeable battery discharging function to restore the re...

Страница 70: ...hots varies depending on the level of charge in Ni MH batteries the figures shown here for the number of available shots using batteries are not guaranteed The number of available shots will also decline at low temperatures Ni MH batteries 2300 mAh Approx 400 frames Battery Type With LCD monitor ON Specifications System Model Digital camera FinePix S3 Pro Effective pixels 12 34 million S pixel 6 1...

Страница 71: ...e bathroom or shower Do not disassemble 140 Explanation of Terms Adobe RGB 1998 A color space introduced as the working color space for Adobe Photoshop 5 0 AdobeRGB encompasses almost all the colors reproduced by CMYK printers and is intended primarily for printing applications It was introduced as SMPTE 240E in the RGB settings in Adobe Photoshop 5 0 and as Adobe RGB 1998 in the profile settings ...

Страница 72: ... it and gently release the card Request regular internal testing and cleaning for your camera Build up of dust in your camera can cause a fire or electric shock h Contact your FUJIFILM dealer to request internal cleaning every 2 years Please note this is not a free of charge service Do not heat change or take apart the batteries Do not drop or subject the batteries to impacts Do not attempt to rec...

Страница 73: ...Printed in Japan FGS 406110 FG Printed on recycled paper 26 30 Nishiazabu 2 chome Minato ku Tokyo 106 8620 Japan http home fujifilm com products digital ...

Отзывы: