98
98
99
Advanced
Features
Playback
4
]
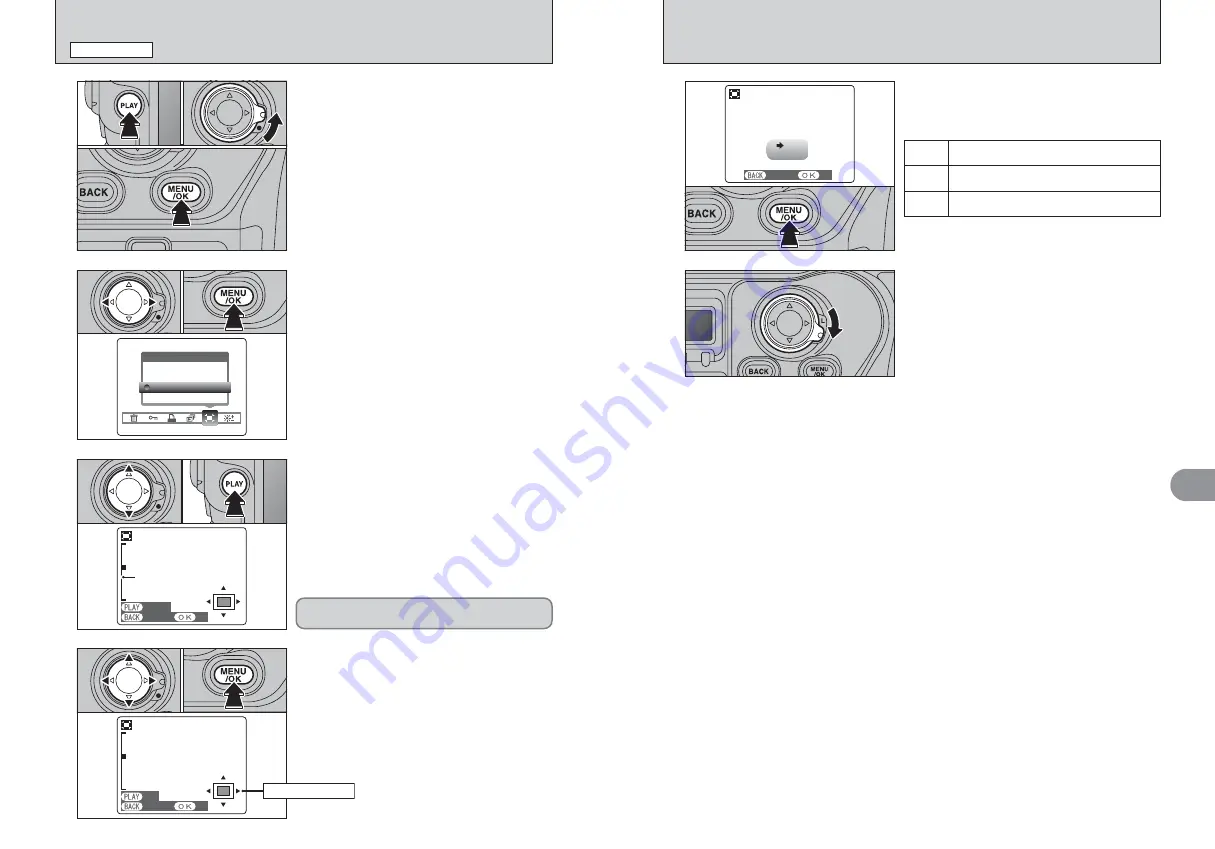
TRIMMING
PLAYBACK MENU
2
1
Press “
d
” or “
c
” to select “
]
” TRIMMING.
2
Press the “MENU/OK” button.
3
1
Press “
a
” to zoom in. Press “
b
” to zoom out on
a still image. A zoom bar appears on the LCD
monitor.
2
Press the “PLAY” button to move to another part
of the image.
●
!
Press the “BACK” button to return to single-frame playback.
●
!
Press the “PLAY” button to return to zooming.
0
1
0
2
4
1
Press “
a
”, “
b
”, “
d
” or “
c
” to display another
area. The current displayed image appears on
the navigation screen.
2
Press the “MENU/OK” button to save the image.
SET
SET
TRIMMING
TRIMMING
PANNING
PANNING
SET
SET
CANCEL
CANCEL
Zoom bar
ZOOM
ZOOM
SET
SET
CANCEL
CANCEL
Saved image size varies depending on the zoom
scale. Up to 1M can be saved.
0
1
0
2
0
1
0
2
1
Press the “PLAY” button to select Playback
mode.
2
Unlock the 4-direction button.
3
Press the “MENU/OK” button to display the
menu screen.
1
0
1
0
2
0
3
5
Check the saved image size and press the
“MENU/OK” button. The trimmed image is added
as a separate file in the final frame.
6M
3M
■
Image Sizes
Printing at up to 10R (25.4
×
30.5 cm/10
×
12 in.) /
A4 size
Printing at up to 6R (15.2
×
20.3 cm/6
×
8 in.) / A5
size
1M
Printing at up to 3R (8.9
×
12.7 cm/3.5
×
5 in.) size
REC OK?
REC OK?
1M
REC
REC
CANCEL
CANCEL
When you have finished the procedure, lock the 4-
direction button to prevent accidental improper use.
6
Navigation screen


