background image

50

More on Photography


n

n

 Face Recognition

 Face Recognition

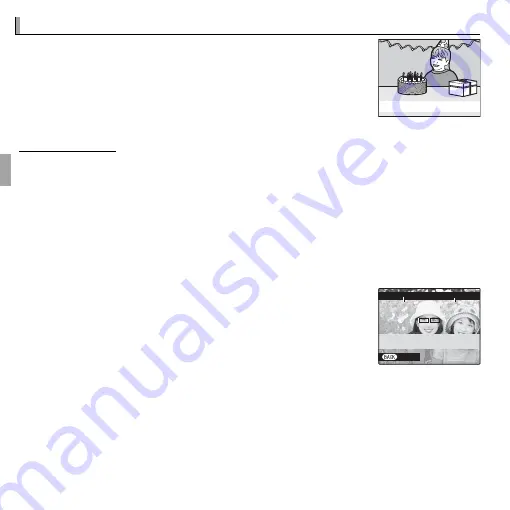
The camera can store information on the face and personal 
details (name, relationship, and birth date) of portrait sub-
jects and assign these subjects priority for Intelligent Face 
Detection or display their names and other information 
during playback.

Happy Birthday!

 Adding New Faces

 Adding New Faces

Follow the steps below to add faces to the face recognition database.

  1

 Select 

REGISTER

.

Select 

REGISTER

 for 

b


FACE DETECTION SET-UP

  > 

FACE RECOGNI-

TION

 (

P

 100).


R

To disable face recognition, select 

OFF

.

  2

 Take a photograph.

After checking that the subject is facing the camera, 
frame the subject using the guides and take the pho-
tograph.


R

If an error is displayed, take the photograph again.

CANCEL

REGISTER FACE

CAPTURE THE FACE
ALONG WITH THE GUIDLINE

Содержание FINEPIX F800EXR

Страница 1: ...understood its contents and the warnings in ForYour Safety Pii before us ing the camera For information on related products visit our website at http www fujifilm com products digital_cameras index ht...

Страница 2: ...cords as this can result in a risk of re or electric shock Ventilation Slots and openings in the cabinet are provided for ventilation to ensure reliable operation of the video product and to pro tect...

Страница 3: ...the video product Lightning For added protection for this video product receiver during a lightning storm or when it is left unattended and unused for long periods of time unplug it from the wall out...

Страница 4: ...camera in the bathroom or shower This can cause a re or electric shock Donot disassemble Never attempt to change or take apart the camera never open the case Failure to observe this precaution can cau...

Страница 5: ...cle or in direct sunlight This can cause a re Keep out of the reach of small children This product could cause injury in the hands of a child CAUTION CAUTION Do not place heavy objects on the camera T...

Страница 6: ...ouch imme diately after charging or use This is normal Battery Life At normal temperatures the battery can be recharged about 300 times A noticeable de crease in the length of time the battery will ho...

Страница 7: ...battery charger Q CAUTION Do not use the discharge option with alkaline batteries The camera draws a small amount of current even when o Ni MH batteries that have been left in the camera for an extend...

Страница 8: ...rinse your mouth thoroughly with water Drink large quantities of water and induce vomiting then seek medical assistance Although the display is manufactured using extremely high precision technology...

Страница 9: ...s representations or war ranties of any kind express or implied arising by law or otherwise including but not limited to content quality accuracy completeness e ectiveness reliability tness for a part...

Страница 10: ...r Majesty the Queen in Right of Canada Queen s Printer for Ontario Canada Post Corporation GeoBase Department of Natural Resources Canada ZIP 4 United States Postal Service 2010 the USPS Australia Cop...

Страница 11: ...th the Data provided to you hereunder Government End Users If the Data is being acquired by or on behalf of the United States government or any other entity seeking or apply ing rights similar to thos...

Страница 12: ...onotusethedeviceinlocationssubjecttomagneticfields staticelectric ity or radio interference Do not use the transmitter in the vicinity of microwave ovens or in other locations subject to magnetic elds...

Страница 13: ...e WarningMessagesandDisplays WarningMessagesandDisplays P P138 138 Find out what s behind that flashing icon or error message in the display Memory Cards Memory Cards Pictures can be stored in the cam...

Страница 14: ...era lights and sounds Frequently Used Buttons Frequently Used Buttons Taking Pictures During Playback Taking Pictures During Playback y To return instantly to shooting mode press the shutter button ha...

Страница 15: ...Photography and Playback Taking Pictures in R E AUTO Mode 17 Viewing Pictures 21 More on Photography More on Photography Shooting Mode 22 E E AUTO E Priority 23 R E AUTO 23 E Priority 24 Adv ADVANCED...

Страница 16: ...Uploading Pictures 64 Location Data 66 Downloading Location Data 66 Recording Location Data with Pictures 67 Viewing Location Data 68 Copying Location Data to Other Images 69 Photo Navigation 70 U La...

Страница 17: ...102 J AE BKT EV STEPS 103 Using the Menus Playback Mode 104 Using the F Mode Menu 104 F Mode Menu Options 104 m PHOTOBOOK ASSIST 104 U LANDMARK NAVIGATOR 104 UPHOTO NAVIGATION 104 U GEOTAGGING SET UP...

Страница 18: ...R INTELLIGENT DIGITAL ZOOM 122 C AF ILLUMINATOR 123 jRAW 123 t SAVE DATA SET UP 124 QVIDEO SYSTEM 125 qWIRELESS SETTING 126 U DEMONSTRATION 126 K FORMAT 126 Technical Notes Technical Notes Optional Ac...

Страница 19: ...related information may be found Menus and other text in the displays are shown in bold In the illustrations in this manual displays may be simplified for explanatory purposes Supplied Accessories Su...

Страница 20: ...f each item Selector button Move cursor up d exposure compensation button P39 b delete button Pxiv Move cursor left F macro button P40 Move cursor right N flash button P41 MENU OK button Command dial...

Страница 21: ...USB multi connector 77 79 88 24 Connector for HDMI cable 78 25 Battery chamber 9 26 Memory card slot 10 27 Battery latch 9 11 1 Press and hold the F button for monitor sunlight mode 2 Press and hold t...

Страница 22: ...38 8 Internal memory indicator 9 Monitor sunlight mode 6 10 Movie mode 75 11 Number of available frames 142 12 Sensitivity 91 13 Image size quality 92 96 14 Dynamic range 97 15 Film simulation 94 16 W...

Страница 23: ...Detection indicator 45 100 3 Red eye removal indicator 109 4 Pro focus mode pro low light mode 28 29 5 Motion panorama z 26 61 6 3D image 31 7 Portrait enhancer 33 8 Advanced filter 25 9 Gift image 5...

Страница 24: ...ACK to cycle through shooting and playback indicators as follows Shooting Indicators displayed indicators hidden best framing HD framing histogram Playback Indicatorsdisplayed indicatorshidden Ifavori...

Страница 25: ...is fully inserted and clicks into place on the charger terminals Q The plug adapter is exclusively for use with the supplied battery charger Do not use it with other devices Battery charger Plug adapt...

Страница 26: ...ted Battery not inserted Insert the battery Insert the battery Battery fully charged Battery fully charged Remove the battery Remove the battery On On Battery charging Battery charging Blinks Blinks B...

Страница 27: ...en the battery chamber cover when the camera is on Failure to ob serve this precaution could result in dam age to image files or memory cards Q Do not use excessive force when handling the battery cha...

Страница 28: ...n angle or use force If the memory card is not correctly inserted or no memory card is inserted a will appear in the LCD monitor and internal memory will be used for re cording and playback Click Q SD...

Страница 29: ...red by an AC power adapter Press the shutter button to end the show Removing the Battery and Memory Card Removing the Battery and Memory Card Before removing the battery or memory card turn the camera...

Страница 30: ...d damage the card Format SD SDHC SDXC memory cards before first use and be sure to reformat all memory cards after using them in a computer or other device For more information on formatting memory ca...

Страница 31: ...me the copies not the originals Q Q Batteries Batteries Remove dirt from the battery terminals with a clean dry cloth Failure to observe this precaution could prevent the battery from charging Do not...

Страница 32: ...tching to Playback Mode Press the a button to start playback Press the shutter button halfway to return to shooting mode PlaybackMode PlaybackMode To turn the camera on and begin playback press the a...

Страница 33: ...ints and other marks on the lens can affect pictures Keep the lens clean Q The ON OFF button does not completely end the supply of power to the camera R R Auto Power Off Auto Power Off The camera will...

Страница 34: ...Press the selector left or right to highlight the year month day hour or minute and press up or down to change To change the order in which the year month and day are displayed highlight the date form...

Страница 35: ...will appear in the LCD monitor The The o o Icon Icon In R mode the camera continuously adjusts focus and searches for faces in creasing the drain on the battery o is displayed in the LCD monitor Scen...

Страница 36: ...display Zoom indicator Zoom out Zoom in Holding the Camera Holding the Camera Hold the camera steady with both hands and brace your elbows against your sides Shaking or unsteady hands can blur your sh...

Страница 37: ...ject is poorly lit the AF assist illuminatormaylight see C AFILLUMINATOR P 123 for information on disabling the illuminator Double beep If the camera is able to focus it will beep twice and the indica...

Страница 38: ...oothly press the shutter button the rest of the way down to take the picture Click The Shutter Button The Shutter Button The shutter button has two positions Pressing the shutter button halfway sets f...

Страница 39: ...n taking important photo graphs take a test shot and check the results 1 Press the a button The most recent picture will be displayed 2 View additional pictures Press the selector right to view pictur...

Страница 40: ...luding aperture M and A and or shutter speed M and S Adv ADVANCED Sophisticated techniques made easy P25 SP SCENE POSITION Choose a scene suited to the subject or shooting conditions and let the camer...

Страница 41: ...T NIGHT TRIPOD TRIPOD MACRO MACRO BEACH BEACH SUNSET SUNSET SNOW SNOW SKY SKY GREENERY GREENERY SKY SKY GREENERY GREENERY Non portrait Non portrait a a c c d d h h e e u u v v w w x x y y z z Portrait...

Страница 42: ...ring shooting and do not move the camera until shooting is complete Q Frame coverage is reduced TheEIcon When the shutter button is pressed halfway the camera chooses the pre ferred E mode S RESOLUTIO...

Страница 43: ...OLOR POP COLOR Create high contrast images with saturated colors J J HIGH KEY HIGH KEY Create bright low contrast images K K DYNAMICTONE DYNAMICTONE Dynamic tone expression is used for a fantasy effec...

Страница 44: ...K 2 Press the selector right to view a choice of pan directions Press the selec tor left or right to highlight a pan direction and press MENU OK 3 Press the shutter button all the way down to start re...

Страница 45: ...waves and waterfalls or subjects that undergo marked changes in brightness Panoramas may be blurred if the subject is poorly lit z z Choose z for seamless 360 panoramas that can be played back in a l...

Страница 46: ...left or right Use for portraits or photos of flowers similar to those pro duced by SLR cameras R Softening can not be applied to background objects that are too close to the main subject If a message...

Страница 47: ...or static subjects at high zoom ratios R A single combined photograph may not be created with some scenes or if the subject or camera moves during shooting Do not move the cam era until shooting is co...

Страница 48: ...rimposed on the view through the lens as a guide to taking the second shot R To return to Step 1 and retake the first shot press the selector left To save the first shot and exit without creating a mu...

Страница 49: ...t recording a picture press DISP BACK 3 The first shot will be shown superimposed on the view through the lens Using it as a guide frame the second shot and press the shutter release button R The 3D e...

Страница 50: ...www fujifilm com 3d print The supplied software displays 3D anaglyph images 3D photos can also be viewed using other applications that support the MP format 3D TVs that support the MP format can displ...

Страница 51: ...ER ENHANCER Choose for a smooth skin effect when shooting portraits l lDOG DOG Choose when photographing dogs m mCAT CAT Choose when photographing cats M M LANDSCAPE LANDSCAPE Choose for daylight shot...

Страница 52: ...rawings in print l l DOG DOG m m CAT CAT The camera focuses on the faces of dogs or cats that are facing the camera and the self timer menu offers a n AUTO RELEASE option that releases the shutter aut...

Страница 53: ...icture will be under or over exposed at cur rent settings is shown by the exposure indicator SETTING SHUTTER SPEED 1000 F3 5 A AAPERTUREPRIORITYAE APERTUREPRIORITYAE You choose the aperture using the...

Страница 54: ...l be displayed in red Adjust shut ter speed until the correct exposure is achieved If the subject is outside the metering range of the camera the aperture display will show F Press the shutter button...

Страница 55: ...1 Focus Position the subject in the focus frame and press the shutter button halfway to lock focus and exposure Focus and exposure will remain locked while the shutter button is pressed halfway AF AE...

Страница 56: ...car bodies Fast moving subjects Subjects photographed through a window or other re flective object Darksubjectsandsubjectsthatabsorbratherthanreflect light such as hair or fur Insubstantial subjects...

Страница 57: ...or use the command dial to choose an exposure compen sation value and then press MENU OK Choose positive values to increase exposure Choose negative values to reduce exposure R A d icon and exposure...

Страница 58: ...ontrol to compose pictures P18 To exit macro mode press the selector left F and select OFF MACRO OFF P Close up shots R Use of a tripod is recommended to prevent blur caused by camera shake R The shad...

Страница 59: ...t ing at night or indoors under low light 1 Press the flash pop up button to raise the flash 2 Press the selector right N and choose from the fol lowing flash modes Option Option Description Descripti...

Страница 60: ...m light We also recommend that you lower the flash when the camera is off R If the flash will fire p will be displayed when the shutter button is pressed halfway At slow shutter speeds k will appear i...

Страница 61: ...sed automatically when the camera detects a human portrait subject facing the camera Use for portraits of babies S 10 SEC The shutter is released ten seconds after the shutter button is pressed Use fo...

Страница 62: ...P101 The following options are available ISO P91 IMAGE SIZE P92 IMAGE QUALITY P96 RAW P123 DYNAMIC RANGE P97 FILM SIMULATION P94 PHOTOMETRY P100 AF MODE P101 FACE RECOGNITION P50 FACE DETECTION P45 L...

Страница 63: ...ct ON for b FACE DETECTIONSET UP FACEDETECTION P100 Faces can be detected with the camera in vertical or horizon tal orientation if a face is detected it will be indicated by a green border If there i...

Страница 64: ...RANGE BKT DYNAMIC RANGE BKT 49 49 I I TOP TOP n n 47 47 P PBEST FRAME CAPTURE BEST FRAME CAPTURE 47 47 OFF OFF R The flash turns off automatically The previously selected flash mode is restored when...

Страница 65: ...t and return to shooting mode P BEST FRAME CAPTURE The camera takes a series of pictures starting before and ending after the shutter button is pressed 1 Press the selector right when the camera is in...

Страница 66: ...raphs The camera begins recording while the shutter button is pressed halfway and completes the burst when the shutter button is pressed all the way down The illustration shows a burst of eight shots...

Страница 67: ...limits of the exposure metering system X FILM SIMULATION BKT Each time the shutter button is pressed the camera takes one shot and pro cesses it to create three copies with different P FILM SIMULATIO...

Страница 68: ...g playback Happy Birthday AddingNewFaces AddingNewFaces Follow the steps below to add faces to the face recognition database 1 Select REGISTER Select REGISTER for b FACE DETECTION SET UP FACE RECOGNI...

Страница 69: ...14 characters and press MENU OK BIRTHDAY Enter the subject s date of birth and press MENU OK CATEGORY Choose the option that describes your relationship to the sub ject and press MENU OK R If you atte...

Страница 70: ...ibed above R To delete face recognition data for the selected subject select ERASE AddingFacesAutomatically AddingFacesAutomatically To automatically add frequently photographed subjects to the face r...

Страница 71: ...ltiple sub jects from the face recognition database the camera displays the name of the sub ject that will be used to set focus and exposure the subject shown by the green frame If no name is entered...

Страница 72: ...ired frame R Pictures taken using other cameras are indicated by a m gift image icon during playback ContinuousShooting ContinuousShooting In the case of pictures taken in continuous shooting mode onl...

Страница 73: ...image currently displayed in LCD monitor Zoom indicator Press DISP BACK to exit zoom R If the pictures before or after the current picture are the same size as the current picture you can rotate the...

Страница 74: ...evious and following images in the background Select j to increase the number of images displayed to two nine or one hundred i to view fewer images 100 0001 100 0001 When two or more images are displa...

Страница 75: ...e shown by S When the operation is complete press DISP BACK to display a confirmation dialog then highlight OK and press MENU OK to delete the selected pictures ALL FRAMES ALL FRAMES A confirmation di...

Страница 76: ...search conditions under BY FACE Search for faces from the face recognition database BY I FAVORITES Search by rating BY SCENE Search by scene BYTYPE OF DATA Find all still pictures or all movies BY UPL...

Страница 77: ...selected for pho tobooks 2 Scroll through the images and press the selector up to select or deselect To display the current image on the cover press the selector down Press MENU OK to exit when the bo...

Страница 78: ...ough the pictures EditingandDeletingPhotobooks EditingandDeletingPhotobooks Display the photobook and press MENU OK The following options will be dis played select the desired option and follow the on...

Страница 79: ...wn again to resume To exit to full frame playback press the selector up while panorama playback is in progress Once displayed in full frame playback panoramas can be zoomed in or out using the zoom co...

Страница 80: ...lation y Flash mode u White balance i Exposure compensation o Frame number 0 Picture overexposed areas blink on and off 1 Histogram Histograms Histograms Histograms show the distribution of tones in t...

Страница 81: ...Playback Viewing Photo Information Zooming in on the Focus Point Zooming in on the Focus Point Press the selector down to zoom in on the focus point Press DISP BACK or MENU OK to return to full frame...

Страница 82: ...jifilm dsc com To upload pictures or view pictures remotely 1 In playback mode press the F button to display the playback F mode menu 2 Select q WIRELESS IMAGE TRANSFER SEND SELECTED MULTIPLE IMAGES V...

Страница 83: ...tion data and other information included with pictures Verify the destination before beginning upload R The time needed for upload varies with file size and the distance to the destination At default...

Страница 84: ...e added to pictures or used for photo or landmark navigation To download the app or view information on using FUJIFILM Camera Application visit http app fujifilm dsc com DownloadingLocationData Downlo...

Страница 85: ...ata acquired in Step 2 will be added to the new images The camera will display the name of the most recently ac quired location or its latitude and longitude In addition a i icon will displayed if loc...

Страница 86: ...Note that the camera automatically stops recording location data three hours after the last update Q Place names are current as of the date on which the landmark database was cre ated P145 and will no...

Страница 87: ...or the location data and press MENU OK 3 Press the selector left or right to display the destination and press MENU OK to copy the data to the image Q Once copied the new location data can not be dele...

Страница 88: ...location from a smartphone P66 2 Display a picture with a k icon 3 Select U PHOTO NAVIGATION in the F mode menu P104 Theapproximatedirectionanddistancetothe location where the picture was taken are d...

Страница 89: ...R To view landmark information download location data for your current position from a smartphone and select U LANDMARK NAVIGATORintheF modemenu P93 104 Thedisplayvarieswithcamera orientation For an A...

Страница 90: ...zoom in and out To display additional information press the selector left or right to highlight landmarks and press MENU OK Press the selec tor down to choose the landmark type or up to download loca...

Страница 91: ...n during recording To end recording press the F button again Recording ends automatically when the movie reaches maximum length or memory is full For information on the maximum footage that can be rec...

Страница 92: ...ff select OFF for C AF ILLUMINATOR P123 R Focus exposure and white balance are adjusted automatically throughout record ing The color and brightness of the image may vary from that displayed before re...

Страница 93: ...on Description Description i1920 1920 1080 Full HD High Definition h1280 1280 720 High Definition f 640 480 Standard definition k640 480 80fps High speed movie Sound is not recorded and focus exposure...

Страница 94: ...ete delete Press the selector up to end playback Adjust speed Adjust speed Press the selector left or right to adjust playback speed dur ing playback Adjust volume Adjust volume Press MENU OK to pause...

Страница 95: ...Connect the camera to a TV to show pictures to a group 1 Turn the camera off 2 Connect the supplied A V cable as shown below Insert into USB multi connector Connect yellow plug to video in jack Connec...

Страница 96: ...nector Insert into HDMI connector R When an HDMI cable is connected pictures and sound are played back on the TV Q When connecting cables be sure the connectors are fully inserted 3 Tune the televisio...

Страница 97: ...that depending on the printer not all the functions described below may be supported 1 Connect the supplied USB cable as shown and turn the printer on 2 Turn the camera on 3 Press the selector left o...

Страница 98: ...an be printed from internal memory or a memory card that has been formatted in the camera R If no pictures are selected the camera will print one copy of the current picture R Page size print quality...

Страница 99: ...ard The information in the order includes the pictures to be printed and the number of copies of each picture 1 Select playback mode and press MENU OK to display the playback menu 2 Highlight K PRINT...

Страница 100: ...the print order and press MENU OK when settings are complete 7 A confirmation dialog will be displayed Press MENU OK to save the print order R Remove the memory card to create or modify a print order...

Страница 101: ...ore 512MB or more 1 1GB or more GB or more 2 2 Free disk space Free disk space 2GB or more 2GB or more GPU GPU Supports DirectX 9 or later Supports DirectX 9 or later recommended recommended Supports...

Страница 102: ...nt Control dialog will then be displayed click Yes Windows 7 or Allow Windows Vista The installer will start automatically click Install MyFinePix Studio and follow the on screen instructions to insta...

Страница 103: ...ow the on screen instructions to complete installation 5 Remove the installer CD from the CD ROM drive when installation is com plete Store the installer CD in a dry location out of direct sunlight in...

Страница 104: ...Video Video 800 600 pixels or more with thousands of colors or better Other Other Built in USB port recommended Operation is not guaranteed with other USB ports Recommended when displaying HD movies...

Страница 105: ...ct Preferences from the Image Capture application menu The Im age Capture preferences dialog will be displayed choose Other in the When a camera is connected open menu then select FPVBridge in the App...

Страница 106: ...fer could result in loss of data or damage to internal memory or the memory card Charge the battery before connecting the camera 2 Turn the camera off and connect the supplied USB cable as shown mak i...

Страница 107: ...lamp is out before turning the camera off or discon necting the USB cable if the number of images copied is very large the indicator lamp may remain lit after the message has cleared from the compute...

Страница 108: ...e when it is no longer required or before begin ning reinstallation After quitting the software and disconnecting the camera drag the FinePixViewer folder from Applications into the Trash and select E...

Страница 109: ...UTO Control the camera s sensitivity to light Higher values can reduce blur note however that mot tling may appear in pictures taken at high sensitivities 100 100 ISO ISO 12800 12800 Bright Bright Sce...

Страница 110: ...allowing more pictures to be recorded O O4 3 4 3 Size Aspect ratio SizeVersus Aspect Ratio SizeVersus Aspect Ratio Size Size Option Option Prints at sizes up to Prints at sizes up to O O 34 25cm 13 5...

Страница 111: ...OCATION INFO SEARCH Download location data from a smartphone MY LANDMARK MY LANDMARK REGISTER REGISTER Add custom landmarks names or photos to the landmark database or edit or delete custom landmarks...

Страница 112: ...on Description c c PROVIA PROVIA STANDARD STANDARD Standard color reproduction Suited to a wide range of subjects from por traits to landscapes d d Velvia VIVID Velvia VIVID A high contrast palette of...

Страница 113: ...elector left to highlight the current tab 1 3 Press the selector up or down to highlight the tab containing the desired option Tab P EXIT SHOOTING MENU 1 4 Press the selector right to place the cursor...

Страница 114: ...ED FILTER Choose an advanced shooting mode P25 N N ISO ISO default default AUTO AUTO Control the camera s sensitivity to light P91 O O IMAGE SIZE IMAGE SIZE default default O O 4 3 4 3 Choose image si...

Страница 115: ...is selected the cam era will automatically select values between 100 and 400 in response to shooting conditions Option Option Description Description AUTO AUTO V V100 100 Increase contrast when shoot...

Страница 116: ...ighting g g For underwater photography h h CustomWhite Balance CustomWhite Balance Choose h to adjust white balance for unusual lighting conditions White balance measure ment options will be displayed...

Страница 117: ...default OFF OFF Capture motion in a series of pictures Capture motion in a series of pictures P P46 Choose from 46 Choose from O O X X Y Y I I P P and and OFF OFF U U LOCATION NAVIGATOR LOCATION NAVI...

Страница 118: ...er information can be viewed during playback P50 C C PHOTOMETRY PHOTOMETRY default default o o Choose how the camera meters exposure when Intelligent Face Detection is off Option Option Description De...

Страница 119: ...ects the focus area automatically u u CONTINUOUS CONTINUOUS The camera continuously adjusts focus to reflect changes in the distance to the subject in the focus frame x xTRACKING TRACKING Position the...

Страница 120: ...ttery and that the sound of the camera focusing may be audible R If a face is detected when u is selected a o icon will be displayed and the camera will continuously adjust focus to maintain focus on...

Страница 121: ...he size of the exposure bracketing increment used when O AE BKT is selected for R CONTINUOUS Select from increments of 1 3EV 2 3EV and 1EV note that the camera may not be able to use the selected brac...

Страница 122: ...light items and press the selector right to view options then highlight an op tion and press MENU OK Press DISP BACK to exit when set tings are complete F F ModeMenuOptions ModeMenuOptions m m PHOTOBO...

Страница 123: ...ion data with pictures LOCATION INFO LOCATION INFO Display location data km mile km mile Choose the units used to display location data PLACE NAME STAMP PLACE NAME STAMP Choose ON to embed location da...

Страница 124: ...selector left to highlight the current tab 1 3 Press the selector up or down to highlight the tab containing the desired option Tab EXIT PLAYBACK MENU 1 4 Press the selector right to place the cursor...

Страница 125: ...ptions Access the following location data options Option Option Description Description LANDMARKNAVIGATOR LANDMARKNAVIGATOR View landmark information P P71 71 PHOTO NAVIGATION PHOTO NAVIGATION View th...

Страница 126: ...R Only movies can be selected for upload to YouTube R During playback selected pictures are indicated by jYouTube or jFACEBOOK icons RESET ALL Deselecting All Pictures Choose RESET ALL to deselect al...

Страница 127: ...lly while a slide show is in progress B B RED EYE REMOVAL RED EYE REMOVAL If the current picture is marked with a g icon to indicate that it was taken with Intelligent Face Detection this option can b...

Страница 128: ...on from all pictures Q Protected pictures will be deleted when the memory card or internal memory is formatted P126 G G CROP CROP Create a cropped copy of the current picture 1Display the desired pict...

Страница 129: ...IMAGE ROTATE Rotate pictures taken in tall orientation so that they are displayed in tall orientation in the LCD monitor 1Display the desired picture 2Select C IMAGE ROTATE in the playback menu 3Press...

Страница 130: ...ARD Copy pictures from internal memory to a memory card b CARD y a INTERNAL MEMORY Copy pictures from a memory card to internal memory 3Highlight one of the following options and press MENU OK FRAME C...

Страница 131: ...to replace the existing memo PlayingVoice Memos PlayingVoice Memos Pictures with voice memos are indicated by a q icon during playback To play the voice memo back select PLAY for F VOICE MEMO R The ca...

Страница 132: ...splay pictures with an aspect ratio of 4 3 this option is available only when an HDMI cable is connected Select 16 9 to display the image so that it fills the screen with its top and bottom cropped ou...

Страница 133: ...or left to highlight the tab for the current menu 1 3 Press the selector down to highlight the tab con taining the desired option EXIT SET UP Tab 1 4 Press the selector right to place the cursor in th...

Страница 134: ...ht g LOCAL and press the selector right 2Use the selector to choose the time difference between local time and your home time zone 3Press MENU OK To switch between local time and your home time zone h...

Страница 135: ...U GEOTAGGING SET UP GEOTAGGING SET UP Access the following location data options Access the following location data options P66 66 Option Option Description Description LOCATION INFO SEARCH LOCATION I...

Страница 136: ...duced when camera controls are oper ated Choose e OFF mute to disable control sounds SHUTTERVOLUME SHUTTERVOLUME Adjust the volume of the sounds produced when the shutter is released Choose e OFF mute...

Страница 137: ...the MENU OK button is pressed OFF Pictures are not displayed after shooting LCD BRIGHTNESS LCD BRIGHTNESS Control the brightness of the display MONITOR SUNLIGHT MONITOR SUNLIGHT MODE MODE Select ON t...

Страница 138: ...some situa tions the camera turns off automatically even when OFF is selected POWER POWER MANAGEMENT MANAGEMENT Optimize camera performance for increased battery life or display quality n POWER SAVE T...

Страница 139: ...he shutter button is pressed halfway or the shutter is released m SHOOTING ONLY SHOOTING ONLY OFF OFF Image stabilization off Choose this option when using a tripod R MOTION has no effect when sensiti...

Страница 140: ...om Intelligent digital zoom INTELLIGENT DIGITAL INTELLIGENT DIGITAL ZOOM ZOOM off off j i Optical zoom R Selecting another mode may end intelligent digital zoom and restore maximum optical zoom R In R...

Страница 141: ...nator directly into your subject s eyes j jRAW RAW default default OFF OFF Choose RAW JPEG or RAW to record RAW pictures note that because RAW data are not pro cessed on the camera RAW pictures must b...

Страница 142: ...Frame number 100 0001 100 0001 CONTINUOUS Numbering continues from the last file number used or the first available file number whichever is higher Choose this option to re duce the number of pictures...

Страница 143: ...ographs Q If the camera clock is not set you will be prompted to set the clock to the current date and time P16 Q We recommend that you turn the DPOF print date option off when printing images with a...

Страница 144: ...uploaded to the smartphone the original is not affected U U DEMONSTRATION DEMONSTRATION default default OFF OFF Choose ON for a location data demo using mock location data This option should normally...

Страница 145: ...Computer Related Computer Related Printing Printing Printer PictBridge compatible printer USB cable supplied SD SDHC SDXC memory card FINEPIX F800EXR DIGITAL CAMERA TV HDTV HDMI cable sold separately...

Страница 146: ...geable bat teries can be purchased as required Note that the NP 50 may record fewer photos per charge than the NP 50A Battery Battery chargers chargers BC 45W Replacement battery chargers can be purch...

Страница 147: ...s such as near a broadcasting anten na power line radar emitter motor transformer or magnet in contact with volatile chemicals such as pesticides next to rubber or vinyl products Water and Sand Exposu...

Страница 148: ...th a piece of FUJIFILM lens cleaning paper to which a small amount of lens cleaning fluid has been applied Care should be taken to avoid scratching the lens or LCD monitor The camera body can be clean...

Страница 149: ...for is selected for Z Z POWER MANAGEMENT POWER MANAGEMENT POWER POWER MANAGEMENT MANAGEMENT Select Selectn n POWER SAVE POWER SAVEtoreducethedrainonthebattery toreducethedrainonthebattery P P120 120 O...

Страница 150: ...pressed Memory is full Memory is full Insert a new memory card or delete pictures Insert a new memory card or delete pictures P P10 57 10 57 Memory is not formatted Memory is not formatted Format the...

Страница 151: ...be deleted to avoid recording the location with is on Location data can not be deleted to avoid recording the location with subsequent pictures turn subsequent pictures turn PLACE NAME STAMP PLACE NAM...

Страница 152: ...camera correctly P P18 18 Fast shutter speed selected Fast shutter speed selected Choose a slower shutter speed Choose a slower shutter speed P P35 36 35 36 Pictures are blurred Pictures are blurred...

Страница 153: ...icrophone was obstructed Hold the camera correctly during recording Hold the camera correctly during recording P P2 18 2 18 The speaker is obstructed The speaker is obstructed Hold the camera correctl...

Страница 154: ...display increases upload times for larger images in addition some phones may not display images over a certain size images over a certain size No picture or sound No picture or sound The camera is no...

Страница 155: ...I want to use an AC power I want to use an AC power adapter and DC coupler adapter and DC coupler overseas overseas Check the label on the AC power adapter The AC power adapter can be used with volta...

Страница 156: ...nd then on again Camera malfunction or moving parts of lens obstructed Turn the camera off and then on again taking care not to touch the lens If the message persists contact a FUJIFILM dealer taking...

Страница 157: ...RD INSERT A NEW CARD WRITE ERROR WRITE ERROR Memory card error or connection error Memory card error or connection error Reinsert the card or turn the camera off and then Reinsert the card or turn the...

Страница 158: ...etion Choose fewer images Choose fewer images PROTECTED FRAME PROTECTED FRAME An attempt was made to delete rotate or add a voice memo to a protected picture Remove An attempt was made to delete rotat...

Страница 159: ...onfirm that the device is turned on and that the USB cable is connected PRINTER ERROR PRINTER ERROR Printer out of paper or ink or other printer error Check printer see printer manual for details Prin...

Страница 160: ...10 970 970 1240 1240 1970 1970 O O16 9 16 9 6 6 10 10 810 810 1290 1290 1650 1650 2620 2620 P P 4 3 4 3 7 7 14 14 970 970 1900 1900 1970 1970 3850 3850 P P16 9 16 9 10 10 19 19 1280 1280 2480 2480 259...

Страница 161: ...4 608 2 592 4 608 2 592 P P 4 3 4 3 3 264 2 448 3 264 2 448 P P 3 2 3 2 3 264 2 176 3 264 2 176 P P 16 9 16 9 3 264 1 840 3 264 1 840 Q Q 4 3 4 3 2 304 1 728 2 304 1 728 Q Q 3 2 3 2 2 304 1 536 2 304...

Страница 162: ...on image sensor shift Optical stabilization image sensor shift Shutter speed Shutter speed combined combined mechanical and electronic mechanical and electronic shutter shutter 8 s 8 s 1 1 2 000 2 000...

Страница 163: ...tor 3 0 in 460k dot color LCD monitor frame coverage approx 100 3 0 in 460k dot color LCD monitor frame coverage approx 100 Movies Movies i i1920 1920 1 920 1 080 1 920 1 080 1080p 1080p 30fps 30fps f...

Страница 164: ...andSDmemorycard Note Note Number of shots that can be taken with battery varies with battery charge level and will Number of shots that can be taken with battery varies with battery charge level and w...

Страница 165: ...Input capacity Input capacity 100V 100V 8 0VA 8 0VA 240V 240V 12VA 12VA Rated output Rated output 4 2V DC 600mA 4 2V DC 600mA Supported batteries Supported batteries NP 50A rechargeable batteries NP 5...

Страница 166: ...manufactured using advanced high precision technol ogy small bright points and anomalous colors may appear particularly in the vicinity of text This is normal for this type of LCD monitor and does not...

Страница 167: ...149 Memo Memo...

Страница 168: ...7 3 AKASAKA 9 CHOME MINATO KU TOKYO 107 0052 JAPAN http www fujifilm com products digital_cameras index html...

Страница 169: ...O H H p p Q Q R R s s f f U U V V W W N N B BOFF OFF Q Q 1 1 N N 1 1 O O B BON ON K K 1 1 L L 1 1 M M P P 1 1 1 1 1 1 1 1 1 1 1 1 1 1 1 1 1 1 h h S S R R o o n n F F F F 1 1 1 1 OFF OFF d d 5 5 N N AU...

Страница 170: ...1 1 1 1 1 1 1 1 1 1 1 1 1 1 1 1 1 V V 1 1 1 1 1 1 1 1 W W X X Y Y Z Z P P c c 1 1 5 5 d d e e b b 5 5 f f 5 5 D D 5 5 y y R R O O X X Y Y P P I I OFF OFF 1 1 1 1 1 1 1 1 1 1 1 1 Z Z b b OFF OFF 1 1 1...

Страница 171: ...ON OFF OFF 1 1 1 1 1 1 1 1 1 1 1 1 1 1 1 1 B B ON ON OFF OFF 1 1 1 1 1 1 C C ON ON 5 5 OFF OFF 1 1 1 1 1 1 1 1 1 1 1 1 1 1 5 5 j j ON ON OFF OFF 1 1 1 1 1 1 1 1 1 1 1 1 1 1 x x n n o o 1 1 Automatica...

Отзывы: