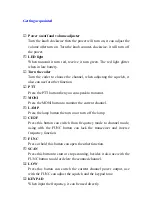
background image


Display 


Icon Description 


Current channel power output Tx lower than Rx   


Current channel power output Rx lower than Tx 

When the choosing channel included in scanning list it display, 

deleted channels aren’t display this icon 

LO 

Current channel on low power output transmitting 


Display frequency, channel number, menu setup or other 

function 


According to the function you chose, display the number   


Display when in the process of converse frequency 


Display when the channel have the CTCSS function 


Display when the channel have the DCS function 


When receiving, it shows the high or low signal. When 

transmitting, it shows the battery voltage 


Display after press the FUNC and enter the function mode 

Note: the unaccounted icons above are not to be use provisionally in the transceiver 


Operation Basics 


Switching power ON/OFF 

Turn the power switch/volume control clockwise to switch the 

transceiver ON. 

Turn the power switch/volume control counterclockwise to switch the 

transceiver OFF. 


Adjusting the volume 

Rotate the power switch/volume control to adjust the volume 

clockwise increase the volume and counterclockwise decreases. 


When talk to others, it is need adjust the volume exactly 

Note: When adjusting the volume, you can press MONI key to 

monitor background noise. 


Choose the channel 

Rotate the channel selector to choose the channel you need, clockwise 

Содержание BF620001

Страница 1: ...ations Commission Code of Federal Regulations 47CFR part 2 sub part J American National Standards Institute ANSI Institute of Electrical and Electronic Engineers IEEE C95 1 1992 Institute of Electrical and Electronic Engineers IEEE C95 1 1999 Edition International Commission on Non Ionizing Radiation Protection ICNIRP 1998 Operational Instructions To ensure optimal performance and compliance with ...

Страница 2: ... connected _ Consult the dealer or an experienced radio TV technician for help FCC Requirements Your radio must be properly licensed Federal Communications Commission prior to use Your HYT Wireless dealer can assist you in meeting these requirements Your dealer will program each radio with your authorized frequencies signaling codes etc and will be there to meet your communications needs as your s...

Страница 3: ...lasting operations turn off your radio when you are near electrical blasting caps 6 Do not use any portable radio that has a damaged antenna If a damaged antenna comes into contact with your skin a minor burn may result 7 Do not expose the radio in direct sunlight for a long time or place it close to a heating source 8 When transmitting with a portable radio hold the radio in a vertical position w...

Страница 4: ...ry pack Install the antenna Getting acquainted LCD display Operating basics Switching power on off Adjusting the volume Choose channel Adjusting the squelch Transmitting Receiving Display mode Scanning Channel display mode Frequency display mode Channel locked QT and DQT Auxiliary Function Keypad locked Keypad voice Busy channel locked Lamp High Low power output Battery voltage Monitor Choice QT ...

Страница 5: ...Choice DQT Setup for the provisional different Tx Rx frequency Beat setup on the frequency mode Step frequency setup on the frequency mode QT codes table DQT codes table Technical specification ...

Страница 6: ...rvice institution or factory Please carefully unpack the transceiver we recommend you identify the items listed in the following table If any items is missing or have been damaged please immediately contact your dealer Supplied accessories Item No Quantity Antenna 1 1 User s manual 2 1 Battery 3 1 ...

Страница 7: ...please take off the battery pack from the charger or operation equipment and not to use Please use the special charge The charge is special made for the 6200 it is scientific and more safe for charging to this model This charge can identify the battery type for 6200 Li ion battery or Ni H battery Use the Li ion battery pack Please charging before use it In order to reduce the discharge please take...

Страница 8: ...ure exceed the using range the orange light will flicker If the battery damaged or connect out of place the red light will flicker Install Take off the battery pack Can not be short circuit or put the battery into the fire Can not try to take off the cover of the battery pack Can not to install the battery pack on dangerous environment otherwise the spark will course the blast 1 Press the battery ...

Страница 9: ... to transmit 5 MONI Press the MONI button to monitor the current channel 6 LAMP Press the lamp button the turn on or turn off the lamp 7 CH2F Press this button can switch from frequency mode to channel mode using with the FUNC button can lock the transceiver and inverse frequency function 8 FUNC Press or hold this button can open the other function 9 SCAN Press this button to start or stop scannin...

Страница 10: ...h or low signal When transmitting it shows the battery voltage Display after press the FUNC and enter the function mode Note the unaccounted icons above are not to be use provisionally in the transceiver Operation Basics Switching power ON OFF Turn the power switch volume control clockwise to switch the transceiver ON Turn the power switch volume control counterclockwise to switch the transceiver ...

Страница 11: ...se to choose the high squelch counterclockwise to choose the low squelch 3 Press FUNC button finish installation the level of the squelch store into the function data Press the button except FUNC exit install it can not be changed about the level of the squelch Return to the normal operation Transmitting 1 According to the different setup for the monitor function use MONI button for a moment make ...

Страница 12: ...when your local dealer programming at least 2 channels it can use the scanning function Otherwise must at least 2 channels not setup for the scan deleted About how to use the code squelch or the transmitting scanning please ask the local dealer star scanning please press SCAN Scanning start from current channel the channel number rise the screen display SCAn Finish scanning press the buttons excep...

Страница 13: ...etween the through and cut the A on the screen show that the channel is on the scanning list contrarily it is not Note This function just can use on the frequency display mode QT and DQT 1 The local dealer may programming the transceiver with the QT and DQT when you choose these channels you can just hear the same code in the same channel any others will not receive 2 This function can let you no ...

Страница 14: ...ng the transceiver will sound the alarm and can not transmit Undo the PTT will stop alarm and return to the receive mode Lamp 1 The transceiver has the night lamp function press the LAMP open the lamp if no any operation when the lamp open the lamp will be closed after 5 minutes 2 Long time open the lamp press the FUNC button then press the LAMP the lamp open the lamp just can close till next time...

Страница 15: ...de you need press FUNC button the QT code will change to your needed In the process of operation press the buttons except FUNC and VOL it will exit the setup and return to the normal display mode the QT code is not changed Choice DQT Channel display mode Change the DQT code provisionally 1 Hold on the FUNC button one second then the LCD display OFF 2 Rotate the channel selector to choose the new D...

Страница 16: ...equency if you do some operation like change the frequency or scanning the transceiver will return to the same Tx Rx frequency mode Beat setup on the frequency mode 1 Press the FUNC button then LCD display current beat frequency 2 Rotate the channel selector to choose the beat frequency you need press the FUNC button the selected beat frequency will store to the date of frequency display mode Step...

Страница 17: ... 162 271 423 612 743 073 165 306 431 624 754 074 172 311 432 627 QT QT NO Frequency HZ QT NO Frequency HZ QT NO Frequency HZ QT NO Frequency HZ 1 67 0 11 94 8 21 131 8 31 186 2 2 69 3 12 97 4 22 136 5 32 192 8 3 71 9 13 100 0 23 141 3 33 203 5 4 74 4 14 103 5 24 146 2 34 210 7 5 77 0 15 107 2 25 151 4 35 218 1 6 79 7 16 110 9 26 156 7 36 225 7 7 82 5 17 114 8 27 162 2 37 233 6 8 85 4 18 118 8 28 1...

Страница 18: ...W 90 H mm Weight 183g including the battery pack Transmitter UHF Power output 3W 1W Conducted power Frequency stability 5ppm Modulated mode 16K F3E Spurious emissions 70dB FM noise 40dB FM distortion 5 Maximum frequency deviation 5HKz Receiver UHF Frequency stability 5ppm Selectivity at 12dB SINARD Better than 0 25µV Receiving FM bandwidth 7KHz Adjacent channel selectivity 65dB Intermodulation rej...

Отзывы: