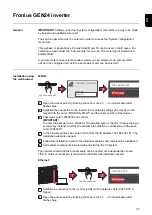
3
In the browser address bar, enter and confirm IP address 169.254.0.180. The install-
ation wizard is opened.
4
Follow the installation wizard in the individual sections and complete the installation.
5
Add system components in Solar.web and start up the PV system.
The network wizard and the product setup can be carried out independently of each
other. A network connection is required for the Solar.web installation wizard.
Configuring the
Fronius Smart
Meter TS as the
primary meter
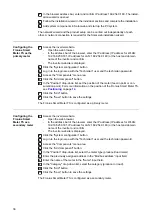
1
Access the inverter website.
-
Open the web browser.
-
In the address bar of the browser, enter the IP address (IP address for WLAN:
192.168.250.181, IP address for LAN: 169.254.0.180) or the host and domain
name of the inverter and confirm.
-
The inverter website is displayed.
2
Click the "System configuration" button
3
Log in to the login area with the "Technician" user and the technician password.
4
Access the "Components“ menu area.
5
Click the "Add component" button.
6
In the "Position" drop-down list, set the position of the meter (feed-in point or con-
sumption point). For more information on the position of the Fronius Smart Meter TS,
see
on page
.
7
Click the "Add" button.
8
Click the "Save" button to save the settings.
The Fronius Smart Meter TS is configured as a primary meter.
Configuring the
Fronius Smart
Meter TS as a
secondary meter
1
Access the inverter website.
-
Open the web browser.
-
In the address bar of the browser, enter the IP address (IP address for WLAN:
192.168.250.181, IP address for LAN: 169.254.0.180) or the host and domain
name of the inverter and confirm.
-
The inverter website is displayed.
2
Click the "System configuration" button
3
Log in to the login area with the "Technician" user and the technician password.
4
Access the "Components“ menu area.
5
Click the "Add component" button.
6
In the "Position" drop-down list, select the meter type (producer/load meter).
7
Enter the previously assigned address in the “Modbus address” input field.
8
Enter the name of the meter in the "Name" input field.
9
In the "Category" drop-down list, select the category (producer or load).
10
Click the "Add" button.
11
Click the "Save" button to save the settings.
The Fronius Smart Meter TS is configured as a secondary meter.
36
Содержание Smart Meter TS 5kA-3
Страница 2: ......
Страница 4: ...4 ...
Страница 5: ...Safety rules 5 ...
Страница 6: ...6 ...
Страница 10: ...10 ...
Страница 11: ...General information 11 ...
Страница 12: ...12 ...
Страница 15: ...Installation 15 ...
Страница 16: ...16 ...
Страница 19: ...1N1E 3 2E 1 3 3 2E 1 3 3 3E 19 EN ...
Страница 30: ...30 ...
Страница 31: ...Start up 31 ...
Страница 32: ...32 ...
Страница 41: ...41 EN ...
Страница 42: ...42 ...
Страница 43: ...43 EN ...


