2
Printed in U.S.A.
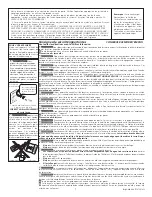
Grounding type
wall receptacle
Power supply
cord with 3-prong
grounding plug
Do not under
any circumstances
cut, remove,
or bypass
the grounding prong
from this plug.
Do not use or
mix liquid chlorine bleach
with other household
chemicals such as toilet
cleaners, rust removers,
acid or products containing
ammonia. These mixtures
can produce dangerous
fumes which can cause
serious injury or death.
Avoid fire
hazard or electrical shock.
Do not use an adaptor plug
or extension cord or remove
grounding prong from
electrical power cord.
Failure to follow this
warning can cause serious
injury, fire or death.
FOR YOUR SAFETY
Do not store or use gasoline
or other flammable vapors
or liquids in the vicinity of
this or any other appliance.
Your washer is equipped with a door safety interlock. Verify proper operation of interlock system daily, using
the following procedure:
1. With the washer door open, insert the required number of coins (or the appropriate card, on machines
equipped
with a card-start system) and press the START button. THE WASHER MUST NOT START!
2. Close the washer door. Press the START button again to start the machine. Attempt to open the door,
without exerting excessive force. THE DOOR MUST NOT OPEN!
IF THE WASHER STARTS WITH THE DOOR OPEN, OR THE DOOR CAN BE OPENED WHILE THE WASHER IS
OPERATING, THE MACHINE MUST IMMEDIATELY BE TAKEN OUT OF SERVICE. DISCONNECT THE POWER
CORD, AND MARK THE MACHINE "OUT OF ORDER", UNTIL THE INTERLOCK SYSTEM IS REPAIRED, AND
OPERATES AS DESCRIBED ABOVE.
If you have questions regarding operation of this machine, or proper testing of the door interlock system,
call 1-800-944-9044 for the Frigidaire Company Authorized Service.
Read all instructions before using this washer.
Important Safety Instructions
CORRECT
Use this way ONLY
SAVE THESE INSTRUCTIONS
Note:
The instructions
appearing in this
INSTALLATION AND
SAFETY INSTRUCTIONS
manual are not meant to
cover every possible
condition and situation
that may occur. Common
sense and caution must
be practiced when
installing, operating and
maintaining any
appliance.
To reduce the risk of fire, electrical shock, or injury to persons when using this washer, comply with the
basic warnings listed below.
Failure to comply with these warnings could result in serious personal injuries.
Prevent Fire
Do not wash items that have been previously cleaned in, soaked in, or spotted with gasoline, cleaning
solvents, kerosene, cooking oils, waxes, etc. Do not store these items on or near the washer. These substances give
off vapors or chemical reactions that could ignite or explode.
Do not put oily or greasy rags or clothing on top of the washer. These substances give off vapors that
could ignite the materials.
Do not add gasoline, cleaning solvents, or other flammable or explosive substances to the wash water.
These substances give off vapors that could ignite or explode.
Under certain conditions, hydrogen gas may be produced in a hot water system that has not been used
for 2 weeks or more.
HYDROGEN GAS IS EXPLOSIVE.
If the hot water system has not been used for such a period,
before using the washer, turn on all hot water faucets and let the water flow from each for several minutes. This will
release any accumulated hydrogen gas. Hydrogen gas is flammable; do not smoke or use an open flame during this
time.
Failure to comply with these warnings could result in fire, explosion, serious bodily injury and/or damage
to the rubber or plastic parts of the washer.
Protect Children
Do not allow children to play on or in the washer. Close supervision of children is necessary when the washer
is used near children. As children grow, teach them the proper, safe use of all appliances.
Destroy the carton, plastic bag and other packing materials after the washer is unpacked. Children might
use them for play. Cartons covered with rugs, bedspreads or plastic sheets can become airtight chambers.
Keep laundry products out of children's reach. To prevent personal injury, observe all warnings on product
labels.
Before the washer is removed from service or discarded, remove the washer lid to prevent accidental
entrapment.
Failure to comply with these warnings could result in serious personal injuries.
Prevent Injury
Test door interlock system daily. Follow instructions on previous page.
To prevent shock hazard and assure stability during operation, the washer must be installed and electrically
grounded by a qualified service person in accordance with local codes. Refer to INSTALLATION AND SAFETY
INSTRUCTIONS for detailed grounding procedures. If the washer is moved to a new location, have it checked and
reinstalled by a qualified service person.
To prevent personal injury or damage to the washer, the electrical power cord of the washer must be
plugged into a properly grounded and polarized 3-prong outlet.
The third grounding prong must never be removed.
Never ground the washer to a gas pipe. Do not use an extension cord or an adaptor plug.
Follow package directions when using laundry products. Incorrect usage can produce poisonous gas--
resulting in serious injury or death.
•
Do not
combine laundry products for use in 1 load unless specified on the label.
•
Do not
mix chlorine bleach with ammonia or acids such as vinegar.
To prevent serious personal injury and damage to the washer:
•
All repairs and servicing must be performed by an authorized servicer
unless specifically recommended in
this INSTALLATION AND SAFETY INSTRUCTIONS manual. Use only authorized factory parts.
•
Do not
tamper with controls.
•
Do not
install or store the washer where it will be exposed to the weather.
To reduce the risk of electric shock, disconnect this appliance from the power supply before attempting
any user maintenance. Turning the controls to the OFF position does not disconnect this appliance from the power supply.
To prevent injury, do not reach into the washer while parts are moving. Before loading, unloading or
adding items, push in the cycle selector knob and allow the tub to coast to a complete stop before reaching inside.
Failure to comply with these warnings could result in serious personal injuries.
This washer is equipped with an electrical overload protector. The motor will stop if it becomes overheated.
The washer will automatically restart after a cool down period of up to 30 minutes, if the washer has not been manually
turned off during this time.

