background image

3


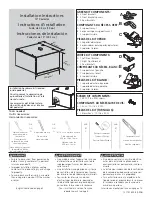
- EXCESSIVE WEIGHT HAZARD -


To avoid 

back or other injury, have more than one person move or lift 
the washer.

C

1

) Attaching washer mounting hardware

3.5 cu ft WASHER INSTRUCTIONS (GREEN KIT)

D

1

) Mounting washer

E

1

) Installing or re-installing washer

Use the following instructions for mounting either of these types 

1. 

of washers to the pedestal:

Using two or more persons, slightly tip the washer back and lift it 

1. 

onto the pedestal. Still tipped, slide the washer back against the 
rear brackets and gently set down the front so the appliance is 
between the front and rear brackets.

Attach each front clip to outer-most set of holes with 2 screws 

2. 

and supplied spacer.

Insert “A” tab of each rear bracket into the middle slots on rear 

3. 

of pedestal. Orient bracket inward for washer mounting.

Adjust the appliance side-to-side to align its mounting holes with 

2. 

the pedestal’s bracket holes. 

Install 2 screws through each rear bracket into the base of the 

3. 

washer.

Install a screw through each front bracket into the base of the 

4. 

washer.

Slide appliance/pedestal into place.

1. 

Check for levelness and rock all four (4) legs again. Repeat until 

2. 

level and solid.

Refer to 

3. 

Washer Installation Instructions

 for complete details 

on installing water, drain, or electrical.

SLIDE BACK

TIP DOWN

middle

slot

inward

Install 2 screws through each rear bracket into aligning pedestal 

4. 

holes.

Locate spacer under each front bracket.

“A”

tab

•  GREEN KIT  •  GREEN KIT  •  GREEN KIT  •  GREEN KIT  •  GREEN KIT  •

Содержание 137147600 B (0906)

Страница 1: ...erramientas necesarias 25 63 5 cm 15 38 cm 27 68 5 cm Failure to disconnect from power source before stacking could result in personal injury or even death Improper installation of dryer venting could result in personal injury or damage to property To avoid back or other injury have more than one person move or lift the washer or dryer Ne pas débrancher l appareil de sa source d alimentation en él...

Страница 2: ...washer from electrical 3 connection Turn off hot and cold water supply and disconnect hot and cold water supply hoses from water supply outlets Disconnect drain hose from drain pipe If appliance has plastic feet screw each foot flush to the base 4 If appliance has metal feet unscrew them remove the locking 5 nut and reinstall the feet flush to the base A Preparing washer or dryer for mount ing on ...

Страница 3: ...2 screws 2 and supplied spacer Insert A tab of each rear bracket into the middle slots on rear 3 of pedestal Orient bracket inward for washer mounting Adjust the appliance side to side to align its mounting holes with 2 the pedestal s bracket holes Install 2 screws through each rear bracket into the base of the 3 washer Install a screw through each front bracket into the base of the 4 washer Slide...

Страница 4: ...ust the appliance side to side to align its mounting holes with 2 the pedestal s bracket holes Install 2 screws through each rear bracket into the base of the 3 dryer Install a screw through each front bracket into the base of the 4 dryer Slide appliance pedestal into place 1 Check for levelness and rock all four 4 legs again Repeat until 2 level and solid Refer to 3 Dryer Installation Instruction...

Страница 5: ... style 2 dryer mounting Adjust the appliance side to side to align its mounting holes with 2 the pedestal s bracket holes Install a screw through each front bracket into the base of the 3 dryer Slide appliance pedestal into place 1 Check for levelness and rock all four 4 legs again Repeat until 2 level and solid Refer to 3 Dryer Installation Instructions for complete details on installing electric...

Страница 6: ...p to outer most set of holes with 2 screws 4 Adjust the appliance side to side to align its mounting holes with 2 the pedestal s bracket holes Reinstall backsheet screws removed earlier through each rear 3 bracket into the base of the washer Reinstall the lower service access panel 4 Reinstall the 2 screws removed earlier 5 through the outer hole of each front bracket into the base of the washer S...

Страница 7: ...5 7 cu ft DRYER STYLE 3 INSTRUCTIONS WHITE KIT EXCESSIVE WEIGHT HAZARD To avoid back or other injury have more than one person move or lift the dryer TIP DOWN SLIDE BACK ENGAGE REAR TABS Reinstall the plastic hole plugs in front panel 4 WHITE KIT WHITE KIT WHITE KIT WHITE KIT WHITE KIT WHITE KIT Use the following instructions for mounting this type of dryer to 1 the pedestal Remove all 4 adjustabl...

Страница 8: ...nstallée débranchez la laveuse de la prise 3 électrique Coupez l alimentation en eau chaude et froide puis débranchez les tuyaux d alimentation en eau chaude et froide des entrées d alimentation en eau Débranchez le tuyau de vidange de sa prise Si l appareil est muni de pieds en plastique vissez chaque pied de 4 sorte qu il soit bien de niveau avec la base Si l appareil est muni de pieds en métal ...

Страница 9: ...nt du matériel fourni Insérez la languette A de chaque support arrière dans les fen 3 tes du milieu situées à l arrière du socle Positionnez le support vers l intérieur pour permettre le montage de la laveuse Ajustez l électroménager d un côté à l autre afin d aligner ses 2 trous de montage avec les trous des supports du socle Insérez 2 vis dans chaque support arrière et dans la base de la 3 laveu...

Страница 10: ...sécheuses de type 1 orientez les supports vers l intérieur Ajustez l électroménager d un côté à l autre afin d aligner ses 2 trous de montage avec les trous des supports du socle Insérez 2 vis dans chaque support arrière et dans la base de la 3 sécheuse Installez une vis dans chacun des supports avant et dans la base de 4 la sécheuse Glissez l électroménager le socle en place 1 Vérifiez le niveau ...

Страница 11: ...des sécheuses de type 2 orientez les supports vers l extérieur Ajustez l électroménager d un côté à l autre afin d aligner ses 2 trous de montage avec les trous des supports du socle Installez une vis dans chacun des supports avant et dans la base 3 de la sécheuse Glissez l électroménager le socle en place 1 Vérifiez le niveau en faisant bouger l appareil d avant en arrière 2 et de gauche à droite...

Страница 12: ... dans la base de la laveuse Remettez en place le panneau d accès inférieur pour l entretien 5 ainsi que les 2 vis retirées plus tôt Glissez l électroménager le socle en place 1 Vérifiez le niveau en faisant bouger l appareil d avant en arrière 2 et de gauche à droite Répétez cette vérification jusqu à ce que l appareil soit de niveau et stable Reportez vous à la section 3 Instructions d installati...

Страница 13: ...n de la sécheuse pour obtenir des instructions d installation détaillées sur l alimenta tion en électricité l alimentation en gaz ou le conduit d évacuation Réinstallez les bouchons en plastique dans le panneau avant 4 DANGER DE POIDS EXCESSIF Pour évi ter les blessures au dos ou d autres types de blessure demandez l aide d autres personnes pour déplacer ou soulever la sécheuse ENGAGER LES LANGUET...

Страница 14: ...a se encuentra instalada desconéctela del su 3 ministro eléctrico Cierre el suministro de agua fría y caliente y desconecte las mangueras de admisión de agua de las tuberías de agua Desconecte la manguera de drenaje de la tubería de desagüe Si el electrodoméstico tiene patas de plástico ajuste cada pata 4 para que quede al ras de la base Si el electrodoméstico tiene patas de metal aflójelas retire...

Страница 15: ...ar la lavadora Ajuste el electrodoméstico de lado a lado para alinear sus aguje 2 ros de instalación con los agujeros de los soportes del pedestal Instale 2 tornillos en cada soporte trasero para fijarlo a la base de 3 la lavadora Instale un tornillo en cada soporte delantero para fijarlo a la base 4 de la lavadora Deslice el electrodoméstico y pedestal a su ubicación final 1 Verifique que esté ni...

Страница 16: ...porte hacia la parte interior para instalar la secadora tipo 1 Ajuste el electrodoméstico de lado a lado para alinear sus aguje 2 ros de instalación con los agujeros de los soportes del pedestal Instale 2 tornillos en cada soporte trasero para fijarlo a la base de 3 la secadora Instale un tornillo en cada soporte delantero para fijarlo a la base 4 de la secadora Deslice el electrodoméstico y pedes...

Страница 17: ...o en las ranuras 3 delanteras de la parte trasera del pedestal Oriente el soporte hacia la parte exterior para instalar la secadora tipo 2 Ajuste el electrodoméstico de lado a lado para alinear sus aguje 2 ros de instalación con los agujeros de los soportes del pedestal Instale un tornillo en cada soporte delantero para fijarlo a la base 3 de la secadora Deslice el electrodoméstico y pedestal a su...

Страница 18: ... a la base de la lavadora Instale un tornillo a través del agujero exterior de cada soporte 4 delantero para fijarlo a la base de la lavadora Reinstale el panel de acceso de servicio inferior con los 2 tornillos 5 que retiró anteriormente Deslice el electrodoméstico y pedestal a su ubicación final 1 Verifique que esté nivelado y agite las cuatro 4 patas nuevamen 2 te Repita este paso hasta que la ...

Страница 19: ...stalación de la secadora para obtener detalles completos sobre la conexión del suministro eléctrico y de gas o de los conductos de ventilación Coloque nuevamente los tapones de plástico en el panel delantero 4 KIT BLANCO KIT BLANCO KIT BLANCO KIT BLANCO KIT BLANCO PELIGRO DE EXCESO DE PESO Para evitar lesiones en la espalda u otro tipo de lesiones más de una persona deberá levantar o mover la seca...

Страница 20: ...h the listed washer or dryer see owners manual for specific model and operated according to the information in the Use and Care Guide Operating Instructions and Installation Instructions the supplier will repair or replace any of its mechanical parts if they are defective in workmanship or material Keep your bill of sale The date of the bill establishes the warranty period should parts be required...

Отзывы: