
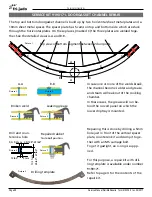

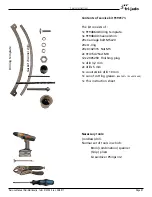
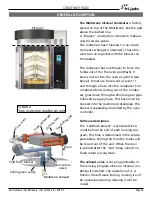


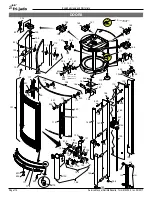


Condenser Hood
Page 99
Service Manual Deli Multisserie form 9123560 rev. 02/2017
EXCHANGING PARTS
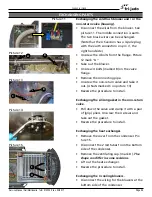
Picture 14
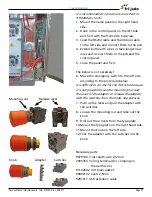
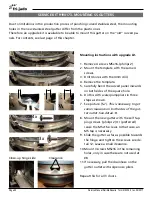
Picture 13
C
B
Picture 12
A
B
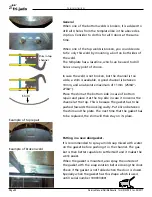
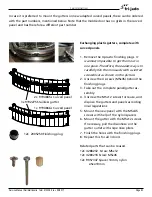
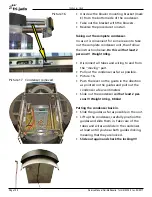
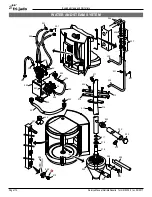
Picture 15
E
D
Picture 11
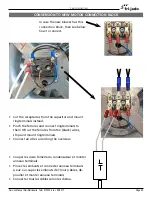
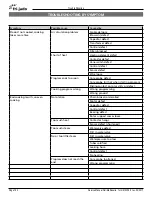
Exchanging the cold flush blower and / or the
non-return valve (housing).
• Disconnect the wires from the blower. See
picture 11. The middle connection is earth.
The two black wires can be exchanged.
(Note that the US version has a 3-pole plug
with the earth connection on pin 3 , the
right hand side)
• Unscrew the 4 bolts from the flange. Picture
12 mark “A”
• Take out the blower.
• Unscrew 4 bolts (marked B) on the valve
flange.
• Remove the connecting pipe.
• Unscrew the non-return valve and take it
out. (4 Nuts marked C on picture 13)
• Reverse the procedure to install.
Exchanging the silicon gasket in the non-return
valve.
• Pull down the valve and clamp it with a pair
of (grip) pliers. Unscrew the 4 screws and
take out the gasket.
• Reverse the procedure to install.
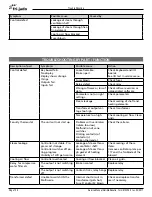
Exchanging the heat exchanger.
• Remove the cover from the condenser. Pic-
ture 15.
• Disconnect the 2 red tubes from the bottom
side of the condenser.
• Remove the ventilating cap. (mark D).
The
shape can differ in some revisions.
• Lift out the heat exchanger.
• Reverse the procedure to install.
Exchanging the 3 cooling blowers.
• Disconnect the wiring for the blowers at the
bottom side of the condenser.


