


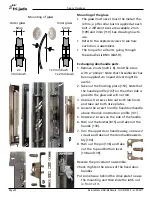


Page 47
Service Procedures
Service Manual Deli Multisserie form 9123560 rev. 02/2017
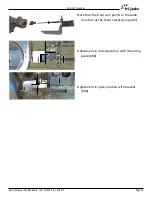
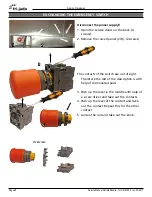
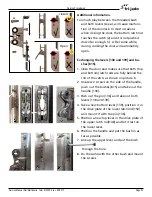
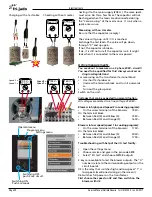
8. The assembly can be taken apart by unscre-
wing the inner sliding pipe [370]. A few
beats with a hammer on the lever will loo-
sen the pipe.
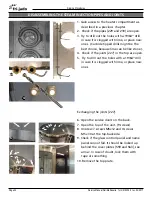
9. The motor can easily be taken from the
valve by unscrewing 4 bolts. Use a 10mm
wrench.
• Note that this can also be done while the
valve is still mounted under the unit.
• Do not loose the 2 (square) filler bushes!
• Mark the position of the shaft and also
take good notice of the position of the
valve (operation or drain).
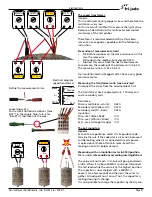
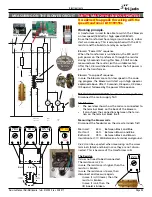
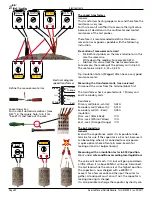
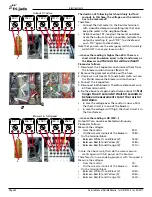
• The ball valve can be operated manual now
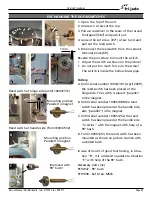
with a wrench (11mm).
The figures show the two positions and how
they can be recognized.
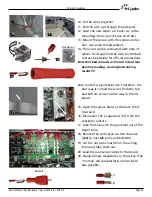
With help of the I/O test screen in the service
menu, it is possible to check the functions
of the valve.
With help of a self made test rig, it is possible
to check the functions manually. Take care
of the necessary safety precautions!!
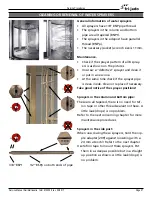
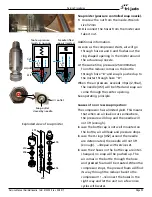
Power (208 V) between wire 1 and 3 will put
the valve in operation position. The indi-
cation arrow will turn clockwise (cw) while
the valve will turn ccw.
In this position, there will be 208V between
wire 1 and 5. (feedback signal)
Power between wire 1 and 4 will put the valve
in drain position. The indication arrow will
turn counter clockwise (ccw) while the valve
will turn cw.
In this position, there will be 208V between
wire 1 and 6. (feedback signal)
Operation
Drain
1 3 4 5 6
1 3 4 5 6
208V~
0V~
signal
208V~
signal
208V~
208V~
0V~
Testconnector
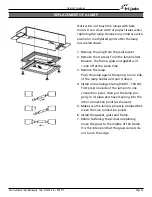
838
817
368
370
371
372
373
369
363
364
365
366


