background image

PATIO COVER INSTRUCTION SHEETS

[email protected]

PATIO COVER INSTRUCTION SHEETS

[email protected]

Fastening & Sealing the GUTTER

Fasten through the 

TOP of Gutter Leg downward into the Roof Panels

(2) Screws per roof panel, 4inches away from all roof seams

Fasten Upward through the Bottom Leg of Gutter into the Roof Panels

(2) Screws per roof panel, 4inches away from all roof seams

Caulk around and on Top of every Gutter Screw on TOP SIDE ONLY

On TOP SIDE ONLY Squeeze a Smooth Bead of Sealant along the back Leg of the Gutter to the 
Roof Panel

NOTE:  ALL CAULKING SEALANT MUST BE CURED FOR 24 HOURS BEFORE YOU CAN 
INSTALL THE PEEL n SEAL TAPING & ROOF MUST BE CLEAN & DRY
Wipe Off 

the 

Rear Leg of the Gutter 

on TOP of the ROOF and about 

4inches of the Roof Panel

Hook Measuring Tape to the inside of Gutter and 

Measure back onto the Roof Panel and Mark it at 

3". Repeat & Mark  at the Center of every Roof Panel

Measure the Front Roof Width, add 3inches and cut a strip of Roof Tape

Peel off the paper backing about 24" at a time

…starting at one end of the roof...

Line up the Tape 

to run in FRONT of the 3inch marks

on the Roof Panels toward the gutter, 

over the Gutter Leg & 

screws and roll it down into the Gutter

…trim it to fit at the end.

A

B

C

A

B

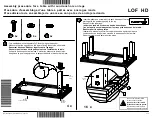
STEP #10: Peel n Seal taping the Roof Seams, Roof Header and Gutter

LifeRoom ONE Installation Guide

Содержание LifeRoom ONE

Страница 1: ...LifeRoom ONE Installation Manual www fourseasonsols com support fourseasonsols com 800 533 0887...

Страница 2: ...TABLE OF CONTENTS LifeRoom ONE Roof Frame page 3 LifeRoom ONE Sidewall Framing page 26 LifeRoom ONE Screen page 30 www fourseasonsols com support fourseasonsols com 800 533 0887...

Страница 3: ...PATIO COVER INSTRUCTION SHEETS support FourSeasonsOLS Com PATIO COVER INSTRUCTION SHEETS support FourSeasonsOLS Com LifeRoom ONE Installation Guide...

Страница 4: ...PATIO COVER INSTRUCTION SHEETS support FourSeasonsOLS Com 3 5 2021 4 PATIO COVER INSTRUCTION SHEETS LifeRoom ONE Installation Guide...

Страница 5: ...s ends if OPTION 2 mark on the wall the location of your wall studs Hold up the Roof Header B and transfer the marks of the truss ends or wall studs to the back side of the Roof Header near the top At...

Страница 6: ...eader is fastened caulk around all the screw heads inside the header AND check top side and caulk spots if it did not squish out upward behind the Roof Header H2 G STEP 2A 3 EDGE Single Beam Preparati...

Страница 7: ...ket I into both Edge Beams the Beam Splice G Rotate the beam over one time so the Top Post Bracket legs are up then fasten 2 two 14x1 1 4 tek screws into each 3 Edge Beam 4 total Rotate the beam one t...

Страница 8: ...sing 4 14 tek screws 2 on each side 6 Setback Brackets should now be fastened to the 3 Edge Beam Measure between the Top Post Brackets and mark the midpoint on the 3 Edge Beam Center the Setback Brack...

Страница 9: ...lower than 80 inches Place a Level on Front Edge of slab to determine which is the LOW Side the left side or the right side After determining the LOW Side measure from slab up to the bottom of the Ro...

Страница 10: ...g using 4 four 14 x 1 1 4 tek screws evenly spaced on both sides Place a Ladder at the first End Post for Person 1 place second ladder near the opposite end for person 2 Stand up the attached Post and...

Страница 11: ...g posts Laydown the Edge Beam and Post Assembly Insert the Bottom Post Bases K into the bottom of each Post J Fasten through the side of posts into the internal legs of the bottom base with 4 four 14...

Страница 12: ...Mark post locations out from house wall for the first and last post then pop a chaulkline connecting the first and last marks These post measurements are critical for future installation of Rolldown...

Страница 13: ...r a towel and set on top of beam to protect roof panels from scratching Slide the gutter end of panel over the 3x3 Edge Beam then slide Roof Header end of panel into the Roof Header until it hits Set...

Страница 14: ...b level REMOVE THE CARDBOARD Then Use a hammer to slowly drive a 5inch tek screw with washer SLOWLY through the top skin of ROOF PANEL until it hits the BEAM keeping it 4 inches away from MALE edge of...

Страница 15: ...ns drill a 3 8 hole through the Bottom Post Bracket K into the slab and insert the WEDGE ANCHORS and tighten Repeat for each post Carefully unwrap the next roof panel look for any dents turn panel so...

Страница 16: ...CHECK EVERY SEAM AFTER PANELS ARE LOCKED BEFORE FASTENEING Then Fasten throughTop of Roof Header downward into the panel with one 10 tek screw keeping 4 inches away from the male panel edge 1inch back...

Страница 17: ...ight overhang the 3x3 FRONT EDGE BEAM and the ROOF HEADER slightly that is OKAY it will get covered up by the EXTRUDED FASCIA E Take one piece of Extruded Gutter D and the Gutter Splice C Measure the...

Страница 18: ...he screw threads inside the Gutter Splice Caulk the LEFT edge of the Gutter Splice gutter bottom and up the sides smooth it out Measure the Length of Extruded Gutter D Transfer that measurement to TOP...

Страница 19: ...D at the end of the Gutter Splice C Slowly push the gutter onto the Roof Panels and slide to the LEFT over the Gutter Splice until the two gutters butt together Align the two Gutters for a good fit m...

Страница 20: ...eeded for a better fit Push the fascia on the roof panel slide it against the house end Fasten the Fascia E through the top leg into the roof panel using 1 one 10 tek screw Take Second piece of Fascia...

Страница 21: ...t End of Patio Cover and repeat STEPS 7 A to F NOTE you will need a 1 1 2 to 2 1 8 hole saw Line up your Scupper Drain Holes typically centered with the First and Last Posts Drill your holes using the...

Страница 22: ...f Roof Header B and the Roof Panel If Sealant at Roof Seams did not Squish up go ahead and Caulk over the Roof Seams where it is needed DO NOT WALK ON Roof Seams Caulk around cover the TOP Screws of F...

Страница 23: ...KING SEALANT MUST BE CURED FOR 24 HOURS BEFORE YOU CAN INSTALLTHE PEEL n SEALTAPING ROOF MUST BE CLEAN DRY Wipe Off the Rear Leg of the Gutter on TOP of the ROOF and about 4inches of the Roof Panel Ho...

Страница 24: ...oving Downward over the Gutter Leg and down into the Gutter Smooth out theTape as you move down toward the Gutter Smooth itTightly against the Sealant and Outward away from the Seams in Both Direction...

Страница 25: ...PATIO COVER INSTRUCTION SHEETS support FourSeasonsOLS Com PATIO COVER INSTRUCTION SHEETS support FourSeasonsOLS Com Step 11 Flashing LifeRoom ONE Installation Guide...

Страница 26: ...evel the Channel up the wall and mark the location on the wall Predrill holes in the Channel Caulk the back side of the channel and fasten to the house wall using 5 fasteners STEP 16 Remove the screws...

Страница 27: ...l the 3x3 side beam Fasten through the side Beam into the hidden Post Bracket using 2 14 tek screws inside and outside At house wall fasten through the Receiving Channel into the Side Beam using 2 14...

Страница 28: ...angle to fit Line up the angle flush with outside edge of the Side Beam and fasten using 8 tek screws spaced every 16 b b Cut the short piece of the 1x1 angle for the short 3x3 Post in the Receiving C...

Страница 29: ...and mark measurements onto the 2 Filler Panel Cut the Filler Panel with a skillsaw fitted with a carbide tip blade Test fit it and push it into the opening LifeRoom ONE STEP 20 Measure fit and fasten...

Страница 30: ...LifeRoom ONE Screen Installation Guide www fourseasonsols com support fourseasonsols com 800 533 0887 LifeRoom ONE Installation Guide...

Страница 31: ...www fourseasonsols com support fourseasonsols com 800 533 0887 LifeRoom ONE What s Included WhatYou Need LifeRoom ONE Installation Guide...

Страница 32: ...sonsols com support fourseasonsols com 800 533 0887 LifeRoom ONE STEP 1 Remove the screws as shown below from both sides of the hood assembly STEP 2 Remove the Cover and set aside LifeRoom ONE Install...

Страница 33: ...e up the post as shown from the top of the floor post bracket not the floor to the bottom of the 3x3 beam STEP 4 Subtract 3 from the measurement you just made H and cut the Side Track Then subtract 3...

Страница 34: ...www fourseasonsols com support fourseasonsols com 800 533 0887 STEP 5 Slide the Receiving Channels over the leg of the End Caps as shown LifeRoom ONE LifeRoom ONE Installation Guide...

Страница 35: ...and Receiving Channels between the Posts of your LifeRoom ONE and push it up tight against the beam STEP 7 Make sure the Hood Assembly is facing upward and tight against the Beam Fasten through each...

Страница 36: ...P 8 Push the Hood Assembly up tight against the 3 Edge Beam Then secure the Receiving Channels to each Post using self drilling screws Keep the bottom screw 5 up from the ground and then equally space...

Страница 37: ...e Side Rails into the Receiving Channels as shown The Plastic Entry Guide should be on the top do not fasten the Rails yet STEP 10 Pull the Screen down into the Side Rails ensuring that the Zipper goe...

Страница 38: ...lel with each other Minor Screen wrinkles are normal sunlight will typically help smooth them out STEP 12 Fasten theTrack to the Receiving Channel using 5 Self drilling Screws on each side Be sure not...

Страница 39: ...lled down attach a fastener through the End Cap on both sides as shown below STEP 14 For 10 5 screens use 2 additional screws to fasten the hood upward to the 3 Edge Beam spaced into thirds For all ot...

Отзывы: